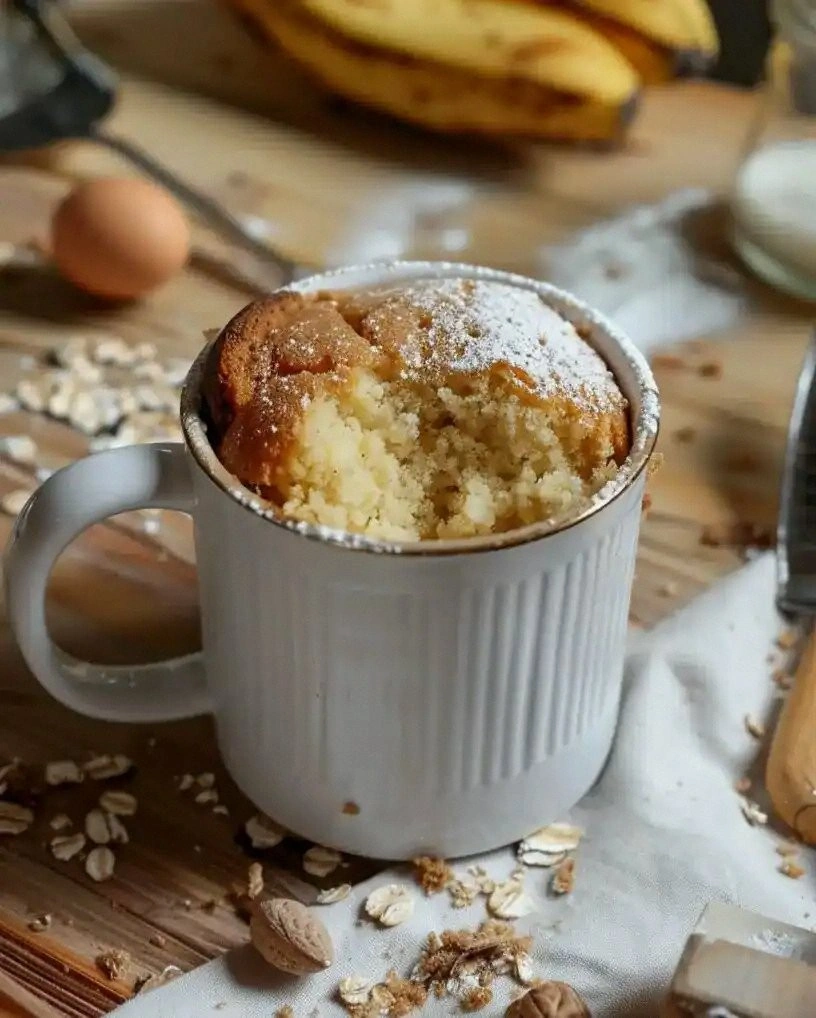
I still remember the night the kitchen became a battleground and the only thing that survived was a burnt batch of cupcakes that tasted like disappointment. The oven was roaring, the timer was ticking, and I stared at the tray as if it were a canvas of culinary failure. I swore to myself that I would never again let a simple dessert fall flat. That night, I stumbled upon a recipe that promised to turn pineapple upside down into a cup of pure joy.
Picture the scene: a bright, golden glaze dancing over ripe pineapple rings, the scent of caramelized sugar mingling with vanilla and butter, the sound of a gentle sizzle as the batter thickens. The texture is a contrast of crisp edges that crackle like thin ice against a soft, airy interior that melts in your mouth. The color is a sunlit amber that makes your taste buds do a little happy dance. The flavor is a sweet, tangy explosion that feels like a tropical vacation in a bite. The whole experience is a symphony that plays on the senses.
This version is not just another pineapple upside down cake; it is the definitive, hands-down best rendition you’ll ever make at home. I dare you to taste this and not go back for seconds because the caramelized pineapple will leave you craving more. Most recipes get this completely wrong by overbaking or using the wrong type of pineapple; here, the technique is refined to perfection. The secret? A buttery base that holds the pineapple in a sweet, moist hug, and a subtle hint of toasted coconut that adds depth.
I confess I ate half the batch before anyone else got to try it, and that’s a testament to how irresistible this is. If you've ever struggled with the classic upside-down cake, you're not alone — and I've got the fix. The next step will transform your kitchen into a tropical paradise, and you’ll wonder how you ever made it any other way. The anticipation is palpable, and the aroma will fill the room with a promise of sweet success. Stay with me here — this is worth it.
The journey starts with a simple dare: make a dessert that not only tastes heavenly but also looks like a miniature sunrise. The next challenge is to master the caramel base that sets the stage for the pineapple's juicy sweetness. The final hurdle? Baking the cups to a golden finish without drying out the batter. And the grand finale? Serving them warm, straight from the oven, with a drizzle of cream or a scoop of vanilla ice cream.
Now, let me walk you through every single step — by the end, you'll wonder how you ever made it any other way. I’ll share the techniques that elevate this humble treat, the ingredient swaps that keep it fresh, and the kitchen hacks that save time and prevent mishaps. The recipe is straightforward, yet it packs a punch that will have friends begging for more. And when you pull the cups out of the oven, the whole kitchen smells incredible, filling every corner with a sweet, tropical breeze.
This is not just a dessert; it's a conversation starter, a mood enhancer, and a testament to the power of a well-executed caramel glaze. The moment the glaze starts to bubble, you’ll know you’re on the right track. The aroma will lure anyone in the house to the kitchen, and the first bite will have them closing their eyes in bliss. I promise you, this is the best version you'll ever make at home.
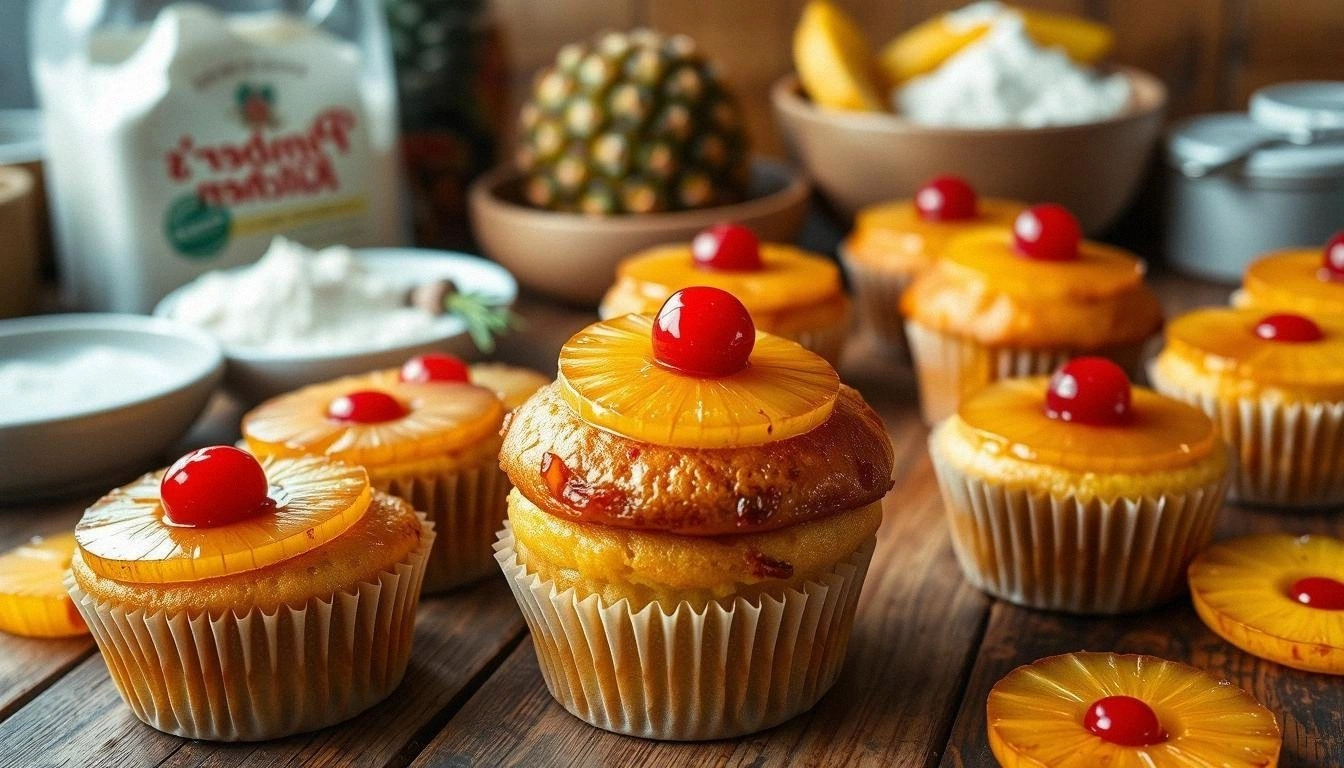
Picture yourself pulling this out of the oven, the whole kitchen smelling incredible, the cups gleaming with a glossy caramel sheen. The pineapple rings sit like miniature suns, ready to burst with flavor. The batter is airy, the edges crisp, and the inside tender. This is a dessert that balances texture and taste in a way that feels both comforting and adventurous. I guarantee you’ll want to recreate this again and again.
Alright, let's break down exactly what goes into this masterpiece. The recipe is designed for four servings, but it scales easily for any occasion. The ingredients are simple, the steps are clear, and the outcome is a dessert that feels like a vacation in every bite. Now, let’s dive into the details that make this cup so special.
What Makes This Version Stand Out
The first thing that sets this recipe apart is the caramel glaze that forms a sweet, buttery base. Caramel: This glaze is made by melting butter and brown sugar until it turns a deep amber, then swirling in vanilla for depth. The result is a glossy coating that locks in moisture and delivers a buttery sweetness that lingers on the tongue.
Next, the pineapple rings are pre-cooked to bring out their natural sugars. Pineapple: Sautéing the pineapple with a touch of cinnamon before baking caramelizes the fruit, intensifying its tropical flavor. Without this step, the pineapple would stay too wet and muddy, but this technique ensures a bright, juicy burst in every bite.
The batter is a light, airy mixture that contrasts the caramel and pineapple. Batter: Using a combination of all-purpose flour, baking powder, and a splash of milk creates a fluffy interior that holds the glaze without becoming soggy. The batter’s lightness is the secret to a cake that feels like a cloud.
The use of coconut milk adds a subtle tropical note. Coconut Milk: Replacing half of the regular milk with coconut milk gives a hint of coconut that pairs beautifully with pineapple. It also adds a silky texture that makes the cup feel luxurious.
The recipe is also incredibly forgiving. Ease: Even if you’re new to baking, the steps are clear and the measurements are precise. The batter can be poured in a minute, and the baking time is short, making it perfect for busy evenings.
Finally, the cups are made in a single pan, which keeps cleanup minimal. Convenience: The paper liners hold the pineapple and glaze in place, and the cups bake evenly. After baking, you can simply flip them out of the pan and serve.
Alright, let's break down exactly what goes into this masterpiece…
Inside the Ingredient List
The Flavor Base
All-purpose flour is the foundation of our batter, providing structure without heaviness. It’s the neutral canvas that allows the sweet and tropical flavors to shine. If you skip the flour, the cups will collapse and lose their airy quality. For a gluten-free version, substitute with a 1:1 blend of gluten-free all-purpose flour and xanthan gum.
Brown sugar is the heart of the caramel glaze, offering a deep molasses-like sweetness. Its natural molasses content adds complexity that refined white sugar simply can’t match. If you prefer a lighter caramel, use light brown sugar or a mix of brown and white sugar. The key is to caramelize until a golden amber hue is achieved.
Butter is essential for both the glaze and the batter. It adds richness and a glossy sheen to the glaze, and it helps the batter set into a tender crumb. Use unsalted butter so you can control the saltiness of the dish. If you’re vegan, substitute with coconut oil or a plant-based butter.
Vanilla extract gives the glaze a warm, aromatic undertone that complements the pineapple. A splash of vanilla in the glaze and a teaspoon in the batter balance the sweetness without overpowering it. If you’re allergic to vanilla, a dash of almond extract will provide a subtle alternative.
The Texture Crew
Eggs are the binding agent that gives the batter its structure. They also help the glaze set into a firm but glossy coating. If you’re avoiding eggs, try using flaxseed meal mixed with water as a binder. Keep in mind that the texture may be slightly different, but it will still hold together.
Milk (or coconut milk) provides moisture and helps the batter rise. Whole milk gives a richer taste, while low-fat milk keeps calories down. Coconut milk adds a subtle coconut flavor that enhances the tropical profile. If you’re lactose intolerant, use a plant-based milk of your choice.
Baking powder is the leavening agent that ensures the cups rise evenly. A pinch of baking soda can also help if you’re using acidic ingredients like pineapple. The right amount of leavening keeps the batter light and airy. Over-leavening can cause the cups to collapse, so measure carefully.
The Unexpected Star
Pineapple, of course, is the star of the show. Fresh or canned, the pineapple should be sliced into rings that fit snugly in the cups. Fresh pineapple offers a bright, tart flavor, while canned pineapple brings a sweeter, more uniform taste. If using canned pineapple, drain it well to avoid excess moisture.
Cinnamon is a subtle spice that can be added to the glaze to give a warm, earthy note. A quarter teaspoon is enough to elevate the caramel without overpowering the pineapple. If you’re avoiding spices, you can skip this step and still achieve a delicious result.
Optional toasted coconut flakes add a crunchy texture and a hint of coconut. They can be sprinkled on top of the glaze before baking or added to the batter for extra flavor. If you’re allergic to nuts, use coconut flakes carefully, as they are technically a fruit.
The Final Flourish
Paper liners are essential for keeping the cups clean and ensuring they come out of the pan easily. They also hold the pineapple rings in place and prevent the glaze from spilling over. If you’re vegan, look for paper liners that are soy-free.
A pinch of salt balances the sweetness and enhances all the flavors. Too much salt will overpower the dish, but a small amount is crucial for depth. If you’re sodium-sensitive, reduce the salt to half a teaspoon.
A small splash of lemon juice can brighten the pineapple’s flavor and prevent it from becoming too sweet. The acidity also helps the caramel glaze set properly. If you don’t have lemon juice, a teaspoon of vinegar can work as a substitute.
Everything's prepped? Good. Let's get into the real action.
The Method — Step by Step
- Preheat your oven to 350°F (175°C). Line a 12-cup muffin tin with paper liners, ensuring each cup is fully covered. Place the pineapple rings on top of each liner, arranging them in a circular pattern that leaves a small gap at the center. This will allow the glaze to flow around the fruit and create a beautiful swirl. The pineapple should be evenly spaced to prevent overcrowding.
- In a small saucepan, melt 1/2 cup of butter over medium heat. Add 1 cup of brown sugar and stir until the mixture becomes smooth and starts to bubble. Keep an eye on the color; it should reach a deep amber before adding vanilla. Once the sugar is fully dissolved, remove the pan from heat and stir in 1 teaspoon of vanilla extract. Let the glaze cool slightly before pouring.
- While the glaze cools, whisk together 2 cups of all-purpose flour, 2 teaspoons of baking powder, and 1/2 teaspoon of salt in a large bowl. In a separate bowl, beat 2 eggs until light and frothy. Add 1 cup of milk (or coconut milk) to the eggs and whisk until combined. Slowly pour the wet mixture into the dry ingredients, stirring gently until just combined. The batter should be smooth but not overmixed.
- Fold in the melted butter glaze into the batter, ensuring an even distribution. The batter will become slightly thicker, which is fine. If the batter feels too thick, add a tablespoon of milk to loosen it. Spoon the batter into the muffin cups, filling each about two-thirds full. This allows room for the cups to rise without overflowing.
- Place the tin in the preheated oven and bake for 20 minutes. After 10 minutes, check the glaze; it should have set enough to hold the pineapple rings in place but still be glossy. The edges of the batter should be lightly golden. If you want a darker caramel, you can brush a little extra glaze on top before baking.
- After 20 minutes, remove the tin from the oven and let it cool for 5 minutes. This short rest allows the glaze to firm up slightly, making it easier to flip. Gently run a knife around the edges to ensure the cups are not stuck. The batter should feel firm to the touch.
- Using a small spatula, carefully flip each cup onto a serving plate. The pineapple should be on top, revealing the caramel glaze. If the glaze appears uneven, you can brush a thin layer of melted butter over it to give it a shiny finish. The cups should look like miniature sunrises with caramel clouds.
- Let the cups cool completely on a wire rack. This final cooling step ensures the batter sets fully and the glaze hardens into a silky coating. While they cool, you can prepare a simple whipped cream or a scoop of vanilla ice cream to serve alongside. The contrast of warm caramel with cool cream is divine.
- Serve immediately, or store in an airtight container in the refrigerator for up to 3 days. If you prefer a firmer texture, chill them for an hour before serving. The caramel glaze will firm up, making each bite a little more substantial. When you reheat, a quick 30-second microwave burst will warm them without drying out the batter.
- Enjoy the sweet, tropical explosion that this cup delivers. The caramelized pineapple and airy batter combine to create a dessert that feels like a vacation in every bite. Don’t be surprised if you find yourself reaching for another cup before the first one is finished. This is the kind of dessert that turns ordinary evenings into memorable moments.
- That's it — you did it. But hold on, I've got a few more tricks that'll take this to another level. Keep reading to discover how to elevate your cups from great to unforgettable.
Insider Tricks for Flawless Results
The Temperature Rule Nobody Follows
Many bakers assume room temperature butter is sufficient, but cold butter actually creates a flakier texture. Use butter that’s been chilled for at least 30 minutes before melting; this helps the glaze set more evenly. If you’re in a hurry, a quick chill in the fridge works just fine. The result is a glossy, slightly crisp glaze that holds the pineapple beautifully.
Why Your Nose Knows Best
The aroma of caramelized sugar is a reliable indicator of doneness. When the glaze starts to emit a rich, nutty scent, it’s time to add the batter. If you’re unsure, taste a small drop of glaze; it should be sweet but not raw. This sensory cue saves you from guessing and ensures consistency.
The 5-Minute Rest That Changes Everything
After baking, let the cups rest for exactly five minutes before flipping. This short pause allows the glaze to set into a firm but flexible coating, preventing cracks. If you skip this step, the glaze can crack when you flip the cups, ruining the presentation. A quick rest is a small investment for a perfect finish.
The Sweetness Balancing Act
Balancing sugar is key; too much caramel can overwhelm the pineapple. Use a ratio of 1:1 for brown sugar to white sugar if you want a lighter glaze. If you prefer a deeper flavor, add a teaspoon of molasses to the glaze. This subtle addition adds complexity without making it overly sweet.
The Perfect Paper Liner Trick
Paper liners are essential for easy removal, but they can absorb some glaze. To counteract this, lightly grease the liners with a neutral oil before placing the pineapple. This creates a barrier that keeps the glaze from seeping into the paper, ensuring a clean release.
The Coconut Milk Secret
Using coconut milk instead of dairy adds a subtle coconut flavor that pairs perfectly with pineapple. The fat content of coconut milk also helps the batter stay moist. If you’re vegan, coconut milk is a natural substitute for milk and butter, maintaining the recipe’s texture.
The Egg Substitute Option
If you’re avoiding eggs, a flaxseed meal mixed with water (1 tablespoon flaxseed + 3 tablespoons water) can serve as a binder. Let the mixture sit for five minutes until it becomes gelatinous. This mimics the structure that eggs would provide, keeping the cups from collapsing.
The Quick Cooling Trick
After baking, place the tin on a wire rack for 5 minutes. This prevents the bottom from steaming and becoming soggy. If you’re in a rush, you can also use a fan to circulate air around the cups, speeding up the cooling process. The result is a crispier base.
The Flavor Layering Technique
Layering flavors by adding a thin coat of vanilla-infused butter to the glaze enhances the overall taste. The butter’s richness complements the caramel, while vanilla adds depth. This step is optional but recommended for those who love a more complex flavor profile.
The Serving Suggestion
Serve the cups warm, topped with a dollop of whipped cream or a scoop of vanilla ice cream. The contrast of warm caramel and cool cream is a delightful sensory experience. If you prefer a dairy-free option, use coconut whipped cream. This keeps the dessert light and refreshing.
Creative Twists and Variations
This recipe is a playground. Here are some of my favorite ways to switch things up:
Tropical Coconut Twist
Swap regular milk for coconut milk and add toasted coconut flakes to the batter. The result is a coconut-infused cup that feels like a beach vacation. The toasted flakes add a satisfying crunch, while the coconut milk keeps the batter moist. This version is perfect for those who love a coconut flavor.
Chocolate Lover's Delight
Add 1/4 cup of cocoa powder to the batter and drizzle melted dark chocolate over the glaze. The chocolate pairs surprisingly well with the pineapple, creating a rich, decadent treat. The cocoa adds depth, while the chocolate glaze gives a glossy finish. This is a crowd-pleaser at parties.
Spiced Cinnamon Kick
Incorporate 1 teaspoon of ground cinnamon into the glaze and sprinkle a pinch of nutmeg on top before baking. The spices give a warm, comforting flavor that balances the sweet pineapple. The nutmeg adds a subtle earthiness that enhances the overall taste. This version works well during cooler months.
Berry Explosion
Replace pineapple with fresh berries like strawberries or blueberries. Use a splash of lemon juice to prevent oxidation and to add tartness. The berries offer a different sweetness profile while maintaining the caramel base. This variation is refreshing and colorful.
Gluten-Free Adaptation
Use a gluten-free all-purpose flour blend and xanthan gum to replace regular flour. The batter will still rise and hold the glaze. This adaptation allows those with gluten sensitivities to enjoy the dessert. The texture remains airy and light.
Vegan Version
Replace eggs with flaxseed meal and use plant-based butter or coconut oil. Use a plant-based milk like oat or almond milk. The vegan cups will still have a fluffy interior and a caramelized glaze. This version is cruelty-free and just as delicious.
These variations keep the core of the recipe intact while adding new layers of flavor. Experimenting with different ingredients is a great way to keep the dish fresh and exciting. Whether you’re craving a tropical escape or a chocolate indulgence, there’s a version for every mood.
Storing and Bringing It Back to Life
Fridge Storage
Store the cups in an airtight container in the refrigerator for up to three days. The caramel glaze will remain firm, and the batter will stay moist. When ready to serve, let them sit at room temperature for 10 minutes to soften the glaze slightly. If you prefer a crispier texture, you can warm them in a toaster oven for a few minutes.
Freezer Friendly
To freeze, place the cups in a single layer on a baking sheet and freeze until solid. Once frozen, transfer them to a freezer-safe bag or container. They can be stored for up to two weeks. When reheating, thaw at room temperature or microwave on low power for 30 seconds. The caramel glaze may soften slightly, but the flavor remains intact.
Best Reheating Method
The ideal way to reheat is in a preheated oven at 300°F (150°C) for 10 minutes. This gently warms the cups without drying them out. If you’re short on time, a 30-second microwave burst works, but be careful not to overheat. Adding a splash of water before microwaving steams the cups back to perfection, keeping them moist and tender.