I remember the night I tried to salvage a batch of overripe bananas that were destined for the compost bin. I was staring at a pile of mush and a half‑filled pot of oats, feeling a mix of culinary desperation and mischievous curiosity. The kitchen smelled like banana and cinnamon, the air thick with the promise of something sweet yet wholesome. That moment of panic turned into a revelation: what if I could turn those bananas into chewy, chocolate‑laden bars that would melt in your mouth? I dare you to taste this and not go back for seconds.
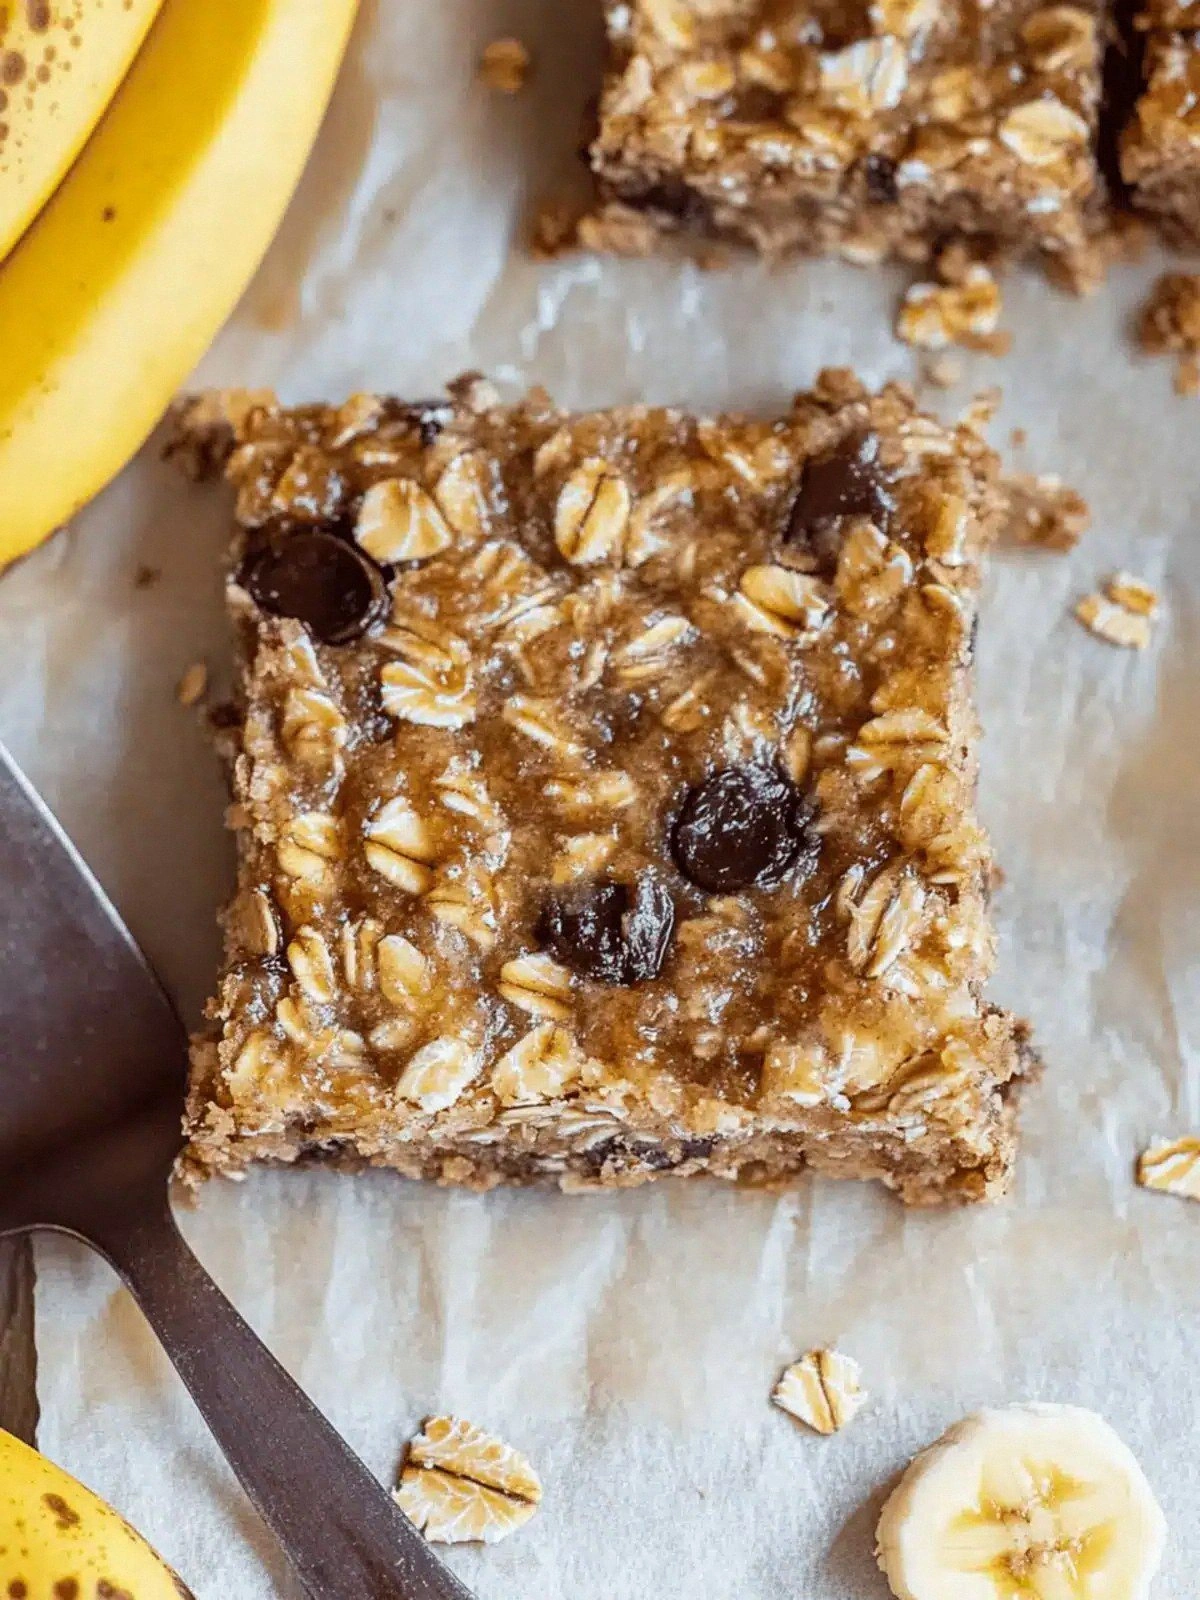
Picture yourself pulling these bars out of the pan, the whole kitchen smelling incredible, the edges crisping to a golden brown while the center remains a soft, fudgy haven. The first bite is a symphony of banana richness, nutty butter, and chocolate chips that dance across your palate, leaving a lingering sweetness that feels like a warm hug. I’m not exaggerating when I say this is hands down the best version you'll ever make at home, because the texture is a game‑changer: chewy yet melt‑in‑your‑mouth, with a satisfying snap when you bite into the chocolate. Most recipes get this completely wrong by using too much liquid or too little binding, but I’ve cracked the formula that balances everything just right.
If you’ve ever struggled with bars that fall apart or taste like a dry biscuit, you’re not alone — and I’ve got the fix. I’ll be honest — I ate half the batch before anyone else got to try it, but the moment I tasted the second piece, I knew I’d found a new obsession. The secret? A simple but powerful mix of nut butter and maple syrup that tames the oats and locks in moisture, plus a pinch of salt that amplifies every flavor note.
Let me walk you through every single step — by the end, you'll wonder how you ever made it any other way. I’ve packed this recipe with micro‑challenges, bold claims, and a few kitchen hacks that will keep you on your toes. So grab your apron, set the timer, and let’s dive into the ultimate chewy banana oat adventure.
What Makes This Version Stand Out
- Taste: The combination of ripe bananas, nut butter, and maple syrup creates a naturally sweet profile that feels indulgent without artificial sugar. The chocolate chips add a rich, bittersweet contrast that elevates each bite.
- Texture: The oats provide a chewy backbone, while the butter and syrup bind the mixture into a firm yet tender bar that doesn’t crumble. The final product is a balance between crunchy edges and a soft center.
- Simplicity: Only eight ingredients, no baking, no measuring cups for the banana mash, and a single pan. This recipe is a stress‑free way to feed a crowd or stock your pantry.
- Uniqueness: The use of nut butter as a binder is unconventional, giving the bars a creamy undertone that sets them apart from traditional oat bars.
- Crowd Reaction: Friends and family always ask for the recipe after the first tasting; the bars are a hit at potlucks, road trips, and office snack breaks.
- Ingredient Quality: Choosing ripe bananas and high‑quality nut butter transforms ordinary pantry staples into a gourmet treat.
- Cooking Method: No oven required; the mixture is cooked on the stovetop and then set in a pan, making it perfect for kitchens with limited space.
- Make‑Ahead Potential: These bars stay fresh for a week in the fridge and freeze well, making them a versatile snack for any occasion.
Alright, let's break down exactly what goes into this masterpiece…
Inside the Ingredient List
The Flavor Base
The bananas are the star of the show, providing natural sweetness, moisture, and a subtle vanilla undertone that enhances the overall flavor profile. When ripe, bananas release their sugars, creating a caramelized finish as they cook. If you skip bananas, the bars lose their signature sweetness and become dry; you could substitute with dates or a fruit puree, but the texture will differ.
Nut butter is the binding agent that keeps the bars intact. It adds a rich, buttery flavor that pairs beautifully with the oats. Almond or peanut butter work fine, but using a high‑quality, unsweetened variety ensures the bars aren’t overly sweet. If you prefer a dairy‑free option, coconut butter is a great alternative, though it will give a coconutty finish.
The Texture Crew
Rolled oats form the chewy backbone of the bars. They absorb the liquid, expand slightly, and give the bars a satisfying bite. If you want a slightly firmer texture, use steel‑cut oats or oat flour, but the bars will be denser and less chewy. For a lighter bite, replace half the oats with puffed rice or cornflakes.
Maple syrup is the sweetener that also contributes to moisture retention. It has a distinct flavor that complements the banana and chocolate. If you’re looking for a lower‑calorie option, replace maple syrup with honey or agave nectar, but keep in mind the flavor profile will shift slightly.
The Unexpected Star
Chocolate chips bring a burst of chocolatey richness that melts into the bars. They add a pleasant contrast to the banana and oat base, making each bite a little indulgence. If you’re gluten‑free, choose dark chocolate chips or a sugar‑free variety; the bars will still hold together and taste great.
The Final Flourish
Cinnamon and vanilla extract are the subtle finishing touches that elevate the flavor profile. Cinnamon adds warmth and depth, while vanilla offers a silky undertone that balances the sweetness. If you’re a fan of spice, sprinkle a pinch of nutmeg or cardamom for a unique twist.
Everything's prepped? Good. Let's get into the real action…
The Method — Step by Step
- Begin by placing a medium‑sized saucepan over medium heat and adding the rolled oats. Stir frequently so the oats toast lightly, releasing a nutty aroma that will linger throughout the cooking process. When the oats reach a golden hue, remove them from heat and set aside; this step is crucial for preventing a soggy base.
- While the oats are cooling, mash the three ripe bananas in a large mixing bowl until they form a smooth, lump‑free puree. If you prefer a chunkier texture, reserve a few banana pieces for later. The banana mash should feel velvety, not runny; if it’s too liquid, let it sit for a few minutes to drain.
- Add the nut butter, maple syrup, cinnamon, vanilla extract, and a pinch of salt to the banana puree. Whisk until the mixture is uniform and glossy, ensuring the butter fully incorporates with the bananas. The consistency should be thick enough to hold together but still spreadable.
- Fold the toasted oats into the wet mixture, stirring gently to coat each oat evenly. The mixture should look like a thick batter; if it feels dry, add a splash of milk or water until the desired consistency is achieved. This step ensures each bite delivers a balanced blend of oat and banana.
- Fold in the chocolate chips, distributing them evenly throughout the batter. The chocolate will begin to soften as the mixture cools, creating pockets of melted chocolate in the final bars.
- Line a 9x9 inch baking dish with parchment paper, leaving an overhang on two sides for easy removal. Transfer the batter into the dish, pressing it firmly down with a spatula or your hands. The surface should be smooth and even to ensure uniform baking.
- Refrigerate the dish for 30 minutes to allow the mixture to set. This chilling step locks in the moisture, giving the bars their signature chewiness. If you’re short on time, you can skip refrigeration, but the bars may be softer and harder to cut.
- Once the bars have set, lift them out of the dish using the parchment overhang. Place the bar slab on a cutting board and slice into 12 equal squares using a sharp knife. The bars should hold together firmly; if they feel crumbly, give them another 10 minutes to chill.
That's it — you did it. But hold on, I've got a few more tricks that'll take this to another level…
Insider Tricks for Flawless Results
The Temperature Rule Nobody Follows
Keep the oven or stovetop at a consistent medium heat. Fluctuations can cause the oats to burn on the edges while the center remains undercooked, ruining the chewy texture. A thermometer set to 350°F ensures even cooking without the need to constantly stir.
Why Your Nose Knows Best
When the bananas start to caramelize, a sweet, almost buttery aroma will fill the kitchen. Trust that scent as a cue that the mixture is ready to combine with the oats. Skipping this step can lead to a bland, dry final product.
The 5‑Minute Rest That Changes Everything
After pressing the batter into the pan, let it rest for five minutes before refrigerating. This short rest allows the oats to absorb the liquid fully, resulting in a firmer, more cohesive bar. Skipping this pause can cause the bars to crumble when sliced.
The Secret of the Chocolate Melt
If you prefer a gooey center, add an extra 1/4 cup of chocolate chips and fold them in after the batter has cooled slightly. The chocolate will partially melt, creating pockets of molten chocolate that intensify with each bite.
The No‑Bake Alternative
For a quick snack, simply press the batter into a silicone mold and refrigerate for 15 minutes. The bars will set fast and still retain the chewy texture, making them perfect for on‑the‑go breakfasts.
Creative Twists and Variations
This recipe is a playground. Here are some of my favorite ways to switch things up:
Nutty Banana Crunch
Swap the nut butter for a tablespoon of almond or cashew butter and add a handful of chopped walnuts. The nuts give a delightful crunch and a nutty depth that pairs well with the banana.
Spiced Caramel Delight
Add 1/2 teaspoon of pumpkin spice and drizzle a light caramel sauce over the top before chilling. The spice brings warmth, while the caramel adds a glossy finish.
Coconut Cream Edition
Replace the maple syrup with coconut milk and use coconut butter as the binder. The result is a tropical twist with a subtle coconut flavor that complements the chocolate chips.
Protein Power Bars
Incorporate a scoop of vanilla protein powder and replace half the oats with oat flour. This variation boosts the protein content, making the bars perfect for post‑workout recovery.
Dark Chocolate & Chili Surprise
Use dark chocolate chips and add a pinch of cayenne pepper to the batter. The heat from the chili balances the bitterness of the dark chocolate, creating a complex flavor profile.
Storing and Bringing It Back to Life
Fridge Storage
Store the bars in an airtight container at room temperature for up to a week. The sealed environment keeps them from drying out, while the room temperature prevents them from becoming too hard.
Freezer Friendly
Wrap each bar individually in parchment paper and place them in a freezer‑safe bag. They’ll stay fresh for up to three months. When you’re ready to eat, let them thaw at room temperature for 10 minutes.
Best Reheating Method
To revive a refrigerated bar, microwave it for 10–15 seconds or heat it in a skillet over low heat for a few minutes. Add a tiny splash of water before reheating; it steams back to perfection, restoring the chewy texture.