Picture this: you’re in a cramped kitchen, the clock ticking, and you’re staring at a pot of bland ground beef that’s about to turn into the most comforting dish you’ll ever taste. I had a friend who dared me to make the ultimate shepherd’s pie, and after a few culinary mishaps—think soggy potatoes and a sauce that tasted like it’d been left in the fridge for a week—I finally cracked the code. That moment of triumph was pure, buttery euphoria, and I knew I had to share the secrets that turned a simple recipe into a culinary masterpiece.
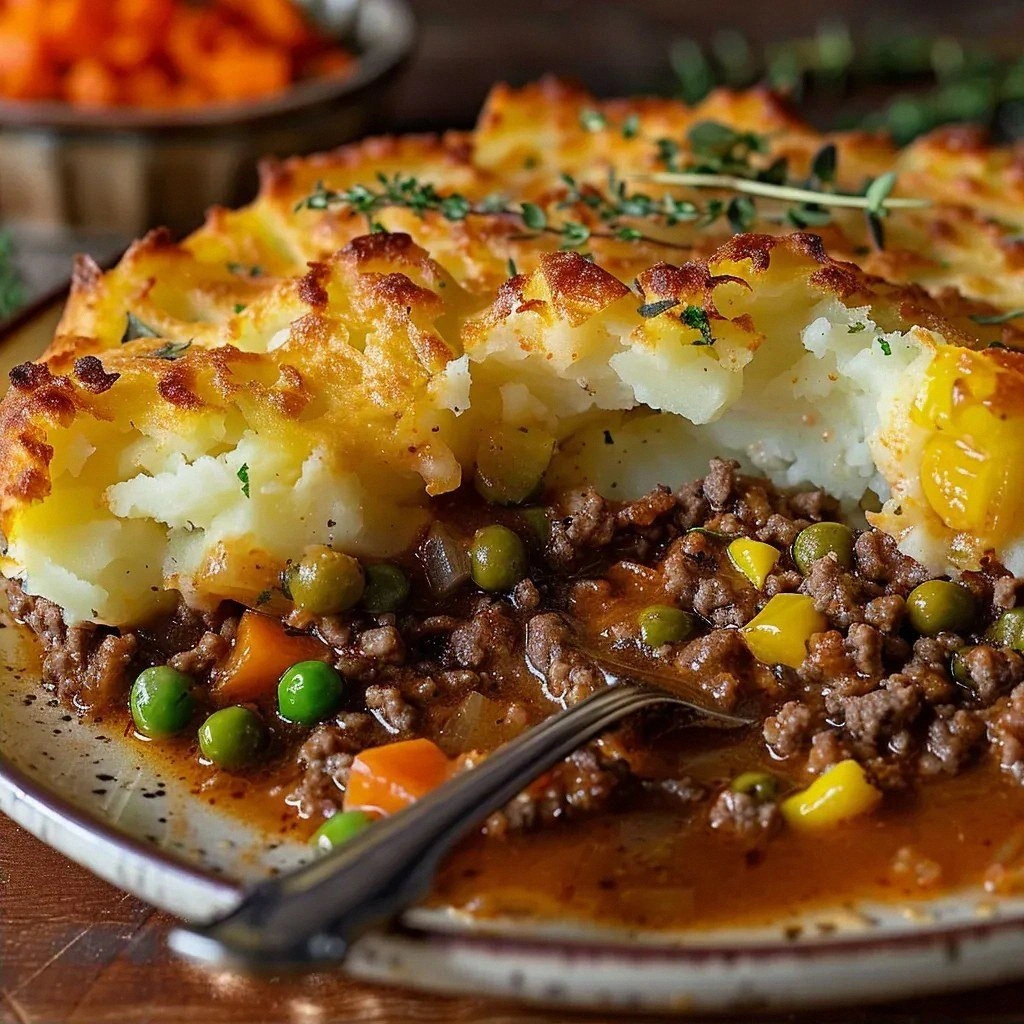
From the first sizzling sound as the beef hits the pan to the golden crust that crackles like freshly baked bread, every detail of this pie is a sensory symphony. The aroma of caramelized onions fills the kitchen, the texture of mashed potatoes is luxuriously smooth, and the hearty filling sings with umami. It’s a dish that feels like a warm hug, a comforting blanket of flavors that clings to your taste buds and refuses to let go.
What makes this version stand out is that it’s not just about the ingredients; it’s about the technique. I’ve perfected the balance of moisture and crispness, the layering of flavors, and the timing that ensures every bite is a revelation. I dare you to taste this and not go back for seconds because it’s simply that good. Most recipes get this completely wrong, but here’s what actually works—soft, fluffy potatoes, a savory meat sauce that’s thickened by tomato paste, and a golden crust that’s the envy of every dinner table.
Let me walk you through every single step—by the end, you’ll wonder how you ever made it any other way. We’ll start with the flavor base, move through the texture crew, and finish with a final flourish that turns the pie from good to unforgettable. Keep your eyes on the stove, your hands on the mixing bowl, and your heart open to the magic that’s about to unfold.
What Makes This Version Stand Out
- Flavor: The combination of tomato paste and beef broth creates a rich, velvety sauce that coats the meat like velvet, leaving each bite saturated with savory depth.
- Texture: The mashed potatoes are whipped to a cloud‑like consistency, ensuring a light, airy top that melts in your mouth while the filling remains hearty.
- Simmer Time: A short, controlled simmer locks in juices, preventing the meat from drying out and giving the filling a silky finish.
- Heat Distribution: Baking the pie at 375°F ensures even cooking, with a golden crust that doesn’t burn yet stays crisp.
- Ingredient Quality: Using 80/20 ground beef balances flavor and moisture, while fresh onions and mixed vegetables add natural sweetness.
- Make‑Ahead Potential: The pie can be assembled, refrigerated, and baked later—perfect for busy weeknights.
- Visual Appeal: The bright, golden top contrasts with the dark, savory filling, creating a dish that looks as good as it tastes.
- Versatility: Swap ground beef for turkey or lamb, and the pie still delivers the same comforting experience.
Alright, let's break down exactly what goes into this masterpiece...
Inside the Ingredient List
The Flavor Base
Ground beef is the heart of this pie. I always choose 80/20 because the fat renders beautifully, infusing the sauce with a natural richness that’s hard to replicate with leaner cuts. If you’re watching calories, a 90/10 blend works, but you’ll need to cook a little longer to compensate for the reduced fat. Skipping the beef entirely turns the dish into a vegetarian version—great for flexitarians, but it loses the hearty, meaty depth that makes this pie special.
The onion is the aromatic backbone. Slice it thin so it caramelizes without burning. A pinch of salt during the sauté helps draw out moisture, creating a sweet, golden base for the meat. If you’re in a hurry, a pre‑sliced onion from the grocery store will save time, but fresh is always better.
Tomato paste is the secret sauce thickener. It adds depth and a subtle sweetness that balances the savory meat. If you’re allergic to tomatoes, a splash of tomato sauce can replace the paste, though you’ll need to reduce liquid slightly to maintain consistency. A small pinch of sugar can counteract acidity if your tomatoes are particularly tart.
The Texture Crew
Mashed potatoes are the crown of this pie, and I treat them like a dessert—light, fluffy, and buttery. Use starchy potatoes like Russet or Yukon Gold for the best fluffiness. Boil them until they’re fork‑tender, then mash with a potato ricer for a silky finish. Adding a splash of warm milk and a knob of butter while mashing ensures the potatoes are creamy and not dry.
Mixed vegetables (carrots, peas, corn, and green beans) bring color, crunch, and a burst of natural sweetness. They also add nutritional value. I sauté them briefly before adding to the meat to keep them vibrant and prevent them from turning mushy during baking. If you’re short on time, frozen mixed vegetables are a convenient alternative, just make sure to thaw and drain them well.
Olive oil is the unsung hero that keeps the meat from sticking and adds a subtle fruity note. Use a light‑to‑medium olive oil for a clean flavor profile; extra‑virgin oil can be used for a more robust taste. If you’re looking for a neutral taste, a neutral oil like canola will do the job without altering the flavor.
The Unexpected Star
Beef broth is the liquid that ties everything together. It hydrates the meat, keeps the potatoes moist, and creates a glossy sauce. Use low‑sodium broth to control salt levels, or make your own by simmering beef bones, onions, and herbs for 24 hours. If you’re vegetarian, vegetable broth works fine, though the flavor will shift slightly.
The Final Flourish
The final flourish is the golden top. A light brush of beaten egg or a splash of milk before baking gives the potatoes a shiny, appetizing look. Some people sprinkle grated cheese on top for an extra layer of flavor, but I keep it simple to let the potato shine. The final bake at 375°F for 20 minutes results in a crust that’s crisp on the edges yet tender in the middle.
Everything's prepped? Good. Let's get into the real action...
The Method — Step by Step
- Heat the skillet. Place a heavy‑bottom skillet over medium heat and add the tablespoon of olive oil. Wait until the oil shimmers before adding the ground beef. This initial sear locks in juices and creates a flavorful crust that sets the tone for the rest of the dish. Watch the beef break apart as it cooks, and stir occasionally to ensure even browning. When the meat turns a deep brown, it’s ready for the next step.
- Cook the onions. Add the diced onion to the skillet and sauté until translucent and caramelized, about 5–7 minutes. The onions should be soft, sweet, and slightly browned. If they start to stick, add a splash of water to deglaze the pan. This caramelization deepens the flavor profile and creates a natural sweetness that balances the savory beef.
- Introduce the tomato paste. Stir in the two tablespoons of tomato paste, letting it cook for a minute to release its oils. The paste should darken slightly and develop a nutty aroma. This step is crucial for thickening the sauce and adding a concentrated tomato flavor that will carry through the pie.
- Simmer with broth. Pour in the cup of beef broth, scraping up any browned bits from the bottom of the skillet. Bring the mixture to a gentle simmer, then reduce the heat to low. Let it cook for 10 minutes, allowing the flavors to meld. The broth should reduce slightly, creating a thick, glossy sauce that clings to the meat.
- Add the vegetables. Stir in the two cups of mixed vegetables, ensuring they’re evenly distributed. The veggies should be just tender, not fully cooked, as they’ll finish in the oven. This step adds texture, color, and a burst of freshness that brightens the dish.
- Season and finish. Taste the filling and adjust seasoning with salt and pepper. If you prefer a touch of heat, add a pinch of crushed red pepper flakes. Let the mixture simmer for another 3–4 minutes, allowing the vegetables to soften slightly and the sauce to thicken. The filling should be rich, savory, and slightly sticky.
- Prepare the potato topping. While the filling simmers, bring a pot of salted water to a boil and add the peeled potatoes. Cook until fork‑tender, about 15–20 minutes. Drain well and return the potatoes to the pot. Mash with a potato ricer, then stir in butter, milk, salt, and pepper until the mixture is smooth and fluffy. The ricer creates a silky texture that melts in your mouth.
- Assemble the pie. Transfer the meat and vegetable filling to a baking dish, spreading it evenly. Spoon the mashed potatoes over the filling, smoothing the top with a spatula. Brush the top lightly with beaten egg or milk for a shiny finish. The golden crust will be the crowning glory of this dish.
- Bake to perfection. Place the assembled pie in the preheated oven and bake for 20–25 minutes, or until the top is golden brown and the filling is bubbling. If the top browns too quickly, tent it loosely with foil. The result should be a beautifully crisp crust with a savory, aromatic filling.
That’s it — you did it. But hold on, I've got a few more tricks that'll take this to another level. The next section will reveal insider secrets that will elevate your pie from good to unforgettable.
Insider Tricks for Flawless Results
The Temperature Rule Nobody Follows
Many cooks set their oven to 350°F, but that can leave the top soggy. Baking at 375°F ensures a crisp crust while the filling stays moist. If you’re using a convection oven, reduce the temperature by 25°F to avoid over‑browning. Always preheat the oven for at least 10 minutes before placing the pie inside.
Why Your Nose Knows Best
Smell is a powerful cue for doneness. As the pie bakes, the aroma of caramelized onions and roasted beef will fill the kitchen. When the scent intensifies and the edges of the potatoes start to crisp, it’s time to pull the pie out. Trust your nose; it’s the best judge of flavor.
The 5-Minute Rest That Changes Everything
After removing the pie from the oven, let it rest for five minutes before slicing. This allows the juices to redistribute, preventing a watery mess on the plate. The rest also lets the mashed potatoes firm up slightly, giving a clean, stable bite.
Use a Cast-Iron Skillet for the Base
A cast-iron skillet retains heat better than a stainless steel pan, giving the meat a richer sear and preventing sticking. If you don’t have cast iron, a heavy non-stick pan works, but you may need to add a little extra oil to prevent the meat from drying out.
Add a Splash of Red Wine
For an extra depth of flavor, deglaze the pan with a splash of dry red wine after browning the beef. The wine adds acidity that balances the richness and creates a more complex sauce. Let the wine reduce to half its volume before adding the broth.
Keep the Potatoes Light
Avoid over‑mashing the potatoes; a few lumps add texture and prevent the topping from becoming too dense. A ricer is ideal, but a hand masher works if you’re short on time. Just be sure to incorporate butter and milk gradually to avoid a greasy finish.
Creative Twists and Variations
This recipe is a playground. Here are some of my favorite ways to switch things up:
Lamb Twist
Replace ground beef with ground lamb for a Mediterranean flair. The fat content of lamb adds a subtle sweetness, and a pinch of rosemary enhances the flavor profile.
Cheesy Surprise
Sprinkle shredded mozzarella or cheddar over the potato topping before baking. The cheese melts into the mash, creating a gooey, golden crust that’s irresistible.
Vegetarian Edition
Use lentils or crumbled tofu in place of beef, and swap beef broth for vegetable broth. Add sautéed mushrooms for umami and a deeper flavor.
Spicy Kick
Add a teaspoon of smoked paprika or a dash of cayenne pepper to the filling. The heat pairs nicely with the savory meat and creates a memorable contrast.
Herb-Infused
Stir in fresh thyme, rosemary, or sage into the filling. The herbs elevate the dish, giving it a fragrant, aromatic finish.
Low-Carb Version
Swap mashed potatoes for mashed cauliflower or use a thin layer of mashed sweet potatoes. This keeps the dish hearty while cutting down on carbs.
Storing and Bringing It Back to Life
Fridge Storage
Cool the pie to room temperature, then cover tightly with foil or plastic wrap. Store in the refrigerator for up to 3 days. The flavors deepen, making it even more delicious when reheated.
Freezer Friendly
Wrap the pie in foil and place it in a freezer‑safe container. Freeze for up to 2 months. When ready, thaw overnight in the refrigerator before reheating.
Best Reheating Method
Reheat the pie in a 350°F oven for 15–20 minutes until hot throughout. Add a splash of water or broth to the bottom of the baking dish to create steam, preventing the potatoes from drying out. Let it rest for 5 minutes before serving.