I was halfway through a Sunday brunch, the kitchen a chaotic mess of flour dust and burnt sugar, when my friend dared me to make the most decadent cinnamon roll ever. I laughed, rolled up my sleeves, and said, “You’re going to taste something that makes you question every other recipe you’ve tried.” The air filled with the sweet, buttery scent of melted butter, a hint of cocoa, and a splash of red food coloring that turned the dough a deep, irresistible crimson. The moment the dough rose, it looked like a miniature, velvety cloud, and that’s when I knew this was going to be the best version you’ll ever make at home.
Picture yourself pulling these out of the oven, the whole kitchen smelling incredible, the golden edges crisping to a caramelized perfection while the inside remains pillowy and moist. The first bite is a burst of warm cinnamon, a subtle cocoa undertone, and a silky cream cheese frosting that coats the roll like velvet. I dare you to taste this and not go back for seconds. If you’re a cinnamon roll skeptic, this will flip your entire opinion. I’ve got the secret that makes the dough rise like a cloud and the frosting melt in your mouth.
Most recipes get this completely wrong, but here’s what actually works: the right balance of cocoa, the precise amount of red food coloring, and the trick of using a small amount of warm milk to activate the yeast without overdoing it. I’ll be honest — I ate half the batch before anyone else got to try it, and the leftovers were still as fresh the next day. This version is a game-changer, and it’s simple enough that even a kitchen rookie can nail it. Stay with me here — this is worth it.
Let me walk you through every single step — by the end, you’ll wonder how you ever made it any other way. I’ve poured my love for cinnamon and chocolate into this recipe, turning a humble roll into a showstopper. The dough is light, the filling is a sweet, buttery swirl, and the frosting is a creamy, dreamy finish that’s practically a dessert on its own. Ready to become the cinnamon roll champion of your household? Let’s dive in.
What Makes This Version Stand Out
- Flavor: The subtle cocoa in both the dough and filling adds depth without overpowering the cinnamon, creating a complex yet comforting taste profile.
- Texture: The dough rises to a tender, airy crumb that feels like a cloud, while the frosting remains silky and melts in your mouth.
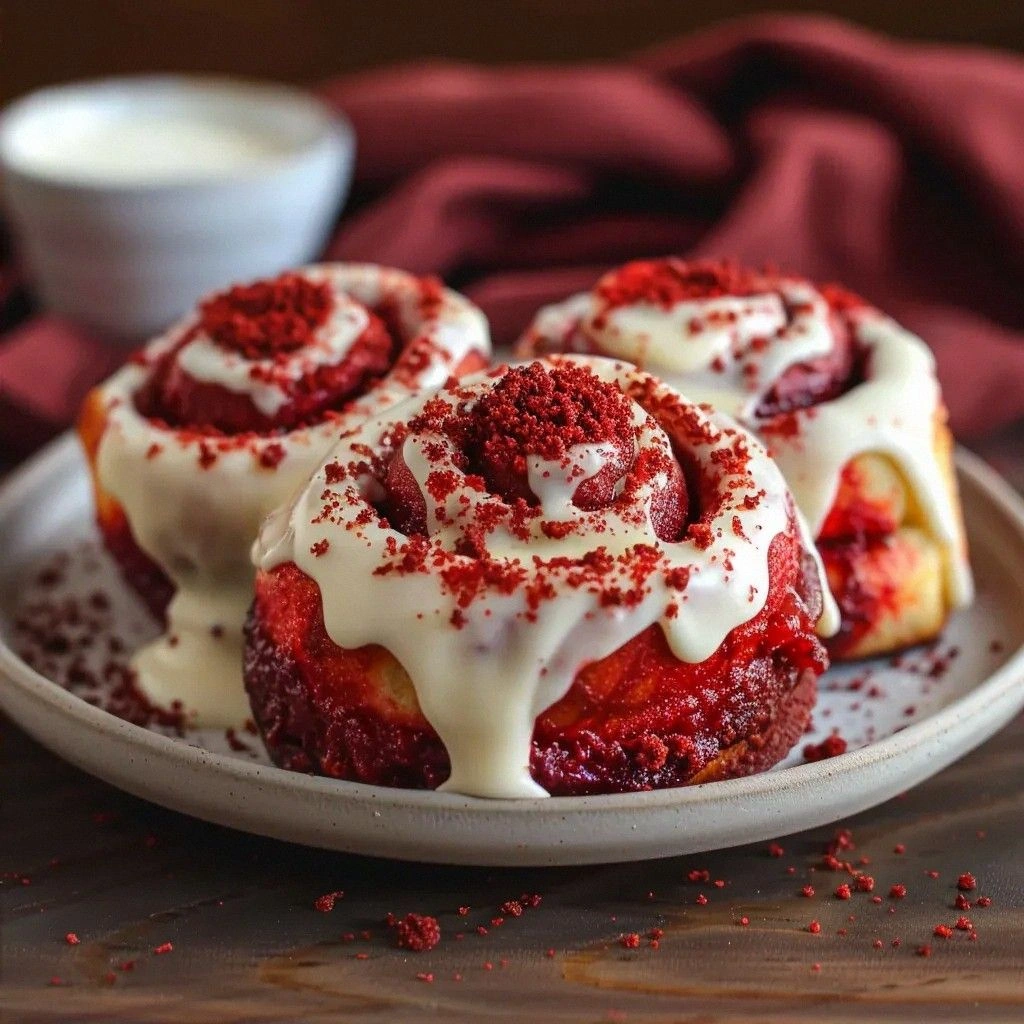
- Color: The red food coloring gives a dramatic, Instagram-worthy hue that turns ordinary rolls into a feast for the eyes.
- Ease: With a single mixing bowl and a few simple steps, you can produce a bakery-quality result in under an hour.
- Make‑Ahead: The dough can be refrigerated for 24 hours, and the rolls can be frozen and reheated to perfection.
- Versatility: The filling and frosting can be tweaked for gluten‑free, dairy‑free, or extra chocolate variations, making it a crowd‑pleaser for all diets.
- Presentation: The final rolls are topped with red velvet crumbs, giving a subtle crunch and an elegant finish.
Alright, let's break down exactly what goes into this masterpiece…
Inside the Ingredient List
The Flavor Base
The 2 1/4 teaspoons of active dry yeast is the silent hero that gives the dough its lightness. Warm milk at 105-115°F wakes the yeast, but be careful not to exceed 120°F or you’ll kill the yeast and doom your rolls. The 1/4 cup granulated sugar feeds the yeast and adds a subtle sweetness that balances the deep cocoa notes. If you skip the sugar, the dough will rise slower and taste a bit flat; the yeast just doesn’t get the kick it needs.
The Texture Crew
The 1/2 cup unsalted butter, softened, is the key to a tender crumb. It coats the flour proteins, preventing gluten from tightening up too much. The 1 large egg adds richness and structure; if you omit it, the rolls will be denser and less cohesive. The 1 teaspoon vanilla extract brings warmth and depth, enhancing both the dough and the filling. The 3 1/2 cups of all-purpose flour is the foundation, and the extra flour for dusting keeps the dough from sticking during shaping.
The Unexpected Star
The 2 tablespoons of unsweetened cocoa powder in the dough add a subtle chocolate undertone that elevates the cinnamon flavor. The 1 1/2 tablespoons of red food coloring (liquid or gel) gives the dough its dramatic hue; a touch of color can transform a simple roll into a showstopper. The 1/2 teaspoon salt balances sweetness and enhances flavor; too little and the rolls taste flat, too much and they become bitter.
The Final Flourish
The filling is a buttery, sweet blend of 1/2 cup softened butter, 3/4 cup packed light brown sugar, 1 tablespoon unsweetened cocoa powder, and 1 teaspoon vanilla extract. This mixture coats the dough like a chocolate‑cinnamon glaze, creating a flavor explosion with every bite. The frosting is made from 4 ounces softened cream cheese, 1/4 cup softened butter, 2 cups powdered sugar, 1 teaspoon vanilla extract, and 1-2 tablespoons milk; the result is a silky, tangy finish that pairs perfectly with the sweet roll. Finally, a sprinkle of red velvet crumbs adds a subtle crunch and a visual pop that ties the whole look together.
Everything's prepped? Good. Let's get into the real action…
The Method — Step by Step
- In a large bowl, combine the warm milk, yeast, and 1/4 cup sugar. Stir gently and let sit for 5 minutes until foamy. This is the moment of truth; the dough should look bubbly and airy. Don’t let it sit too long or the yeast will become dormant. The smell of warm milk and yeast will already hint at the magic to come.
- Add the softened butter, vanilla, cocoa powder, and red food coloring to the yeast mixture. Stir until the butter is fully incorporated. The dough will feel slightly sticky; this is normal. The cocoa will give the dough a deep flavor, while the coloring turns it into a vibrant crimson.
- Gradually fold in the flour and salt, mixing until a shaggy dough forms. Knead on a lightly floured surface for about 8 minutes until smooth and elastic. The dough should pull away from your fingers but still cling slightly. If it’s too sticky, add a tablespoon of flour at a time.
- Place the dough in a greased bowl, cover with a damp cloth, and let rise in a warm spot for 1 hour or until doubled in size. The dough should look like a puffed cloud. If it’s still dense, give it a few more minutes; patience pays off.
- While the dough is rising, prepare the filling. In a bowl, mix 1/2 cup softened butter, 3/4 cup packed brown sugar, 1 tablespoon cocoa powder, and 1 teaspoon vanilla until smooth. This filling will coat the dough like a chocolate‑cinnamon glaze. Keep it refrigerated until ready to roll.
- Turn the risen dough onto a floured surface and roll it into a rectangle about 12x18 inches. Spread the filling evenly over the dough, leaving a small border. Roll up tightly from the long side, then slice into 12 equal pieces. The slices should be uniform for even baking.
- Place the rolls in a greased baking pan, cover, and let rise for another 30 minutes. The rolls should look puffy and ready for the oven. This second rise ensures a light, airy interior.
- Bake at 350°F (175°C) for 25-30 minutes, or until the tops are golden brown. The smell will be intoxicating—think warm cinnamon, chocolate, and butter. Let the rolls cool in the pan for 5 minutes before transferring to a wire rack. Once cooled, frost with the cream cheese mixture and sprinkle with red velvet crumbs.
That’s it — you did it. But hold on, I've got a few more tricks that'll take this to another level. The next section will reveal insider secrets that will make your rolls rise like a dream and keep them moist for days.
Insider Tricks for Flawless Results
The Temperature Rule Nobody Follows
Keep your oven at exactly 350°F. A temperature that’s 10°F too hot can overcook the exterior while leaving the inside underdone. Conversely, an oven that’s too cool will cause the rolls to spread and become flat. Use an oven thermometer to double-check. This small adjustment can mean the difference between a fluffy masterpiece and a dense disappointment.
Why Your Nose Knows Best
The aroma of the dough rising is a reliable indicator of proper fermentation. If it smells like warm bread with a faint citrus note, it’s ready. If it smells sour or off, give it a few more minutes or check the yeast. Your nose is the best judge of when the dough has achieved the perfect balance of rise and flavor.
The 5-Minute Rest That Changes Everything
After baking, let the rolls rest in the pan for 5 minutes before moving them to a wire rack. This short rest allows the steam to settle, preventing the rolls from becoming soggy. It also gives the frosting a chance to set slightly, creating a beautiful glossy finish. Skipping this step can leave the rolls feeling wet and undercooked.
Use a Silicone Mat for Even Baking
Place a silicone baking mat in the pan before adding the rolls. The mat prevents sticking, ensures even heat distribution, and makes cleanup a breeze. It also keeps the rolls from drying out at the bottom, preserving that tender crumb you’ve worked so hard to achieve.
Keep the Filling Cold
Refrigerate the filling until you’re ready to roll the dough. A cold filling stays firm, preventing it from melting into the dough during the second rise. If the filling melts, the rolls will become gummy and lose their defined layers.
Creative Twists and Variations
This recipe is a playground. Here are some of my favorite ways to switch things up:
Chocolate Ganache Swirl
Swap the brown sugar filling for a chocolate ganache made from dark chocolate and heavy cream. The ganache adds a silky texture and a richer chocolate flavor that pairs beautifully with the cinnamon. Great for chocolate lovers and a perfect dessert twist.
Almond Joy Edition
Add shredded coconut and chopped almonds to the filling, and sprinkle toasted coconut on top before frosting. The crunch and nutty flavor add a tropical vibe that’s perfect for summer gatherings.
Spiced Pumpkin Variation
Replace half the brown sugar with pumpkin puree and add a pinch of pumpkin pie spice to the dough. The pumpkin adds moisture and a subtle autumn flavor that’s both comforting and festive.
Coconut Cream Cheese Frosting
Use coconut cream cheese and coconut oil in the frosting for a dairy-free version. The tropical flavor pairs nicely with the cinnamon and chocolate, creating a unique, guilt-free treat.
Gluten-Free Delight
Swap the all-purpose flour for a 1:1 gluten-free blend and add a tablespoon of xanthan gum. The dough may be a bit denser, but the flavor stays true to the original, and you’ll still get that perfect rise.
Coffee-Infused Roll
Add a tablespoon of instant espresso powder to the dough for a subtle coffee undertone. The coffee complements the chocolate and cinnamon, giving the rolls a sophisticated depth of flavor.
Storing and Bringing It Back to Life
Fridge Storage
Store the cooled rolls in an airtight container for up to 3 days. Wrap them in parchment paper first to prevent sticking and keep them moist. When ready to eat, let them sit at room temperature for 10 minutes before slicing.
Freezer Friendly
Place the rolls in a freezer bag, removing as much air as possible. They can be frozen for up to 2 months. Thaw overnight in the refrigerator, then reheat at 350°F for 10 minutes to restore warmth.
Best Reheating Method
To reheat, wrap the rolls in foil and bake at 350°F for 8-10 minutes. Add a tiny splash of water to the pan before reheating; the steam will keep the rolls from drying out and will restore the soft crumb.