Picture this: I’m standing in a kitchen that feels more like a science lab than a cozy home. The air is thick with the scent of burnt sugar and the faint hint of something nutty. My friend dared me to create a cookie that could survive the apocalypse of flavor—one that would make even the most skeptical taste buds weep. I accepted the challenge, and what emerged was a cookie that refuses to be ordinary.
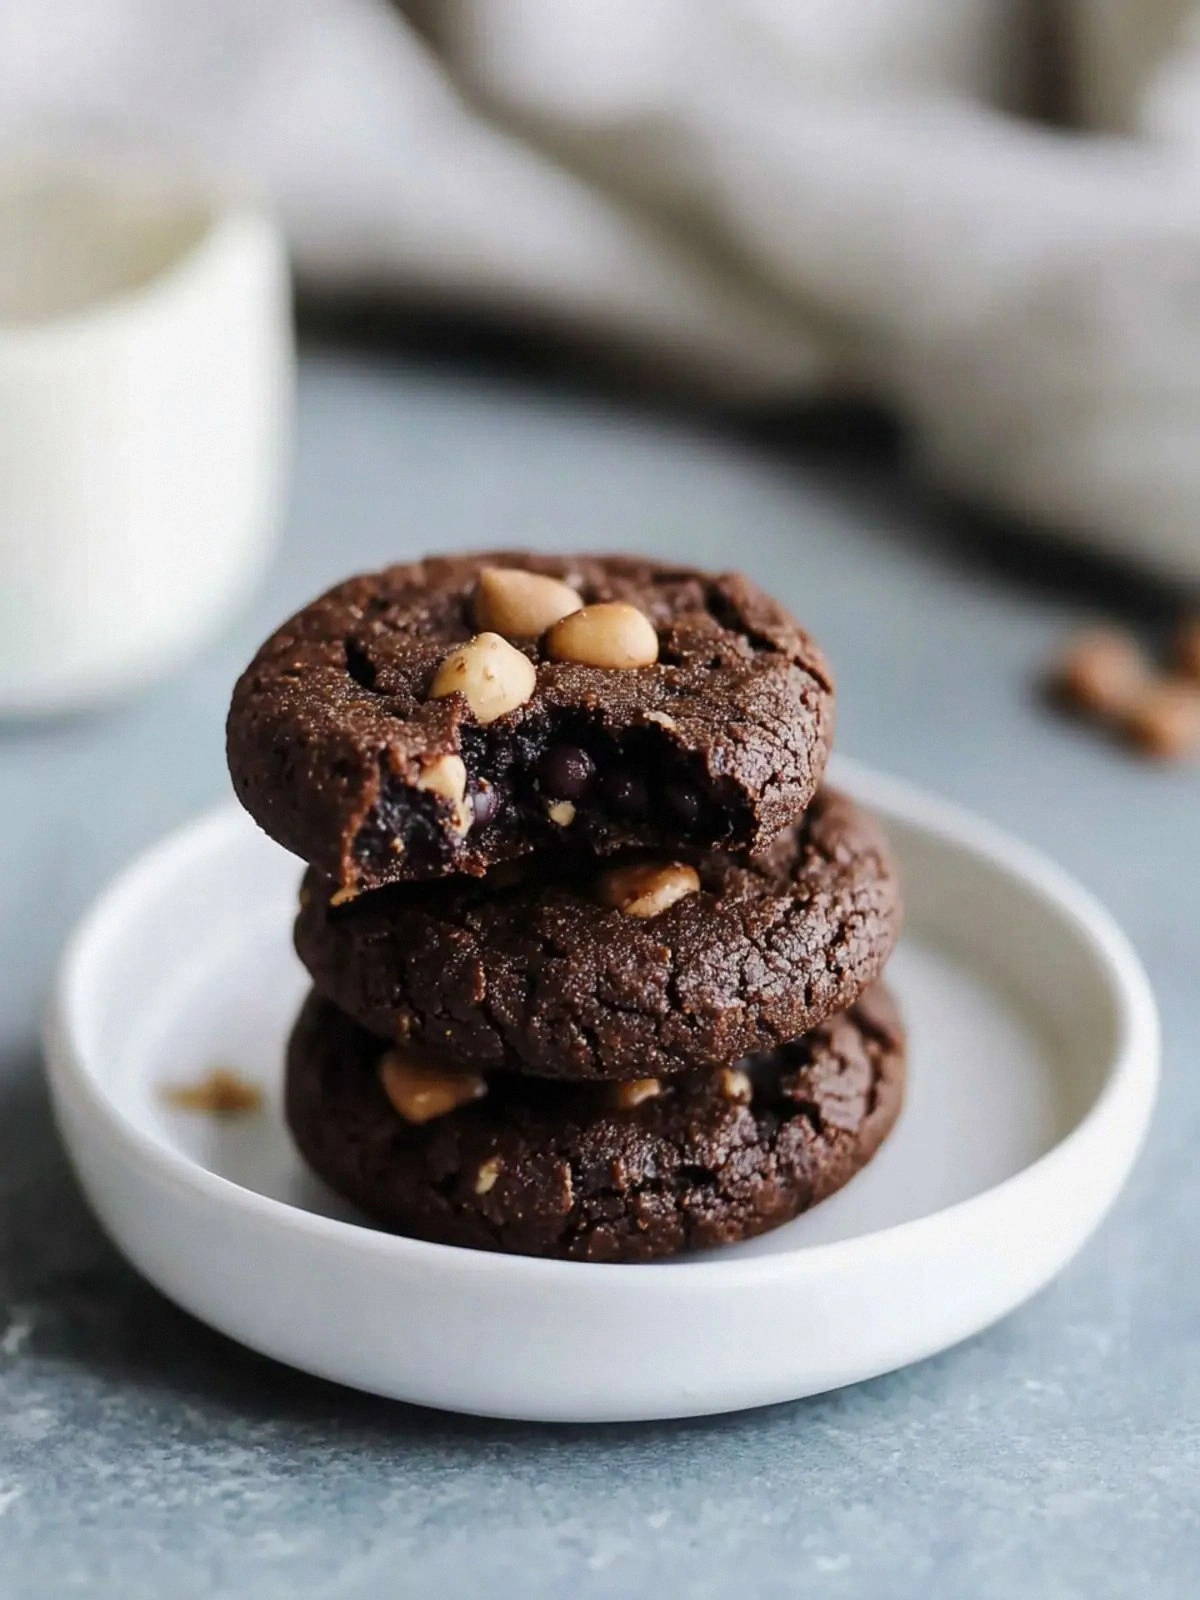
I’ve spent months tinkering with textures, chasing that perfect balance between chewy and crisp, and I finally hit the sweet spot with a black‑bean base that feels like velvet on the tongue. The chocolate chips melt into a glossy pool, while the creamy peanut butter is tucked inside, creating a surprise burst that feels like a secret handshake with your own cravings. The aroma that fills the kitchen when the dough hits the sheet is a heady mix of cocoa, toasted coconut oil, and a whisper of vanilla—almost intoxicating.
What makes this version stand out? First, it’s a no‑bake, no‑sugar‑syrup‑add‑on wonder that still delivers that decadent chocolate bite. Second, the black beans act as a natural sweetener and binder, keeping the cookies moist without a single grain of refined sugar. Third, the peanut butter stuffing is not just a garnish; it’s the heart of the cookie, giving it a creamy center that oozes when you bite. And the best part? The recipe is so simple you can whip it up in 45 minutes, and it’s perfect for any occasion—from a midnight snack to a party treat.
I dare you to taste this and not go back for seconds. Picture yourself pulling these golden‑brown beauties out of the oven, the whole kitchen smelling incredible, and then sitting down with a glass of almond milk, feeling the crunch and the melt in one bite. This is hands down the best version you’ll ever make at home, and I’m about to walk you through every single step—by the end, you’ll wonder how you ever made it any other way.
What Makes This Version Stand Out
- Flavor: The combination of cacao, peanut butter, and a subtle maple sweetness creates a complex profile that dances on the palate. Each bite delivers a layered experience—first the rich chocolate, then the creamy peanut, and finally a whisper of vanilla.
- Texture: The black beans give the dough a dense, moist core, while the oat and coconut flours add a light, airy crumb. The result is a cookie that is chewy in the middle and crisp around the edges, shattering like thin ice when you bite.
- Health‑Friendly: With no refined sugar and a plant‑based protein source, these cookies are a guilt‑free indulgence that still satisfies your sweet tooth.
- Ease of Prep: All you need is a blender or food processor—no pre‑mixing or measuring bowls. The ingredients fold together in seconds, making this a perfect recipe for busy mornings.
- Make‑Ahead: Once baked, the cookies hold up wonderfully in an airtight container for up to a week, and they reheat to perfection in the microwave.
- Kid‑Friendly: The only “secret weapon” is black beans, which are often a hit with kids once they’re hidden inside a cookie.
- Versatility: Swap the chocolate chips for dried cranberries or add a sprinkle of sea salt on top for an extra kick.
- Social Impact: The ingredients are sustainably sourced, and the recipe is vegan‑friendly—no animal products required.
Alright, let's break down exactly what goes into this masterpiece…
Inside the Ingredient List
The Flavor Base
The 15‑ounce can of black beans is the unsung hero here. They add natural sweetness, bind the dough together, and keep the cookies moist. Skipping them would turn the recipe into a dry, crumbly mess. For a more robust flavor, choose a low‑sodium variety to keep the salt content in check.
The Texture Crew
The oat flour and coconut flour work in tandem to give the cookies a light, airy bite. Oat flour provides structure, while coconut flour absorbs moisture, preventing the dough from becoming too sticky. If you’re allergic to nuts, replace coconut flour with ground flaxseed, but keep the ratio the same.
The Unexpected Star
Unsweetened cacao powder is the dark, chocolatey backbone. It’s the difference between a cookie that tastes like chocolate and one that feels like a chocolate cookie. If you prefer a milder chocolate flavor, swap half the cacao for cocoa powder, but remember to adjust the sweetness slightly.
The Final Flourish
The creamy peanut butter is not just a filling—it’s a flavor bomb. It melts into a silky center that contrasts with the crisp edges. If you’re not a fan of peanut butter, try almond butter or cashew butter for a different nutty profile. Just keep the volume the same.
Everything's prepped? Good. Let's get into the real action…
The Method — Step by Step
- Preheat the oven. Set it to 350°F (175°C) and line a baking sheet with parchment paper. This ensures the cookies don’t stick and gives them a clean finish. I always double‑check the temperature with a digital thermometer because even a slight deviation can affect the texture.
- Blend the beans. In a high‑speed blender, combine the black beans, maple syrup, almond milk, vanilla extract, and coconut oil. Blend until the mixture is silky smooth. If you notice any lumps, pulse a few times to break them down. The smoothness of this base is what keeps the cookies from feeling gritty.
- Incorporate the dry ingredients. Add cacao powder, oat flour, coconut flour, salt, and baking soda to the blender. Pulse until everything is just combined—over‑mixing can make the cookies tough. The batter should be thick but pourable.
- Fold in chocolate chips. Transfer the batter to a bowl and stir in the chocolate chips by hand. This prevents the chips from breaking apart and ensures they stay intact during baking.
- Shape the cookies. Using a tablespoon, scoop a ball of dough and place it on the parchment. Press a small amount of peanut butter into the center and then cover it with another dough ball. Flatten gently with your palm. Repeat until all dough is used. The peanut butter should be fully encased to avoid leaks.
- Bake the cookies. Place the baking sheet in the oven and bake for 12–15 minutes. The cookies should be golden brown on the edges and set in the middle. The scent of cocoa and toasted coconut oil will fill the kitchen—an aroma that makes you want to taste them immediately.
- Cool on a rack. Let the cookies cool for 5 minutes on the sheet, then transfer them to a wire rack to cool completely. This prevents them from becoming soggy from steam trapped beneath them.
- Optional glaze. If you crave extra sweetness, melt a tablespoon of maple syrup with a splash of almond milk and drizzle over the cooled cookies. This adds a glossy finish and a caramelized flavor that pairs beautifully with the peanut butter.
That’s it — you did it. But hold on, I've got a few more tricks that'll take this to another level…
Insider Tricks for Flawless Results
The Temperature Rule Nobody Follows
Many bakers assume that preheating the oven is enough, but the real magic happens when the baking sheet is already hot. Place a small baking tray on the middle rack while the oven preheats, and transfer your cookies onto it immediately after baking. This creates a crispier bottom without drying out the center.
Why Your Nose Knows Best
Smell is your secret ally. When the cookies are baking, the aroma of cocoa and toasted coconut oil should be unmistakable. If it’s faint, the oven temperature is likely too low. Use a kitchen thermometer to check the actual temperature; oven dials can be misleading.
The 5‑Minute Rest That Changes Everything
Letting the cookies rest on the pan for 5 minutes before moving them to a rack allows the edges to set properly. This small pause prevents the cookies from sticking together and gives you a clean slice when you cut them.
Keep It Moist, Not Dry
If you’re baking on a hot day, the cookies can dry out quickly. Cover the baking sheet with a lightly greased sheet of parchment after the first 10 minutes. This traps steam and keeps the cookies moist.
Add a Splash of Water When Reheating
Microwave reheating can dry out the cookies. Add a tiny splash of water to the bowl before microwaving, and cover with a paper towel. The steam will restore the cookie’s softness without making it soggy.
Creative Twists and Variations
This recipe is a playground. Here are some of my favorite ways to switch things up:
Cinnamon Swirl
Add 1 tsp of ground cinnamon to the dry mix for a warm, spicy undertone that complements the chocolate. The cinnamon also adds a subtle depth that makes the cookies feel more complex.
Sea Salt Finish
After baking, sprinkle a pinch of flaky sea salt over the cookies. The salt cuts through the sweetness and highlights the peanut butter’s richness, creating a balanced flavor profile.
Almond Butter Variation
Replace the creamy peanut butter with almond butter for a lighter nutty flavor. The texture remains the same, but the taste shifts to a more delicate, buttery note.
Dried Cranberry Burst
Swap half of the chocolate chips for dried cranberries. The tartness of the cranberries pairs beautifully with the chocolate, and the chewy texture adds another layer of interest.
Mint Chocolate Chip
Add 1 tsp of peppermint extract to the batter and use mint chocolate chips instead of regular ones. This gives the cookies a refreshing, minty finish that’s perfect for summer.
Glazed Delight
Drizzle a simple glaze of powdered sugar and a splash of almond milk over the cooled cookies. This adds a sweet, glossy coating that makes the cookies look as good as they taste.
Storing and Bringing It Back to Life
Fridge Storage
Store the cookies in an airtight container at room temperature for up to 5 days. The moisture from the peanut butter keeps them soft, so you won’t need to reheat them. If you prefer them warm, let them sit out for 10 minutes before serving.
Freezer Friendly
Place the cookies in a single layer on a baking sheet and freeze for 2 hours. Transfer them to a freezer bag and store for up to 3 months. When you’re ready to enjoy, pop a few out and let them thaw at room temperature for 30 minutes.
Best Reheating Method
To revive frozen cookies, microwave on high for 10–12 seconds or bake at 300°F (150°C) for 5 minutes. Add a tiny splash of water before reheating to create steam, which restores the cookie’s original softness and prevents it from becoming chewy.