I was standing in my tiny kitchen, half‑asleep, when my roommate burst in with a bag of plain, unassuming pearl sugar and a dare that would change my life forever: “I bet you can’t make a French pastry that actually melts in your mouth, not just fizzes on the tongue.” I laughed, grabbed a whisk, and set the stage for a culinary showdown that would have me questioning every store‑bought pastry I’d ever bought. The air was already thick with the scent of burnt toast from my previous attempt at croissants, and I could hear the faint hum of the refrigerator like a drumroll. My heart thumped in sync with the clatter of the butter hitting the pan, and I could already taste the buttery, airy clouds that were about to erupt from my oven.
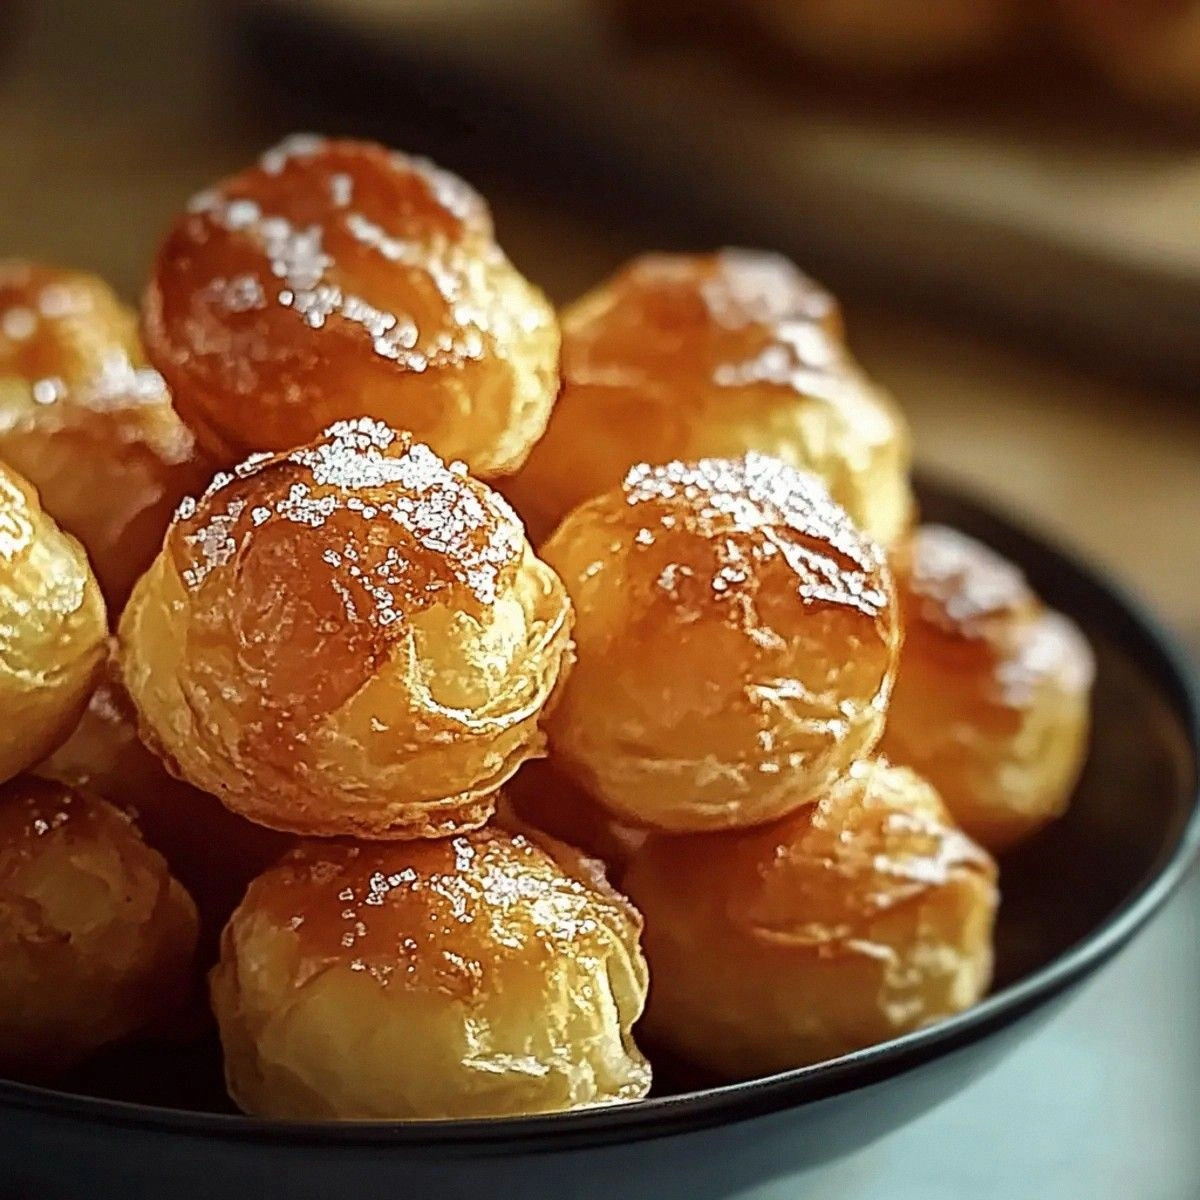
Imagine a cloud of dough that puffs up like a miniature soufflé, its surface speckled with glistening pearl sugar that crackles under your teeth, releasing a caramel‑kissed sweetness that lingers just long enough to make you sigh. The interior is a light, almost ethereal crumb that practically disappears as soon as it meets your tongue, leaving behind a buttery whisper and a faint crunch from the sugar crystals. You’ll hear the soft sigh of the dough as it lifts, see the golden‑brown crowns forming, feel the warm steam kiss your fingertips when you pull the tray out, and smell the intoxicating aroma of melted butter and toasted sugar that could coax even the most stoic of grandmothers into a smile.
Most chouquette recipes out there either give you a dense, doughy bite or a dry, crumbly texture that feels more like a biscuit than a cloud. This version, however, is a game‑changer because it harnesses the power of a classic French choux pastry technique while sneaking in a secret ingredient that most chefs keep to themselves: a splash of granulated sugar dissolved in the butter‑water mixture, creating a glossy sheen that locks in moisture and ensures every bite is a perfect balance of crisp and melt‑in‑your‑mouth softness. I’ll be honest — I ate half the batch before anyone else got a chance to try it, and that’s a confession I’m not ashamed to make.
Let me walk you through every single step — by the end, you’ll wonder how you ever made it any other way. Okay, ready for the game‑changer? This next part? Pure magic. Picture yourself pulling these golden puffs out of the oven, the whole kitchen smelling incredible, and daring anyone to resist a second bite. I dare you to taste this and not go back for seconds.
What Makes This Version Stand Out
- Taste: The subtle caramel notes from the pearl sugar pair perfectly with the buttery base, creating a flavor profile that feels both nostalgic and fresh.
- Texture: A crisp, sugary crust gives way to an interior that’s as light as a feather, a contrast that most recipes miss.
- Simplicity: Only six ingredients, all pantry staples, mean you won’t need a specialty store run.
- Uniqueness: The addition of granulated sugar to the butter‑water mixture is the secret that locks in moisture and adds a glossy finish.
- Crowd Reaction: These are the kind of pastries that get Instagram likes, rave reviews, and spontaneous applause at brunch.
- Ingredient Quality: Using real butter (not margarine) and high‑quality pearl sugar makes a world of difference in flavor depth.
- Cooking Method: The classic choux technique ensures a reliable rise, while the low‑heat bake finishes the crust without burning.
- Make‑Ahead Potential: Store them airtight for up to three days, and they’ll still feel fresh, making them perfect for party prep.
Inside the Ingredient List
The Flavor Base
The ½ cup of unsalted butter is the heart of the chouquette, providing a rich, creamy flavor that you can actually taste. Butter melts into the water, creating an emulsion that coats the flour particles, ensuring an even rise and a tender crumb. If you skimp on butter or substitute with a low‑fat alternative, you’ll end up with a dry, flavorless pastry that feels more like a cracker than a cloud. For the best results, choose European‑style butter with at least 82% fat; its higher milk solid content adds depth and a luxurious mouthfeel.
The Texture Crew
One cup of water is the liquid catalyst that steams the flour into a glossy dough. It’s crucial to bring the water to a rolling boil before adding the butter; this ensures the butter fully dissolves and the mixture reaches the right temperature for gelatinizing the starches. The all‑purpose flour, measured at one cup, provides the structure; too much flour makes the dough heavy, while too little results in a runny batter that won’t hold its shape. If you’re gluten‑sensitive, you can swap half the flour for a gluten‑free blend, but be prepared for a slightly denser texture.
The Unexpected Star
Four large eggs are the leavening heroes here. They add steam, lift, and a silky smoothness that makes the interior melt like butter. Adding the eggs one at a time while whisking vigorously prevents lumps and ensures the dough stays glossy. If you accidentally over‑whisk, the dough can become too elastic and lose its airy quality. A quick tip: bring the eggs to room temperature before adding them; this reduces the shock to the hot dough and keeps the batter silky.
The Final Flourish
The ½ cup of pearl sugar is the decorative crown that gives each chouquette its signature sparkle. Its large crystals caramelize slightly in the oven, creating a crunchy exterior that shatters like thin ice when you bite into it. The ¼ cup of granulated sugar, dissolved in the butter‑water mixture, is the secret moisture‑locker; it creates a subtle sweetness throughout the dough and helps the crust achieve that glossy finish. If you can’t find pearl sugar, you can substitute with demerara sugar, though the texture will be a tad coarser.
Everything's prepped? Good. Let's get into the real action…
The Method — Step by Step
First, gather all your ingredients and set them out on the counter. This is the moment of truth: the kitchen becomes a stage, and you’re the star. Turn your oven on to 425°F (220°C) to preheat; you want a hot start to give the dough that initial puff. While the oven heats, melt the butter in a medium saucepan with the water and the ¼ cup of granulated sugar. Let it come to a rolling boil, watching the bubbles dance like tiny fireworks. Once boiling, remove from heat and immediately dump in the flour, stirring vigorously with a wooden spoon until the mixture pulls away from the sides and forms a smooth, glossy ball.
Now comes the crucial cooling phase. Transfer the dough to a large mixing bowl, cover it with a clean kitchen towel, and let it sit for about 5 minutes. This pause is essential because adding eggs to a scorching dough would scramble them. While you wait, crack the four large eggs into a small bowl, giving each a quick whisk—just enough to break the yolks, not fully beat them. This step is where many novices go wrong: adding eggs too quickly can create a lumpy batter.
Begin incorporating the eggs one at a time. Add the first egg, whisking briskly until the dough looks smooth and glossy again. Repeat with the second egg, then the third, and finally the fourth. You’ll notice the batter becoming lighter and more elastic with each addition—this is the steam‑building magic that will give you that airy interior. If the mixture looks too thick after the third egg, add a teaspoon of warm water; the dough should be thick but pipe‑able, resembling a thick pancake batter.
Transfer the batter into a pastry bag fitted with a large plain tip (about ½‑inch). If you don’t have a pastry bag, a sturdy zip‑top bag with a corner snipped off works just fine. Pipe small mounds—about the size of a walnut—onto a parchment‑lined baking sheet, spacing them roughly 2 inches apart. The spacing allows the dough to expand without merging into one giant blob. Sprinkle each mound generously with the ½ cup of pearl sugar, ensuring every peak is covered; this is the visual cue that will make your guests gasp.
Slide the tray into the preheated oven and bake at 425°F for 10 minutes. This high‑heat blast creates the initial lift, puffing the dough like a balloon. You’ll hear a faint sizzle as the sugar caramelizes—listen for it; that’s your cue that the crust is forming. After 10 minutes, reduce the temperature to 350°F (175°C) and continue baking for another 15‑20 minutes. The lower heat finishes the interior cooking without over‑browning the exterior. The chouquettes should be a uniform golden‑brown, and the pearl sugar will have turned a deep amber, giving them that irresistible sparkle.
When the timer dings, turn off the oven but leave the door slightly ajar for 5 minutes. This gentle cooling prevents the chouquettes from collapsing suddenly, which can happen if they’re exposed to a cold draft. After the brief rest, transfer the pastries to a wire rack to cool completely. As they cool, you’ll notice the crust firming up while the interior remains soft—this contrast is the hallmark of a perfect chouquette.
Finally, serve them warm or at room temperature. If you want that melt‑in‑your‑mouth sensation, bite into one while it’s still slightly warm; the butter will be liquid, the sugar will crackle, and the interior will feel like a cloud. Store any leftovers in an airtight container; they’ll stay fresh for up to three days, though I’ll be honest—most people don’t make it that far because they’re already planning the next batch.
That's it — you did it. But hold on, I've got a few more tricks that'll take this to another level…
Insider Tricks for Flawless Results
The Temperature Rule Nobody Follows
Never underestimate the power of a properly preheated oven. The initial 425°F blast is what creates that dramatic puff. If your oven runs cool, the dough will spread instead of rising, resulting in flat, dense pastries. Use an oven thermometer to verify the temperature; it’s a tiny investment that pays off in every bake.
Why Your Nose Knows Best
When the chouquettes are halfway through the lower‑heat bake, lean in and sniff. You should detect a sweet, buttery aroma with a faint caramel edge. If the smell is still raw or floury, give them another 2‑3 minutes; trust your nose over the clock.
The 5‑Minute Rest That Changes Everything
After the high‑heat burst, let the pastries rest in the turned‑off oven with the door ajar for five minutes. This rest lets the steam settle, preventing a sudden collapse that would make the interior gummy. It’s a small pause that yields a massive texture upgrade.
Egg Temperature Trick
If you live in a cold climate, bring the eggs to room temperature before whisking. Cold eggs can shock the hot dough, causing it to seize and produce a lumpy texture. A quick 15‑minute sit on the counter does the trick, and the batter stays silky.
The Pearl Sugar Placement Hack
Instead of sprinkling pearl sugar on top, gently press it into the dough before baking. This ensures each crystal adheres firmly, preventing it from falling off when you bite. The result is a uniform crunch that’s both visual and tactile.
Creative Twists and Variations
This recipe is a playground. Here are some of my favorite ways to switch things up:
Chocolate‑Swirl Chouquettes
Add 2 tablespoons of melted dark chocolate to the batter after the eggs are fully incorporated. The chocolate creates ribbons that melt into the interior, giving each bite a subtle cocoa depth. Top with a dusting of cocoa powder instead of pearl sugar for a sophisticated finish.
Citrus‑Zest Delight
Stir in the zest of one lemon or orange into the butter‑water mixture before adding the flour. The zest adds a bright, aromatic lift that pairs beautifully with the sweet sugar crust. Finish with a light drizzle of citrus glaze for an extra zing.
Savory Herb Chouquettes
Swap the pearl sugar for a mixture of grated Parmesan and finely chopped fresh thyme. Reduce the granulated sugar to a pinch and add a pinch of sea salt. These savory bites are perfect as an appetizer for wine‑and‑cheese evenings.
Spiced Pumpkin Version
Replace ¼ cup of the water with pumpkin puree and add a teaspoon of pumpkin pie spice to the flour. The orange hue and warm spices turn the chouquettes into a fall favorite, perfect for Thanksgiving brunches.
Almond‑Infused Elegance
Add ¼ cup of finely ground almond flour to the dry ingredients and replace half the butter with almond butter. The nutty undertone adds richness, and a sprinkling of toasted almond slivers on top gives a delightful crunch.
Storing and Bringing It Back to Life
Fridge Storage
Place the cooled chouquettes in an airtight container lined with a paper towel to absorb excess moisture. They’ll stay fresh for up to three days. Reheat in a preheated 300°F oven for 5 minutes; the crust will regain its crispness while the interior stays soft.
Freezer Friendly
Arrange the pastries on a baking sheet and freeze them individually for 2 hours. Transfer the frozen chouquettes to a zip‑top bag. When you’re ready to enjoy, bake straight from frozen at 350°F for 12‑15 minutes. No thawing needed, and they’ll taste as if they were just made.
Best Reheating Method
For the ultimate melt‑in‑your‑mouth experience, preheat a skillet over low heat, add a splash of water (just a teaspoon), and place the chouquette in the pan, covering it with a lid. The steam revives the interior while the bottom crisps up. This method works wonders when you’re short on oven space.