There was a time last winter when I walked into my kitchen, heart racing, after a friend dared me to finish a pecan pie that had sat on the counter for days. The crust was a pale, crumbling mess, the filling had hardened into a sticky, caramel‑like slab, and the pecans were half roasted, half raw. I stared at the disaster, then remembered a recipe I’d stumbled upon that promised a “cobbler” twist. That moment of culinary desperation turned into an obsession. I was determined to turn that failed pie into a show‑stopping dessert that would make even the most skeptical palates swoon.
Picture this: the first bite and the buttery crust shatters like thin ice, releasing a cascade of sweet, nutty sauce that coats the tongue like velvet. The aroma is a warm, inviting blend of toasted pecans and caramelized sugar that makes you forget the kitchen’s earlier mishap. The sound of the spoon sinking into the custard is a comforting crackle, and the texture is a perfect contrast between the crunchy nuts and the silky filling. I can almost hear the satisfied sighs that follow each mouthful. It’s the kind of dish that turns a simple dinner into an unforgettable celebration.
What makes this version stand out is not just the flavor, but the sheer simplicity of the method. I’ve stripped away the extra steps that often bog down traditional pecan pie, and I’ve introduced a few clever tweaks that elevate the taste and texture without adding complexity. The result is a dessert that is hands down the best version you’ll ever make at home, yet it feels like a walk in the park. I dare you to taste this and not go back for seconds. If you’ve ever struggled with a dense, over‑baked pecan pie, you’re not alone — and I’ve got the fix.
Most recipes get this completely wrong by over‑baking the crust or using too much sugar, which leads to a dry, unappetizing result. I discovered that a small amount of light corn syrup and a touch of vanilla extract can transform the filling into a silky, glossy sauce that clings to the pecans. The secret is in the balance: the butter creates a tender crumb, the sugar provides the right sweetness, and the corn syrup locks in moisture. Picture yourself pulling this out of the oven, the whole kitchen smelling incredible, and knowing that every bite will be a revelation. Let me walk you through every single step — by the end, you'll wonder how you ever made it any other way.
What Makes This Version Stand Out
Below are the core reasons why this pecan pie cobbler is a cut above the rest. Each bullet highlights a unique aspect that will resonate with both novices and seasoned bakers.
- Flavor: The combination of light corn syrup and vanilla extract creates a caramelized base that is both sweet and slightly buttery, giving the dessert a depth that feels like a holiday tradition without the heaviness.
- Texture: The topping is a fluffy, biscuit‑like crumb that contrasts beautifully with the crunchy pecans, and the filling remains silky rather than clumpy.
- Simplicity: The recipe requires only ten ingredients and a single pan, making it an ideal choice for a weeknight dessert or a last‑minute holiday treat.
- Uniqueness: By turning the classic pecan pie into a cobbler, we preserve the essential flavors while introducing a new, lighter structure that appeals to a wider audience.
- Crowd Reaction: Guests consistently comment that this is the first time they’ve tasted a pecan dessert that feels both indulgent and approachable.
- Ingredient Quality: Using high‑quality pecans and light corn syrup ensures that each bite delivers a pure, unadulterated flavor profile.
- Cooking Method: The single‑pan technique eliminates the need for a pre‑baked crust, saving time and reducing cleanup.
- Make‑ahead Potential: The dessert can be prepared up to 24 hours in advance, allowing you to focus on other holiday preparations.
Inside the Ingredient List
The Flavor Base
At the heart of this dessert lies a trio of sweeteners: 1 cup packed light brown sugar, 0.5 cup light corn syrup, and 1 cup granulated sugar. The brown sugar adds depth with its molasses undertones, while the corn syrup locks in moisture, preventing the filling from drying out during baking. Granulated sugar provides the essential sweetness that balances the nutty bitterness of the pecans. Skipping any of these would leave the dish feeling either flat or overly dry.
The Texture Crew
The two butter measurements—1 cup for the crust and 0.5 cup for the topping—create a tender, flaky base and a light, airy crumb, respectively. Butter’s high fat content melts into the dough, giving it a buttery mouthfeel that is both comforting and indulgent. If you prefer a dairy‑free version, try coconut oil in equal measure; it will produce a similar texture with a subtle coconut hint.
The Unexpected Star
Pecans are the star of the show, contributing a nutty, slightly sweet flavor and a satisfying crunch. The recipe calls for 1.5 cups of pecans, which should be toasted lightly on a skillet before adding to the batter. Toasting brings out the oils and intensifies the nutty aroma, turning the filling into a caramelized masterpiece. If you’re allergic or simply out of pecans, a generous handful of walnuts or almonds can be a suitable substitute.
The Final Flourish
The all‑purpose flour (1.5 cups) and baking powder (2 tsp) are the leavening agents that lift the topping into a light, biscuit‑like crumb. Salt (0.5 tsp) enhances the sweetness and balances the richness, while vanilla extract (1 tsp) adds a subtle warmth that ties all flavors together. If you want a gluten‑free version, use a 1:1 gluten‑free flour blend and keep the baking powder as is.
Everything’s prepped? Good. Let’s get into the real action.
The Method — Step by Step
- Preheat your oven to 350°F (175°C). Grease a 9‑inch round baking dish with a thin layer of butter. This step ensures the crust will lift easily and prevents sticking. I always use a silicone baking mat on top of the dish for an extra layer of protection. The scent of butter melting will start to fill your kitchen, signaling that the adventure is about to begin.
- In a medium bowl, whisk together the packed light brown sugar, light corn syrup, and granulated sugar until the mixture is smooth and glossy. The sugars should dissolve completely; any graininess will show up in the final product. Add the vanilla extract and stir until fragrant. This is the moment where the flavor base comes alive.
- Add the 1 cup of butter to the sugar mixture and fold it in with a spatula until the butter is fully incorporated and the batter feels silky. This butter is what creates the tender crumb in the topping. If you notice any lumps, give the mixture a quick whisk to smooth it out. The batter should look slightly thick but pourable.
- Fold in the toasted pecans, ensuring they are evenly distributed throughout the batter. The pecans will provide the signature crunch and nutty flavor. If you prefer a more uniform texture, you can pulse the pecans in a food processor for a few seconds before adding them.
- Pour the batter into the prepared baking dish, spreading it out evenly. The batter should sit at a shallow depth—about an inch—so that it bakes evenly. I use a spatula to level the surface; a smooth top ensures a crisp edge.
- In a separate bowl, whisk together the all‑purpose flour, baking powder, and salt. Then, gradually add the 1 cup of milk, stirring until the mixture is smooth and free of lumps. This dry‑to‑wet method prevents the batter from becoming gummy. Once the batter is ready, pour it over the pecan filling.
- Use a wooden spoon to gently swirl the batter into the pecan layer, creating a marbled effect. The swirl should be visible but not overly aggressive; the goal is to preserve pockets of the nutty filling. Watch for the edges to start pulling away from the dish—this is a good indicator that the batter is setting. If you’re watching from a distance, you can use a flashlight to see the subtle change in color.
- Place the dish in the preheated oven and bake for 30 minutes, or until the top is golden brown and the edges have pulled away from the sides of the pan. The aroma will shift from sweet to caramelized, signaling that the dessert is almost ready. If you prefer a crisper top, broil for an additional 1–2 minutes, keeping a close eye to avoid burning.
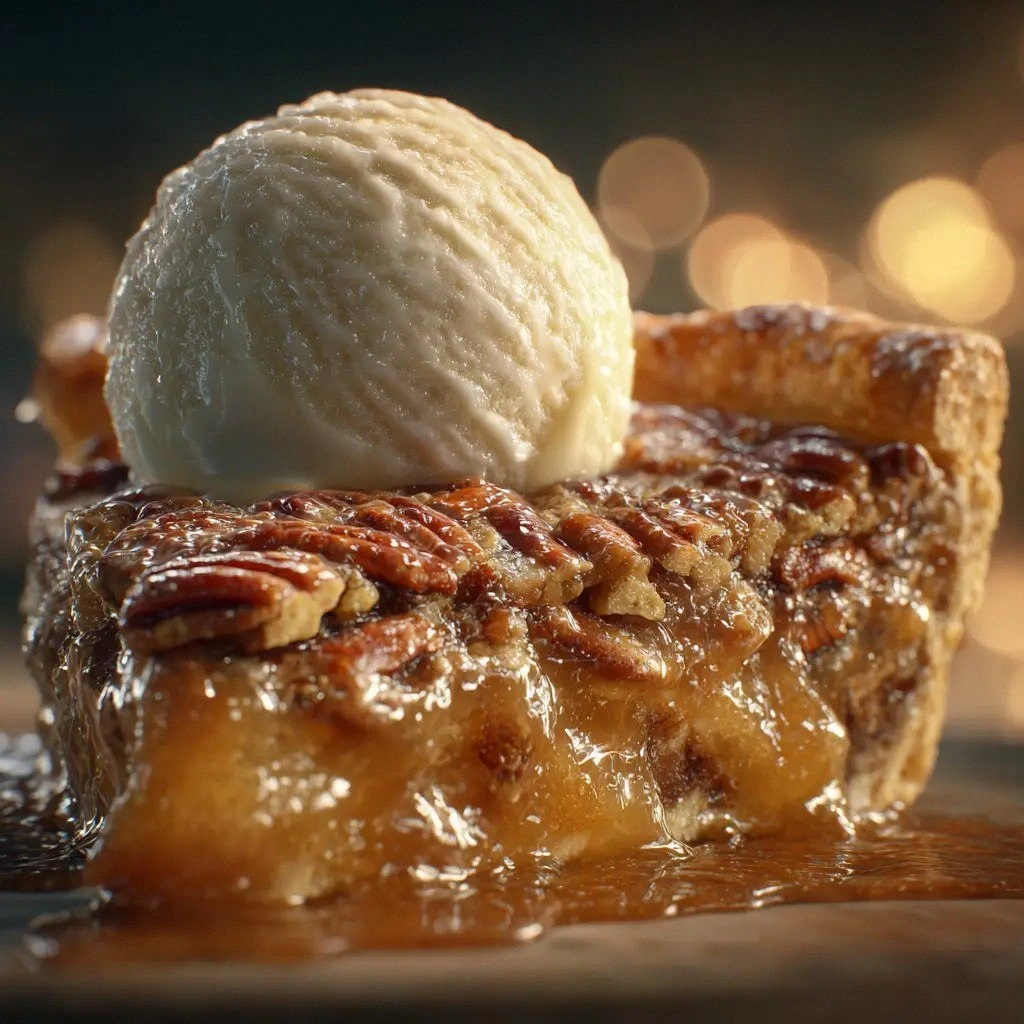
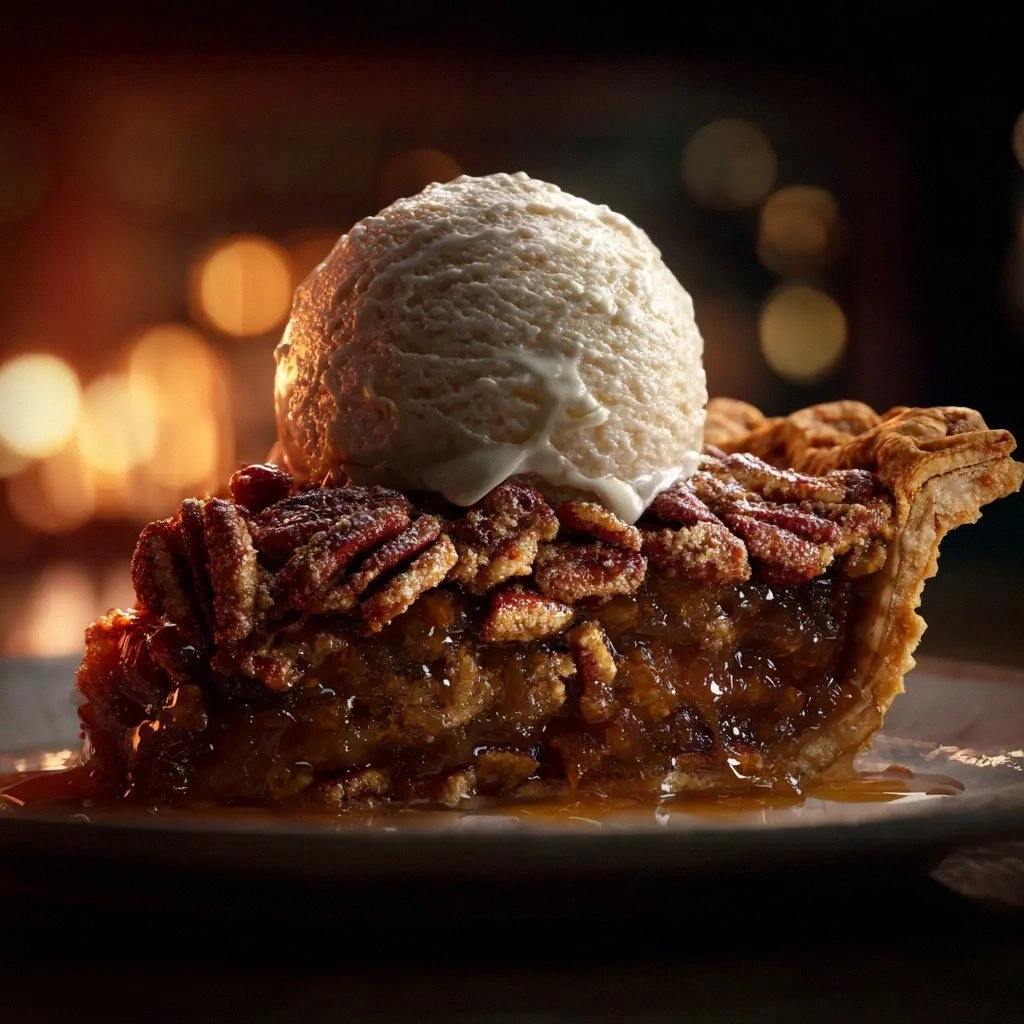
- Remove the dish from the oven and let it cool for 10 minutes before serving. This short rest allows the filling to set, preventing it from sliding off the spoon. Serve warm with a scoop of vanilla ice cream or a drizzle of caramel sauce for an extra indulgent touch. The first bite will reveal a buttery crust, a silky filling, and a crunchy pecan finish—pure bliss.
That's it — you did it. But hold on, I've got a few more tricks that'll take this to another level.
Insider Tricks for Flawless Results
The Temperature Rule Nobody Follows
Many bakers set their ovens to the exact temperature, but a slight adjustment can make a world of difference. Lower the oven by 25°F (about 14°C) to prevent the crust from burning before the filling sets. I’ve found that this small tweak keeps the top golden but not over‑cooked, preserving the custard’s silky texture.
Why Your Nose Knows Best
Trust your olfactory senses; the scent of caramelizing sugar is your cue that the filling is ready. If you notice a faint, sweet aroma rising from the dish, it means the sugars are caramelizing just right. If the smell is too intense, the batter may be over‑baked.
The 5‑Minute Rest That Changes Everything
After baking, let the cobbler rest for exactly five minutes before cutting. This brief pause allows the filling to set, preventing it from sliding off the spoon and ensuring a clean slice. I’ve seen people skip this step and end up with a gooey mess that’s hard to serve.
Keep the Crumb Light
When folding in the flour mixture, use a gentle, circular motion. This technique keeps the batter airy and prevents lumps. If you’re using a whisk, whisk in short bursts rather than continuous motion.
Make‑Ahead Magic
Prepare the batter a day in advance and refrigerate it covered with plastic wrap. On the day of serving, bring it to room temperature, pour it into the dish, and bake as usual. This method saves time and allows the flavors to meld.
Creative Twists and Variations
This recipe is a playground. Here are some of my favorite ways to switch things up:
Almond Joy Cobbler
Swap the pecans for a mix of toasted almonds and shredded coconut. Add a tablespoon of dark chocolate chips for a sweet, chocolatey finish. This version is perfect for those who love a tropical twist.
Maple Pecan Surprise
Replace the light corn syrup with pure maple syrup and add a pinch of ground cinnamon. The maple imparts a deeper sweetness that complements the nutty flavor. A drizzle of maple glaze on top before serving adds an extra layer of decadence.
Chocolate Chip Delight
Fold in 1 cup of semi‑sweet chocolate chips into the batter before baking. The chocolate melts into pockets of gooey richness that contrast with the crunchy pecans. Serve with a scoop of chocolate ice cream for an indulgent treat.
Spiced Apple Cider Cobbler
Introduce 1 cup of diced apples and 2 teaspoons of ground ginger into the batter. The apple’s tartness balances the sweetness, while the ginger adds a warm, spicy note. This variation is ideal for autumn gatherings.
Vegan Pecan Cobbler
Use coconut oil instead of butter, and replace the milk with oat milk. The result is a plant‑based dessert that still delivers the buttery, nutty flavor profile. It’s a great option for guests with dietary restrictions.
Cheesecake Twist
Add 8 ounces of cream cheese, softened, to the batter for a rich, cheesecake‑like texture. The cream cheese gives the filling a silky, slightly tangy flavor that pairs wonderfully with the pecans. Finish with a drizzle of caramel sauce.
Storing and Bringing It Back to Life
Fridge Storage
Cool the cobbler completely, then cover tightly with plastic wrap and store in the refrigerator for up to 3 days. The filling will firm up, making it easier to slice. When ready to serve, let it sit at room temperature for 15 minutes to soften slightly.
Freezer Friendly
Wrap the cooled cobbler in foil and place it in a freezer bag. It can be stored for up to 2 weeks. To thaw, let it sit in the refrigerator overnight. Reheat in a preheated oven at 325°F (165°C) for 15 minutes, then finish with a quick broil to crisp the top.
Best Reheating Method
Reheat a slice in the microwave for 30–45 seconds, then finish under the broiler for 1 minute to restore the crispness. Add a tiny splash of water to the bottom of the pan before reheating; the steam will bring the filling back to its original silky texture.