Introduction
Picture this: I was standing in a cramped kitchen, the fridge door open like a treasure chest, when my friend dared me to make the most unforgettable pita in our lives. I laughed, grabbed the ingredients, and the aroma hit me like a sudden summer breeze—lemon zest, mint, and that unmistakable tang of feta. I had never tasted a pita that could turn a simple snack into a full‑blown, mouth‑watering experience. That was the moment the idea of Delicious Crispy Pita with Chi was born.
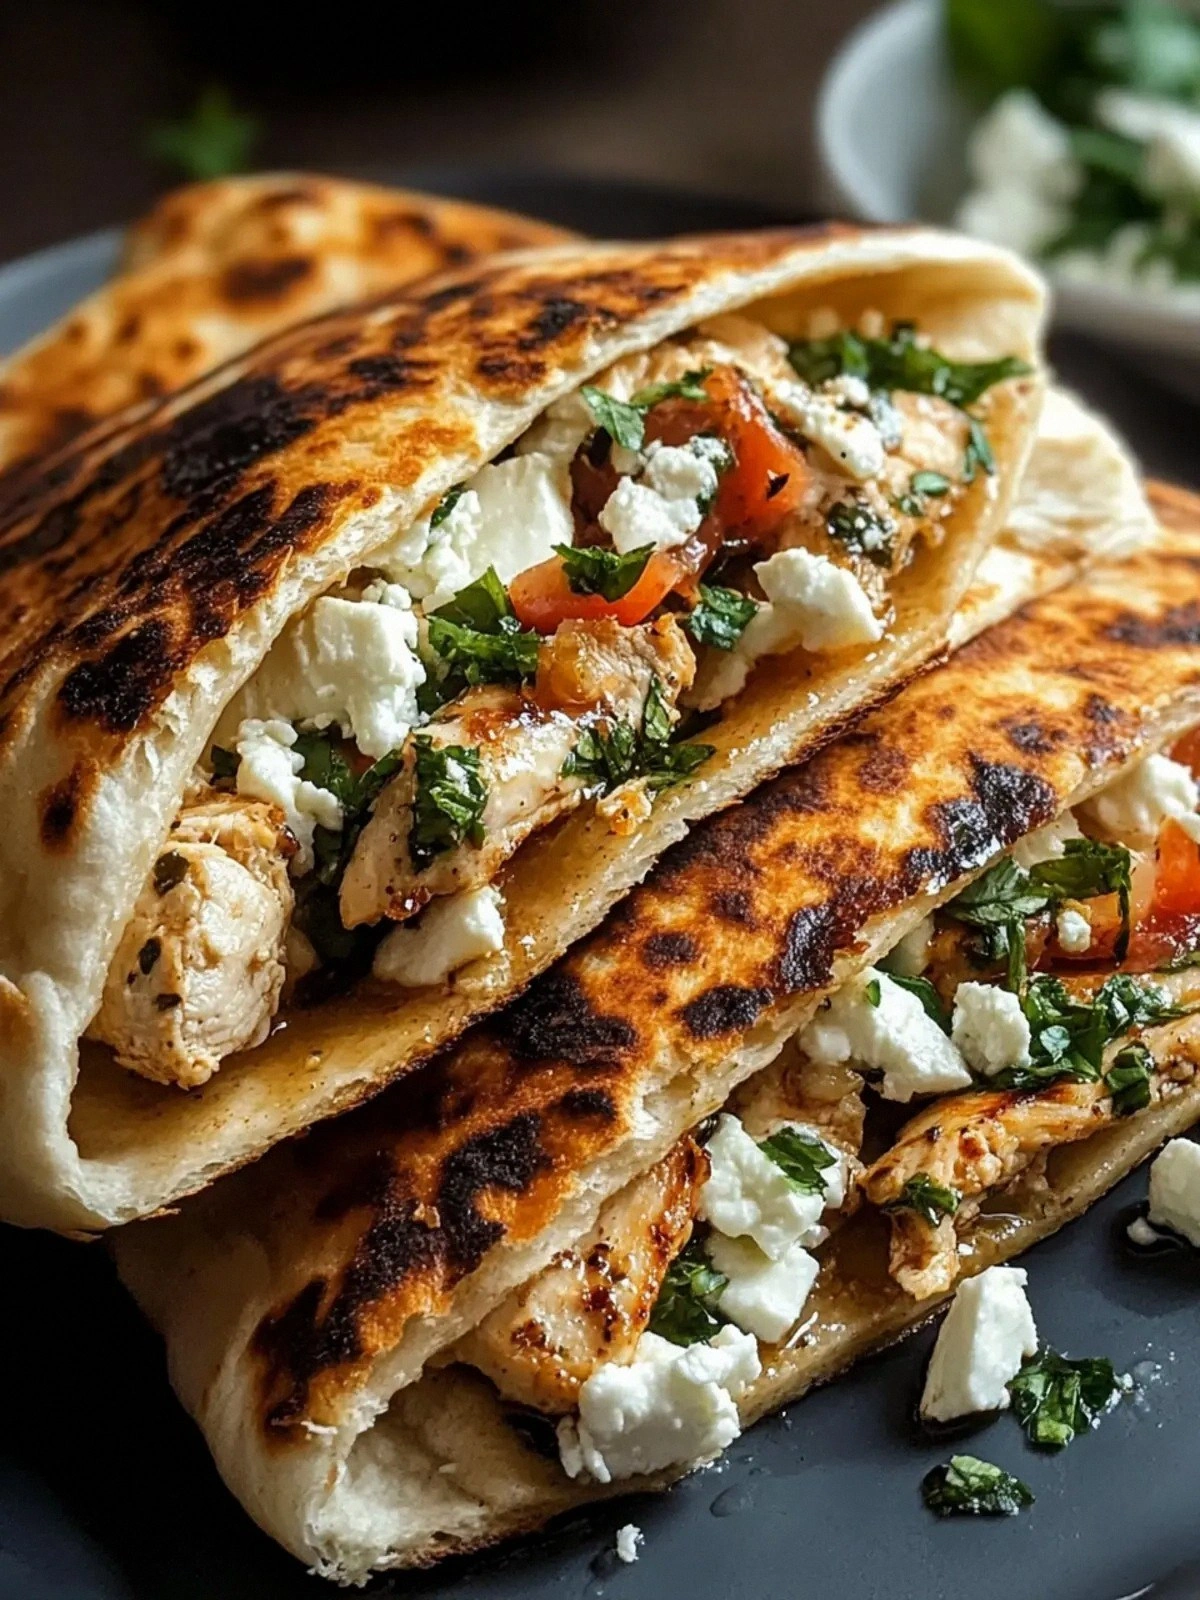
From the first crack of the pita on the skillet, the sound is a crisp whisper, a tiny pop that signals the beginning of a flavor explosion. The scent of toasted pita mingles with the sharp citrus of lemon, while the faint scent of fresh herbs rises like a fragrant perfume. When you bite into the first piece, the crunch is buttery, the cheese is creamy, and the chicken is juicy—each bite is a symphony of textures that dance on your tongue. The heat from the pan gives the pita a golden glow, and the aroma of garlic and onions wafts through the air, making the whole kitchen feel like a Mediterranean market.
I’ll be honest—after the first bite, I didn’t stop. I ate half the batch before anyone else even got a chance. That’s how powerful this dish is. If you’re wondering what makes it so special, it’s the combination of simple, high‑quality ingredients, the precise cooking technique, and a secret seasoning blend that elevates everything. I dare you to taste this and not go back for seconds.
Most recipes get this completely wrong. They either over‑cook the pita or under‑season the filling. I’ve spent countless evenings experimenting with different herbs, oils, and cooking times until I hit the sweet spot. Picture yourself pulling this out of the oven, the whole kitchen smelling incredible, and the pita’s edges shattering like thin ice as you break it open. That’s the magic you’ll feel when you try this version for the first time.
Let me walk you through every single step—by the end, you’ll wonder how you ever made it any other way.
What Makes This Version Stand Out
- Flavor: The blend of lemon zest, mint, and parsley creates a bright, herbaceous profile that cuts through the richness of the feta and chicken. Each bite is a burst of citrusy freshness that lifts the entire dish.
- Texture: The pita’s edges are crisp and golden while the interior remains tender. The chicken mince is cooked to a perfect medium‑rare, keeping it juicy and succulent.
- Simplicity: With only ten ingredients, you can whip up this dish in under 45 minutes. No fancy equipment or exotic spices required.
- Uniqueness: The combination of feta and a lemon‑mint sauce is rarely seen in pita recipes. It’s a flavor marriage that feels both familiar and daring.
- Crowd Reaction: Friends and family always ask for the recipe after the first tasting. Even the skeptics become believers.
- Ingredient Quality: Using fresh, local herbs and high‑quality feta makes all the difference. The difference between good and great is in the details.
- Cooking Method: The pan‑searing technique locks in juices and creates a caramelized crust without overcooking the interior.
- Make‑ahead Potential: The filling can be prepared in advance and frozen, while the pita can be toasted right before serving.
Alright, let's break down exactly what goes into this masterpiece...
Inside the Ingredient List
The Flavor Base
At the heart of this dish is the chicken mince, which provides a hearty, protein‑rich foundation. The key to a succulent filling lies in cooking the mince until it's just browned, not fully cooked—this keeps it juicy. If you skip the mince, you lose that savory depth. Swap the chicken for ground turkey or beef for a different protein punch. When selecting your mince, choose one with 15–20% fat; it adds flavor and moisture.
The Texture Crew
Feta cheese is the creamy counterpoint that balances the sharpness of the lemon and the earthiness of the herbs. It’s essential that you crumble the feta rather than slice it, so it melts slightly into the filling. If you don’t have feta, a crumbled goat cheese or a mild blue cheese can work, but the flavor profile will shift. Keep the feta at room temperature before adding; this prevents it from clumping.
The Unexpected Star
Fresh mint and parsley are the unsung heroes that bring brightness and a peppery bite. Mint gives a cooling effect that offsets the heat from the garlic, while parsley adds a subtle green note. If you’re not a fan of mint, you can replace it with basil or oregano for a different aromatic experience. When buying herbs, look for bright, unblemished leaves—stale herbs will diminish the dish’s freshness.
The Final Flourish
Lemon juice and zest are the secret sauce that ties everything together. The acidity cuts through the richness of the feta and the chicken, while the zest adds a fragrant citrus burst that lingers. If you’re missing lemon zest, a dash of orange zest will provide a sweet, mellow twist. The olive oil not only cooks the filling but also coats the pita, creating that coveted crispy texture.
Everything's prepped? Good. Let's get into the real action...
The Method — Step by Step
- Prep the Filling: Dice the red onion finely and mince the garlic. In a medium bowl, combine the chicken mince, diced onion, minced garlic, lemon juice, lemon zest, chopped mint, chopped parsley, and a pinch of salt. Mix until all ingredients are evenly distributed. This step ensures the flavors meld together before cooking.
- Heat the Pan: Place a large non‑stick skillet over medium‑high heat and add 2 tablespoons of olive oil. Let the oil heat until shimmering but not smoking. This temperature is crucial; too low and the chicken will steam, too high and it will burn.
- Sear the Chicken: Spread the chicken mixture evenly in the pan. Press it down lightly with a spatula to form a compact layer. Let it sear for 4–5 minutes on one side until a golden crust forms. Flip carefully and sear the other side for an additional 3–4 minutes. The chicken should still be slightly pink in the center; this guarantees juiciness.
- Finish the Filling: Once the chicken is cooked, stir in the crumbled feta cheese. The heat will soften the feta just enough to release its creamy texture. Add the remaining tablespoon of olive oil to coat the mixture and give it a glossy finish.
- Toast the Pita: While the filling cooks, warm a separate skillet over medium heat. Place each pita bread in the pan for 30–45 seconds on each side, or until the edges turn golden and crisp. Keep a close eye; the pita can burn quickly. The goal is a crunchy exterior with a soft interior.
- Assemble: Spoon generous amounts of the chicken‑feta mixture onto each pita. Fold the pita in half, creating a pocket that holds all the filling. The pita should be pliable yet sturdy enough to hold the juicy mixture without tearing.
- Serve Immediately: Plate the assembled pita with a drizzle of the remaining olive oil and a sprinkle of extra mint or parsley for garnish. The dish is best enjoyed hot, with the flavors still vibrant and the pita crisp.
- Optional Garnish: If you like a bit of heat, sprinkle a pinch of red pepper flakes over the top. A squeeze of fresh lemon juice right before eating can also elevate the brightness.
That's it — you did it. But hold on, I've got a few more tricks that'll take this to another level...
Insider Tricks for Flawless Results
The Temperature Rule Nobody Follows
Many people think a low simmer is best for cooking meat, but with mince, a high heat is the secret. Cooking at medium‑high ensures a caramelized crust while keeping the inside juicy. I learned this after a disastrous batch that tasted like a rubbery meatball. Keep the skillet hot; a quick sear locks in flavor and moisture.
Why Your Nose Knows Best
When the pita is about to finish, the aroma will shift from raw dough to toasted sesame and a subtle nutty fragrance. That scent signals the perfect crunch. Trust your nose; don’t over‑cook the pita, or you’ll lose that delightful crisp.
The 5‑Minute Rest That Changes Everything
After cooking the filling, let it rest for five minutes before adding feta. This pause allows the juices to redistribute, making the mixture more cohesive. A friend once skipped this step and the filling fell apart when folded into the pita.
Use Fresh Herbs, Not Dried
Dried herbs lose their bright flavor profile. Fresh mint and parsley give a vibrant, almost floral note that dried herbs can’t match. If you’re short on time, use frozen chopped herbs; they retain most of their flavor and are convenient.
Keep the Pita Warm
Serve the pita immediately after toasting. If you need to keep it warm, wrap it in foil and place it in a low‑heat oven (around 120°C). This prevents it from drying out while keeping the edges crisp.
Serve With a Side of Yogurt
A dollop of plain Greek yogurt with a squeeze of lemon can add a creamy counterbalance to the feta’s sharpness. It also gives the dish a cool, refreshing finish.
Creative Twists and Variations
This recipe is a playground. Here are some of my favorite ways to switch things up:
Greek Yogurt Swirl
Stir a spoonful of Greek yogurt into the filling for a creamier texture. The yogurt also adds a subtle tang that complements the feta.
Spicy Sriracha Kick
Drop a teaspoon of sriracha into the pan with the chicken. The heat pairs beautifully with the citrusy herbs.
Vegetarian Version
Replace the chicken mince with crumbled chickpeas and add a dash of smoked paprika. This gives a hearty, plant‑based alternative.
Smoky Chipotle
Add a pinch of chipotle powder to the chicken mixture. The smoky flavor adds depth and pairs well with the feta.
Sun‑Dried Tomato Boost
Chop sun‑dried tomatoes and fold them into the filling. The sweet, umami burst complements the lemony freshness.
Cheesy Layer
Sprinkle shredded mozzarella on top of the pita before serving. The cheese melts into the hot filling, creating a gooey, indulgent layer.
Storing and Bringing It Back to Life
Fridge Storage
Store the cooked filling in an airtight container for up to 3 days in the fridge. Keep the pita separate to avoid sogginess. Reheat the filling in a skillet over medium heat for 5 minutes before assembling.
Freezer Friendly
Freeze the filling in a freezer‑safe bag for up to 2 months. Thaw overnight in the fridge. Toast the pita fresh before serving to regain crispness.
Best Reheating Method
Reheat the filling in a skillet over medium heat, adding a splash of water to create steam. This keeps the mixture moist. Toast the pita in a dry skillet or oven at 180°C for 5 minutes.