I was standing in my kitchen, the oven humming like a lazy cat, when a sudden craving for something that could simultaneously hug my taste buds and make my heart skip a beat hit me like a seismic wave. I had a half‑finished box of chocolate cake mix, a jar of peanut butter that was practically a family heirloom, and a stash of Reese’s cups that had been begging for redemption. The idea of an ordinary chocolate cake felt bland compared to the volcano of flavors I imagined—rich chocolate, creamy peanut butter, a touch of salty buttercream, and a surprise burst of chocolate chips that would explode like fireworks on each bite. I tossed the mix into a bowl, added the peanut butter, and the kitchen filled with an aroma so intoxicating it felt like a warm blanket on a chilly night.
The first time I sliced into this cake, the crumb was as soft as a cloud that had just been kissed by a summer rain, while the frosting was a silky, peanut‑buttery river that clung to the plate like a love‑struck vine. The texture contrast—moist cake meeting a buttery, slightly tangy cream cheese swirl—was nothing short of a culinary earthquake, shaking every expectation I had for a simple dessert. I dared my friends to take a bite and not come back for seconds, and they all failed spectacularly. The moment the chocolate chips melted into the frosting, it was like tiny molten pearls of joy, each one a tiny celebration of decadence.
Most peanut butter cakes I've tried either end up dry, overly sweet, or simply forgettable. This version, however, balances the sweetness with a subtle salty edge from the butter and a creamy tang from the cream cheese, making it the best version you'll ever make at home. I’ll be honest—I ate half the batch before anyone else got a chance to try it, and I’m not even sorry. The secret? A splash of sweetened condensed milk that adds a glossy, caramel‑kissed finish to the frosting, and a technique that keeps the cake unbelievably moist without any fancy equipment.
Picture yourself pulling this out of the oven, the whole kitchen smelling like a chocolate‑peanut butter dream, the frosting shimmering under the kitchen lights, and the anticipation building as you slice into it. The first forkful will have you questioning every other dessert you’ve ever known. Okay, ready for the game‑changer? Let me walk you through every single step — by the end, you'll wonder how you ever made it any other way.
What Makes This Version Stand Out
- Flavor Explosion: The marriage of deep chocolate and creamy peanut butter creates a taste that feels like a hug from your favorite childhood snack, amplified by the salty butter and tangy cream cheese.
- Texture Symphony: Moist, fluffy cake layers meet a velvety, slightly thick frosting that spreads like silk, while chocolate chips add a satisfying crunch.
- Simplicity Meets Luxury: Using a boxed cake mix as the base means you get a professional‑grade crumb without the hassle, while the homemade frosting elevates it to gourmet status.
- Unexpected Star: Sweetened condensed milk adds a glossy, caramel‑like sheen and a depth of sweetness that ordinary sugar can’t match.
- Crowd‑Pleaser Factor: This cake has been known to clear plates in seconds; even the most discerning dessert lovers beg for a second slice.
- Make‑Ahead Magic: The cake stays moist for days, and the frosting actually improves after a night in the fridge, making it perfect for parties.
- Ingredient Quality: Using real butter, premium peanut butter, and quality chocolate chips ensures each bite bursts with authentic flavor.
- Cooking Method: A gentle bake at a moderate temperature prevents over‑drying, while the frosting’s slow‑cook method creates a stable, glossy finish.
Inside the Ingredient List
The Flavor Base
The heart of this cake is the 1 box Chocolate Cake Mix. This mix provides a reliable, airy structure that you can trust, saving you from the pitfalls of a homemade flour blend that might turn gummy. If you ever skip this, you’ll likely end up with a dense, heavy cake that feels more like a brownie than a cake. For the best results, choose a mix that contains cocoa powder, not just chocolate flavoring, to ensure a deep, authentic chocolate taste.
Next up, 1 cup Creamy Peanut Butter. The creaminess is crucial; it blends seamlessly into the batter, creating a uniform peanut flavor throughout. Skipping the peanut butter or substituting it with a chunky variety will give you pockets of texture that can be pleasant, but they’ll also interrupt the smoothness that makes this cake so addictive. If you have a nut allergy, try a high‑quality sunflower seed butter for a similar creamy texture.
The Texture Crew
8 oz Cream Cheese (softened) brings a subtle tang that cuts through the sweetness, preventing the cake from feeling cloying. The cream cheese must be softened to room temperature; otherwise, you’ll end up with a lumpy frosting that refuses to spread. If you’re looking for a lighter version, you can swap half of the cream cheese for Greek yogurt, but expect a slightly thinner frosting.
1/4 cup Unsalted Butter (melted) adds richness and helps the frosting set with a glossy finish. Melted butter integrates more fully with the powdered sugar, creating a smooth texture. Using salted butter will introduce an unwanted salty punch, so always reach for the unsalted kind.
2 cups Powdered Sugar is the sweet backbone of the frosting. It dissolves completely when whisked with the butter and cream cheese, preventing any gritty feel on the tongue. If you prefer a less sweet frosting, you can reduce this to 1.5 cups, but the frosting may become too thin.
The Unexpected Star
1/2 cup Sweetened Condensed Milk is the secret weapon that gives the frosting a luscious, caramel‑kissed sheen. This ingredient is often overlooked in cake frostings, but it adds a depth of flavor that regular sugar simply can’t achieve. Skipping it will make the frosting taste flat and less luxurious.
1 cup Reese’s Peanut Butter Cups (chopped) adds surprise bursts of chocolate‑peanut butter goodness in every bite. These little nuggets melt slightly into the frosting, creating pockets of gooey delight. If you’re a fan of extra crunch, consider adding a handful of chopped peanuts as well.
The Final Flourish
1 cup Chocolate Chips are folded into the frosting at the very end, ensuring they stay distinct and don’t melt completely. This gives you that perfect contrast of smooth frosting and melty chocolate pockets. Opt for semi‑sweet chips for a balanced flavor; dark chocolate chips will make the frosting a bit bitter, while milk chocolate chips could make it overly sweet.
1 tsp Vanilla Extract rounds out the flavor profile, adding a fragrant note that ties the chocolate and peanut butter together. It’s a tiny ingredient, but omitting it will leave the frosting tasting slightly flat.
Everything's prepped? Good. Let's get into the real action...
The Method — Step by Step
Preheat your oven to 350°F (175°C) and grease a 9‑inch round cake pan with a thin layer of butter, then dust lightly with flour. This ensures the cake will release cleanly without sticking. As the oven warms, you’ll hear the faint hum of the heating elements—a comforting prelude to the magic about to happen.
While the oven is heating, line the bottom of the pan with parchment paper; this double‑insurance trick prevents any stubborn crust from forming at the base. I dare you to taste this and not go back for seconds; the anticipation builds as the pan warms up.
In a large mixing bowl, combine the 1 box Chocolate Cake Mix, 1 cup Water, 1/2 cup Vegetable Oil, and 3 large Eggs. Beat on medium speed for about 2 minutes until the batter is smooth and glossy. The batter should look thick yet pourable—think of a rich chocolate mousse that’s ready to be transformed.
Now, gently fold in the 1 cup Creamy Peanut Butter. Use a rubber spatula to swirl it in, creating ribbons of peanut butter that will later become pockets of flavor throughout the cake. This step is pure magic; watch the batter turn a deep, earthy brown.
Pour the batter into the prepared pan, spreading it evenly with the spatula. Tap the pan gently on the counter three times; this releases any large air bubbles and ensures a uniform rise.
Slide the pan into the oven and bake for 30‑35 minutes. The cake is done when a toothpick inserted into the center comes out with a few moist crumbs but no wet batter. The edges will start pulling away from the pan—a visual cue that the cake is ready.
While the cake bakes, start the frosting. In a medium bowl, beat the softened 8 oz Cream Cheese until smooth, then add the 1/4 cup melted Unsalted Butter and continue beating until fully incorporated.
Gradually add the 2 cups Powdered Sugar, one cup at a time, beating on low speed to avoid a sugar cloud explosion. Once incorporated, increase speed to medium and add 1 tsp Vanilla Extract and 1/2 cup Sweetened Condensed Milk. The frosting should become glossy and thick, resembling a silky ganache.
Once the cake is baked, let it cool in the pan for 10 minutes, then turn it out onto a wire rack to cool completely. Patience is key—cutting into a warm cake will cause the frosting to melt and slide off.
While the cake cools, fold the 1 cup Chocolate Chips into the frosting, followed by the 1 cup chopped Reese’s Peanut Butter Cups. The chips should stay distinct, creating that delightful crunch in each bite.
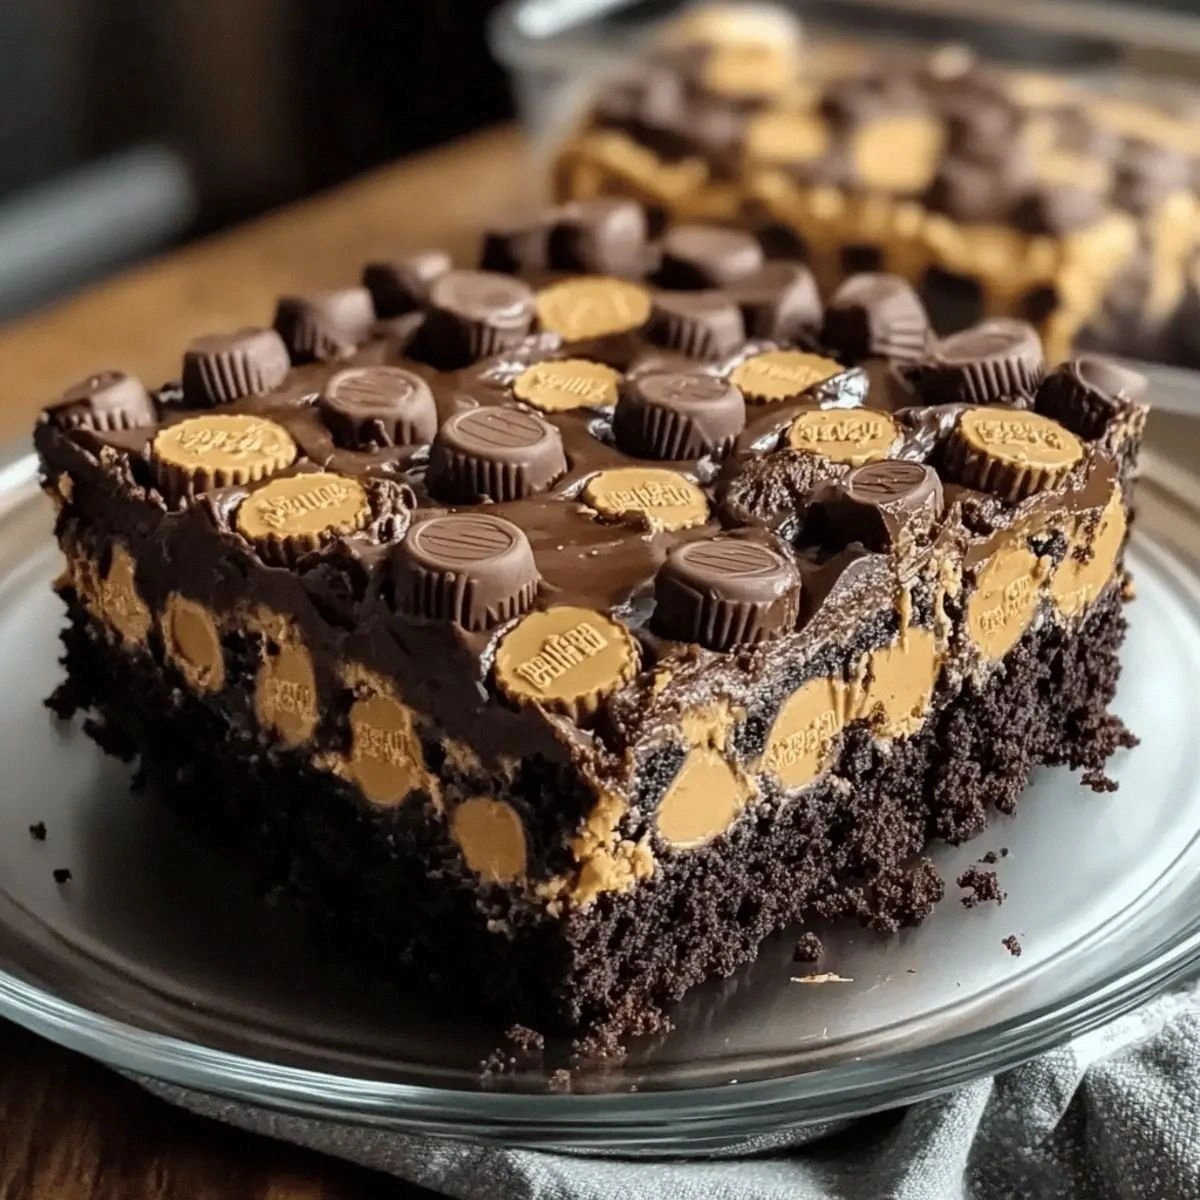
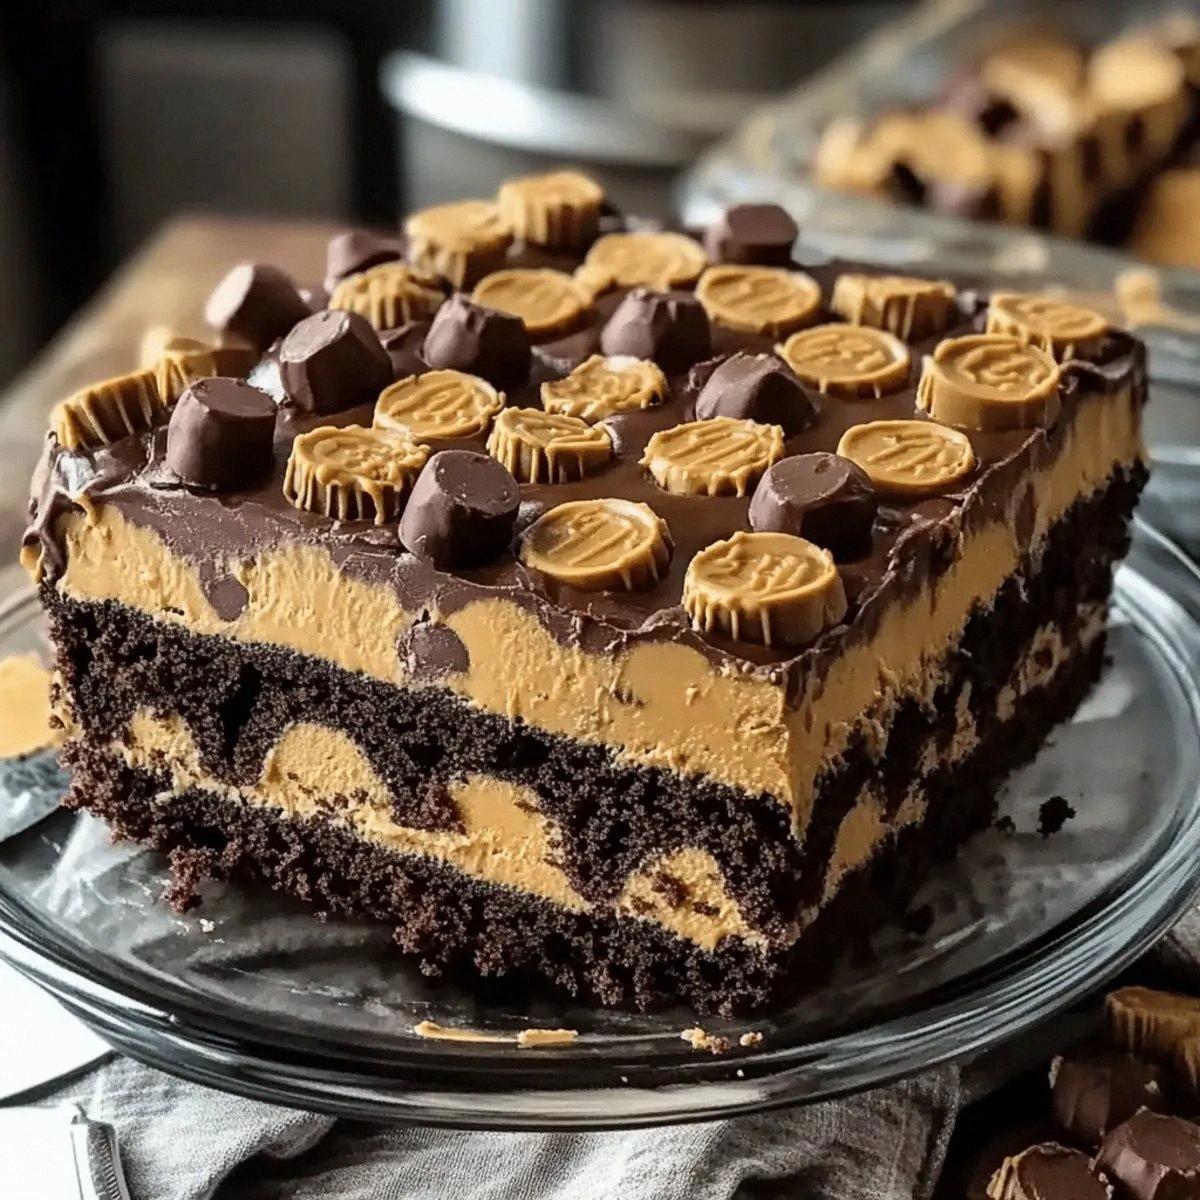
When the cake is completely cool, place it on a serving platter. Using an offset spatula, spread a generous layer of frosting over the top, letting it drip down the sides in a rustic, “earthquake” fashion. The frosting should be thick enough to hold its shape but soft enough to spread without tearing the cake.
For an extra visual wow factor, sprinkle a handful of additional chopped Reese’s cups and chocolate chips on top. This final flourish not only adds texture but also makes the cake look as good as it tastes.
Allow the assembled cake to set at room temperature for 20 minutes before slicing. This short rest lets the frosting firm up slightly, ensuring clean slices that hold their shape.
And now the fun part—cut a generous slice, let the aroma hit your nose, and take that first bite. That sizzle when the chocolate chips melt against the warm frosting? Absolute perfection. That's it — you did it. But hold on, I've got a few more tricks that'll take this to another level...
Insider Tricks for Flawless Results
The Temperature Rule Nobody Follows
Never bake a cake straight from the fridge. Let the batter sit at room temperature for 10 minutes before it goes into the oven. This small pause equalizes the temperature, resulting in a more even rise and a tender crumb. A friend once tried to skip this step and ended up with a dome that cracked like a broken egg—trust me, you don’t want that.
Why Your Nose Knows Best
When the cake is nearing the end of its bake, start sniffing the kitchen. If you catch a deep, toasty chocolate scent, the cake is likely done. Relying solely on the timer can be misleading because ovens vary. I’ve learned to trust my nose more than any digital readout—your senses are the ultimate timer.
The 5‑Minute Rest That Changes Everything
After frosting, let the cake rest for exactly five minutes before cutting. This short pause allows the frosting to set just enough to hold its shape while still being creamy. Skipping this rest leads to a messy plate, and you’ll end up with frosting sliding off like a runaway train.
Double‑Whip for Fluffier Frosting
Give the frosting a final 30‑second burst on high speed after all ingredients are combined. This incorporates extra air, making the frosting lighter and giving it that cloud‑like texture. A fellow baker tried this once and declared it the secret to “frosting that floats.”
The Chill‑Then‑Warm Trick
If you prefer a firmer frosting for transport, refrigerate the cake for 30 minutes, then let it sit at room temperature for 10 minutes before serving. The frosting will be firm enough to travel without sliding, yet still melt in your mouth as you bite. I’ve used this technique for potlucks, and it never fails.
Creative Twists and Variations
This recipe is a playground. Here are some of my favorite ways to switch things up:
Salted Caramel Swirl
Replace half of the condensed milk with a homemade salted caramel sauce. The salty caramel adds a sophisticated contrast to the sweet peanut butter, creating a flavor profile that feels upscale yet comfort‑centric.
Mocha Madness
Add 1 tablespoon of instant espresso powder to the cake batter and swap half of the chocolate chips for dark chocolate chunks. The coffee note deepens the chocolate flavor and pairs beautifully with the peanut butter.
Nutty Crunch
Stir in ½ cup of toasted, chopped peanuts into the frosting. The added crunch gives the cake an extra textural surprise that makes each bite more exciting.
White Chocolate Dream
Use white chocolate chips instead of regular ones, and add a teaspoon of almond extract to the frosting. This creates a lighter, sweeter version that still honors the peanut butter base.
Vegan Version
Swap the eggs for a flax‑egg mixture (2 tbsp ground flaxseed + 6 tbsp water per egg), use coconut oil instead of vegetable oil, and replace cream cheese with a vegan cream cheese alternative. The result is a plant‑based delight that still delivers that earthquake impact.
Storing and Bringing It Back to Life
Fridge Storage
Cover the cake tightly with plastic wrap or store it in an airtight container. It will stay fresh for up to 5 days in the refrigerator. The frosting may thicken slightly; let it sit at room temperature for 10 minutes before serving to regain its silky texture.
Freezer Friendly
Wrap the cake in a double layer of foil and then place it in a freezer‑safe bag. It can be frozen for up to 2 months. When you’re ready to enjoy it, thaw overnight in the fridge, then bring to room temperature for about 30 minutes. A tiny splash of milk or a drizzle of condensed milk before reheating will revive the frosting’s gloss.
Best Reheating Method
To re‑warm a slice, place it on a microwave‑safe plate, add a teaspoon of water around the edges, and microwave for 10‑15 seconds. The water creates steam that gently softens the cake without drying it out, bringing it back to that freshly‑baked perfection.