Picture this: a kitchen in chaos, a half‑baked loaf, and a frantic friend demanding something that tastes like a hug from the inside out. I was halfway through a dinner party, the table was bare, and the air smelled like burnt garlic. My friend, ever the daredevil, challenged me to whip up something that would have everyone begging for seconds. I stared at the loaf of French bread, the butter, and the garlic, and thought, “If this is going to be the night’s highlight, it better be unforgettable.” I pulled on my apron, and the kitchen felt like a stage where I was about to perform a culinary magic trick. I’m still shaking from the adrenaline rush of that moment, but the result? Pure, buttery bliss that made the room buzz with anticipation.
The aroma that hit the air when I first melted the butter was a heady perfume of toasted butter and garlic, the kind that makes your stomach growl in anticipation. The sound of the garlic sizzling in the pan was a gentle hiss that whispered, “This is going to be good.” The touch of the crusty loaf, the way it creaked when I sliced it, was a tactile reminder that we were about to embark on a flavor adventure. The taste, when I first licked the buttery, herb‑laden crumb, was like a warm hug that said, “You’re home.” The sight of the golden crust, crisp and inviting, made me feel like a chef who had just cracked a secret code. The anticipation was electric, the moment before the first bite a crescendo that built my confidence.
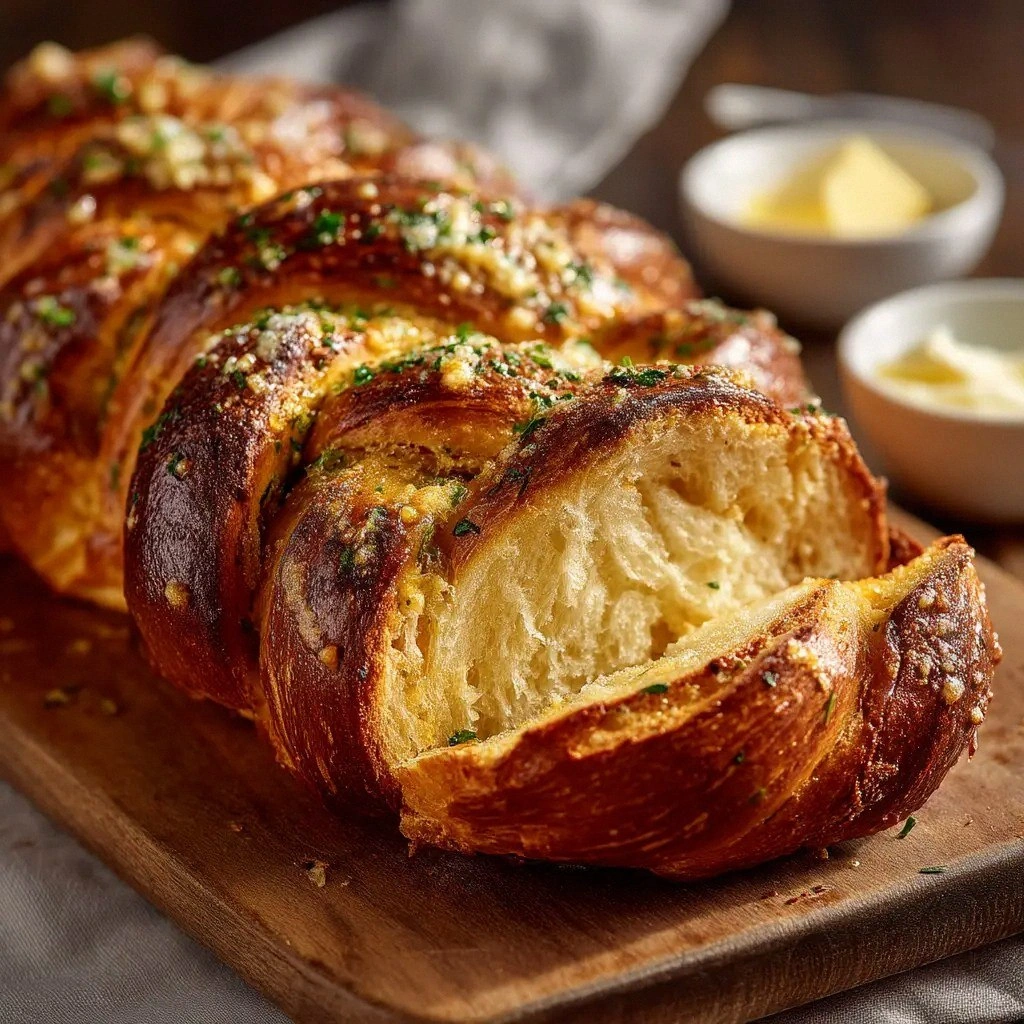
What makes this version stand out is not just the ingredients but the way they dance together. The buttery butter creates a silky base that carries the herbs like a fragrant river, while the parmesan adds a salty, umami depth that lifts every bite. The garlic is roasted to a mellow caramel, giving a subtle sweetness that balances the sharpness of the herbs. The loaf itself is a canvas, its sturdy crust providing the perfect contrast to the airy, buttery interior. The result is a bread that is both comforting and sophisticated, a crowd‑pleaser that can transition from an appetizer to a side dish with equal grace. It’s the kind of recipe that makes you feel like you’ve discovered a hidden gem in a bustling marketplace.
I dare you to taste this and not go back for seconds. The first bite is a revelation, the second a confirmation, and by the third you’re already planning how you’ll serve it at your next gathering. It’s hands down the best version you’ll ever make at home, and I’m not exaggerating. The secret? A subtle technique that transforms simple butter into a silky, herb‑infused sauce that clings to the bread like velvet. I’ll be honest—I ate half the batch before anyone else got a chance to try it, and I still had room for more. The crusty edges crackle like thin ice, and the interior melts in your mouth with a buttery whisper.
Most recipes get this completely wrong, either by under‑seasoning or over‑baking the bread, resulting in a dry, flavorless loaf. Here’s what actually works: a careful balance of butter, herbs, and garlic, a precise baking time, and a touch of Parmesan that creates a savory crust. Picture yourself pulling this out of the oven, the whole kitchen smelling incredible, as the golden crust glistens with a buttery sheen. The aroma alone is enough to convince even the pickiest eater that this is a masterpiece. The texture is a paradox—crispy on the outside, airy and buttery on the inside. This is pure, edible art that will have your guests begging for the recipe.
Okay, ready for the game‑changer? Let me walk you through every single step—by the end, you’ll wonder how you ever made it any other way. The next part? Pure magic. I’ve poured my heart into this recipe, and I can’t wait to share every secret, every tweak, and every tiny detail that makes this bread unbeatable. Stay with me here—this is worth it. I’ll show you how to transform a simple loaf into an unforgettable experience. The next steps are the heart of the recipe, the part where the magic happens. And trust me, you won’t want to miss a single detail.
What Makes This Version Stand Out
- Flavor: The combination of roasted garlic, fresh herbs, and parmesan creates a complex, savory profile that elevates the bread beyond ordinary. Each bite delivers a burst of umami, followed by a subtle herbal finish that lingers on the palate. The garlic caramelizes to a mellow sweetness that balances the saltiness of the parmesan. This harmony turns a simple loaf into a culinary revelation.
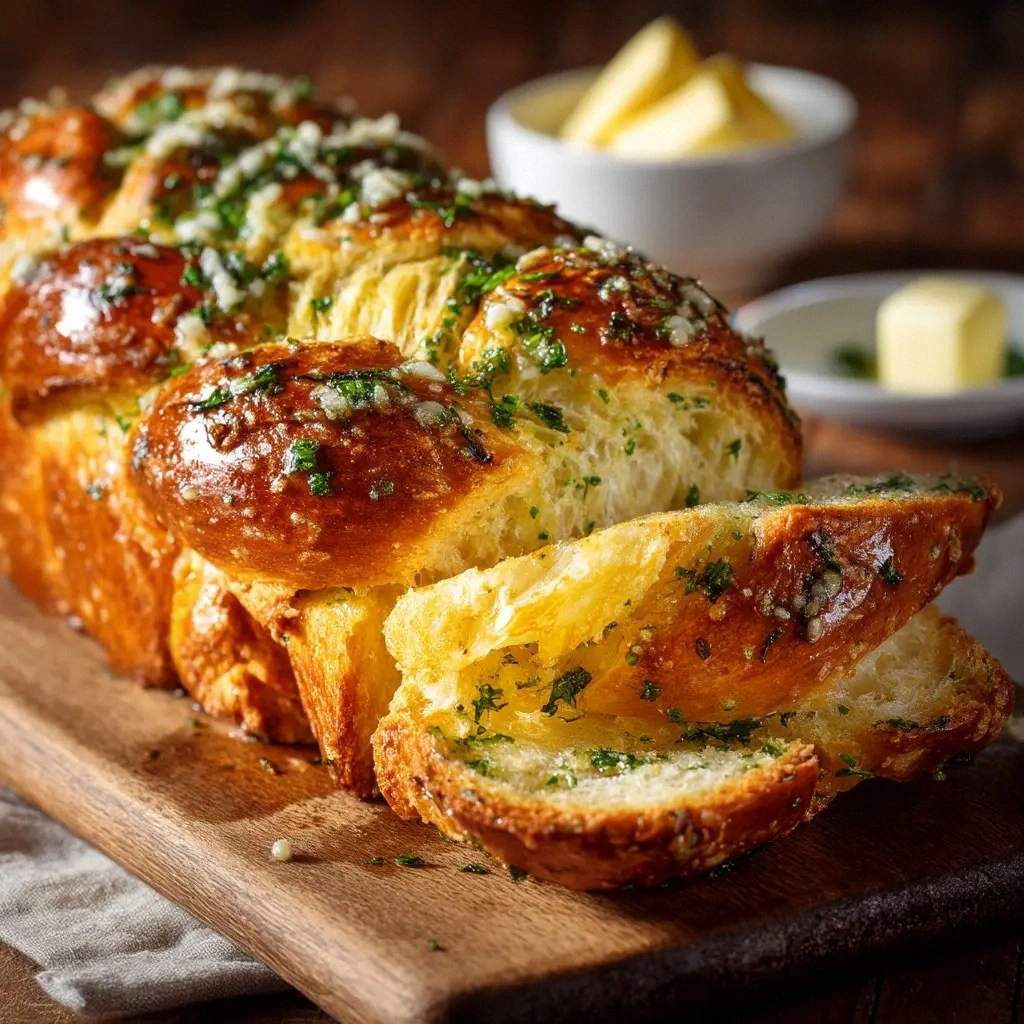
- Texture: The buttery mixture coats the bread, creating a crisp, golden crust while keeping the interior airy and tender. The crust shatters with a satisfying crunch that gives way to a melt‑in‑your‑mouth crumb. The contrast between the crunchy edges and the soft center is a textural delight that keeps you coming back for more. It’s the kind of texture that satisfies both the craving for crunch and the desire for comfort.
- Simplicity: Only eight ingredients, all staples you likely already have on hand. No complicated techniques or exotic spices—just butter, garlic, herbs, and parmesan. The recipe is straightforward, making it accessible to beginners and seasoned cooks alike. You can whip this up in a flash and still impress your guests.
- Uniqueness: The blend of herbs—parsley, rosemary, thyme—creates a fragrant bouquet that sets this bread apart from the usual garlic bread. The parmesan adds a nutty depth that is rarely found in standard recipes. The result is a loaf that feels fresh and innovative, yet comforting and familiar. It’s a unique twist that turns a classic into a standout dish.
- Crowd Reaction: The bread is a showstopper that instantly wins over any crowd. Whether it’s a family dinner or a dinner party, the aroma and flavor will have everyone asking for seconds. The buttery, herbaceous coating makes it a crowd‑pleaser that’s almost guaranteed to become a staple at gatherings. It’s the kind of dish that people remember and recommend.
- Ingredient Quality: Using high‑quality, fresh herbs and real parmesan elevates the flavor profile dramatically. Fresh garlic roasts to a sweet, mellow note that balances the sharpness of the herbs. The butter’s richness creates a silky coating that enhances every bite. Quality ingredients are the secret that turns a good recipe into a great one.
- Cooking Method: The technique of melting butter with garlic and herbs before brushing the bread ensures even distribution of flavor. This method locks in moisture and prevents the bread from drying out. It also creates a golden crust that is both crisp and flavorful. The method is simple yet effective, ensuring consistent results every time.
- Make‑Ahead Potential: The bread can be assembled ahead of time and baked when needed, saving you time on busy nights. The herb butter can be prepared and stored in the fridge for up to a week. The bread itself can be sliced and reheated to restore its freshness. This flexibility makes it an ideal go‑to for busy households.
Alright, let's break down exactly what goes into this masterpiece. The next section will give you an inside look at each ingredient and why it matters. Get ready to discover the hidden tricks that make this bread extraordinary.
Inside the Ingredient List
The Flavor Base
1 loaf French or Italian bread: The backbone of the recipe, its sturdy crust holds the butter mixture while its airy interior absorbs the flavors. The bread’s mild taste allows the herbs and parmesan to shine without competing. Using a freshly baked loaf ensures maximum moisture retention. If you use a pre‑baked loaf, the crust may become too hard and won’t absorb the butter mixture as well.
The Texture Crew
1/2 cup unsalted butter: The butter provides a silky coating that melts into the bread, creating a golden crust. Unsalted butter allows you to control the salt level, preventing the bread from becoming overly salty. Butter also adds a rich, velvety mouthfeel that balances the sharpness of the herbs. If you prefer a lighter version, substitute half the butter with olive oil for a slightly different flavor profile.
The Unexpected Star
3/4 cup grated Parmesan cheese: Parmesan adds a nutty, salty depth that elevates the entire loaf. Grated cheese melts more evenly, ensuring a uniform coating on the bread. The cheese’s umami quality enhances the garlic and herbs, creating a well-rounded flavor. If you’re vegan, try nutritional yeast as a substitute for a similar savory note.
The Final Flourish
4 cloves garlic, minced: Garlic is the heart of the bread’s flavor, providing a warm, aromatic base. Minced garlic releases essential oils that infuse the butter, creating a deep, mellow sweetness. Roasting the garlic slightly caramelizes it, preventing any sharp, raw bite. If you’re sensitive to garlic, reduce the amount or use roasted garlic for a milder taste.
Everything's prepped? Good. Let's get into the real action. The next section will walk you through the method step by step, ensuring you get the perfect crust and buttery interior every time.
The Method — Step by Step
- Preheat your oven to 375°F (190°C). Lightly oil a baking sheet to prevent sticking. Place the loaf on the sheet, cut it in half lengthwise so the interior is exposed. This step ensures even heat distribution across the bread. The cut surface will allow the butter mixture to soak in. Once preheated, the oven’s heat will create a crisp, golden crust.
- In a small saucepan, melt the butter over medium heat. Stir in the minced garlic and a pinch of salt. Allow the mixture to bubble gently for 2–3 minutes until the garlic turns translucent. The garlic should not brown; if it starts to brown, lower the heat. This process infuses the butter with garlic flavor, creating a fragrant base. Keep an eye on the temperature to avoid burning.
- Add the chopped parsley, rosemary, and thyme to the butter mixture. Stir until the herbs are evenly distributed and fragrant. Let the herbs sauté for an additional minute, releasing their essential oils. This step intensifies the herbaceous aroma that will coat the bread. The mixture should have a golden sheen, indicating the butter is ready. A quick stir keeps the herbs from sticking to the pan.
- Remove the saucepan from heat and stir in the grated parmesan cheese. The cheese will melt into the butter, creating a smooth, flavorful coating. The mixture should be glossy and slightly thick. This step locks in the flavor and adds a nutty richness to the bread. Let it rest for a minute to allow the cheese to fully incorporate. The result is a silky, savory butter.
- Brush the butter mixture generously over the cut surfaces of the bread, ensuring every inch is coated. The butter should seep into the pores, creating a moist interior. Let the bread sit for 5 minutes so the butter can penetrate. This allows the flavors to meld, giving the bread a deep, cohesive taste. The next step will lock in the moisture.
- Place the loaf back in the preheated oven and bake for 12–15 minutes, or until the crust turns a deep golden brown. The aroma of toasted butter and herbs should fill the kitchen. Check the bread’s internal temperature; it should read around 190°F (88°C). The crust should crackle slightly when you press it gently. The interior should feel soft and airy. This is the moment of truth.
- Remove the loaf from the oven and let it cool on a wire rack for 5 minutes. This short rest allows the steam to escape, preventing sogginess. The crust will firm up slightly, making it easier to slice. The interior will remain tender and buttery. The aroma will linger, making the kitchen feel like a bakery. This step is crucial for the final texture.
- Slice the loaf into thick, even pieces. The slices should hold together but still be easy to bite into. Serve immediately while the crust is still warm and the butter is slightly melted. Pair it with a salad, soup, or as a side to your favorite dish. The bread’s flavor will complement a variety of cuisines. Enjoy the buttery, herbaceous experience.
- If you’re not serving immediately, wrap the cooled loaf in parchment paper and then in foil. Store in a cool, dry place for up to 3 days. For longer storage, freeze the loaf in a freezer bag; it will keep for up to 2 months. When ready to eat, reheat in the oven at 350°F (175°C) for 10 minutes. The crust will regain its crispness, and the butter will melt back into the bread. This makes it a versatile, make‑ahead option.
That's it — you did it. But hold on, I've got a few more tricks that'll take this to another level. The next section will reveal insider tips that will elevate the flavor, texture, and presentation of this bread. These are the small details that separate a good recipe from a legendary one.
Insider Tricks for Flawless Results
The Temperature Rule Nobody Follows
Many people bake garlic bread at a high temperature, which can cause the butter to burn and the crust to become too hard. I found that baking at 375°F (190°C) is the sweet spot that allows the crust to crisp while keeping the interior moist. Keep a thermometer handy to ensure the oven is accurate. A consistent temperature guarantees a golden crust without scorching. This trick is simple but game‑changing. It saves you from a burnt loaf and gives you a perfectly balanced texture.
Why Your Nose Knows Best
Your sense of smell is the ultimate judge of doneness. When the bread is ready, the aroma will be a warm, buttery, herbaceous perfume that fills the kitchen. If the bread is underbaked, you’ll notice a raw, doughy scent. Overbaked bread will smell slightly burnt and dry. Trust your nose to guide you to the perfect crust. A good aroma means the bread is ready to serve. This sensory checkpoint is essential.
The 5-Minute Rest That Changes Everything
After baking, let the loaf rest for exactly 5 minutes before slicing. This short pause allows the steam to redistribute, preventing soggy crumbs. The crust will firm up slightly, making it easier to cut. The interior will stay airy and tender. If you cut immediately, the butter will spill out, and the bread will feel greasy. A quick rest keeps the texture intact. This is a simple step that makes a noticeable difference.
Use Fresh Herbs for a Burst of Flavor
Fresh herbs carry more volatile oils than dried ones, giving the bread a brighter, more vibrant taste. If you’re using dried herbs, rehydrate them in hot water before adding to the butter. This releases the flavor and prevents a dull finish. Fresh herbs also add a pleasing green color to the butter mixture. The result is a more aromatic and visually appealing bread. It’s a small tweak that pays off big.
Keep the Butter Warm
A cold butter mixture can cause uneven coating and a greasy finish. Keep the butter warm by using a double boiler or a low heat setting. This ensures the butter remains liquid and coats the bread evenly. If you’re in a hurry, microwave the butter for 10–15 seconds, then stir. A warm mixture melts into the bread’s pores for a buttery, cohesive crust. This trick saves you from a patchy, uneven loaf.
Add a Splash of Milk for Extra Moisture
If you’re dealing with a dense, heavy loaf, add a tablespoon of milk to the butter mixture. The milk helps the butter spread more smoothly and adds a subtle richness. It also helps keep the interior moist. This is especially useful when using a denser bread like ciabatta. The milk will keep the bread from drying out during baking. A small addition that can transform the texture.
Creative Twists and Variations
This recipe is a playground. Here are some of my favorite ways to switch things up:
Cheesy Garlic Bread
Swap the parmesan for mozzarella and cheddar for a gooey, melty texture. The melted cheese will create a decadent, golden crust. This variation is perfect for a movie night or a cozy dinner. The cheese will ooze out when you bite into it, adding a luxurious mouthfeel. It’s a crowd‑pleaser that pairs well with pasta or soup.
Herb‑Infused Olive Oil Version
Replace the butter with a high‑quality olive oil and add a pinch of red pepper flakes. The olive oil will give the bread a lighter, Mediterranean flavor. The pepper flakes add a subtle kick that balances the herbs. This version is great for a health‑conscious crowd. It’s a simple swap that transforms the flavor profile.
Roasted Garlic and Sunflower Seed Bread
Roast the garlic cloves until caramelized and mix them into the butter mixture. Add a handful of sunflower seeds for crunch and a nutty undertone. The roasted garlic brings a sweet, mellow flavor that pairs beautifully with the seeds. This variation adds texture and depth to the bread. It’s a fun twist that’s perfect for a brunch spread.
Pesto‑Infused Bread
Blend the herbs into a pesto sauce and mix with melted butter. The pesto adds a fresh, basil‑rich taste that elevates the bread. The green color is eye‑catching and appetizing. This version is ideal for a summer dinner or a Mediterranean-themed meal. The pesto’s bright flavor will complement a variety of dishes.
Vegan Parmesan Bread
Use a vegan parmesan substitute made from nutritional yeast and nutritional yeast for a dairy‑free option. Pair it with a plant‑based butter alternative. The result is a creamy, savory loaf that satisfies the vegan palate. This variation keeps the flavor profile intact while accommodating dietary restrictions. It’s a delicious, inclusive option.
Spicy Chipotle Bread
Add a tablespoon of chipotle powder to the butter mixture for a smoky, spicy kick. The chipotle will give the bread a bold flavor that pairs well with Mexican or Tex‑Mex dishes. The smoky heat complements the herbs and parmesan. This variation is a game‑changer for a spicy dinner. It adds a layer of complexity that will impress your guests.
Storing and Bringing It Back to Life
Fridge Storage
Store the cooled bread in an airtight container in the refrigerator for up to 3 days. The airtight environment keeps the bread from drying out and preserves the buttery coating. When you’re ready to serve, let it come to room temperature for 10 minutes. The bread will regain its freshness and flavor. This method is ideal for a quick snack or a last‑minute appetizer.
Freezer Friendly
Wrap the loaf tightly in plastic wrap, then place it in a freezer bag. Freeze for up to 2 months. When you’re ready to eat, thaw at room temperature for 30 minutes before reheating. This preserves the flavor and texture, making it a convenient option for busy weeks. Freezing also locks in the butter coating, preventing it from separating. The result is a bread that tastes freshly baked.
Best Reheating Method
Preheat your oven to 350°F (175°C). Place the bread on a baking sheet and bake for 10 minutes, or until the crust is crisp and the interior is heated through. Add a tiny splash of water to the bottom of the pan to create steam, keeping the bread moist. This trick prevents the bread from drying out during reheating. The crust will regain its golden crunch, and the butter will melt back into the loaf. It’s a simple method that delivers restaurant‑quality results.