I still remember the first time I tried making black bean soup at home. The recipe looked harmless enough online — dump some canned beans in a pot, add water, sprinkle cumin, simmer. What could go wrong? Everything, apparently. The result tasted like muddy water with a side of disappointment. My roommate took one polite spoonful, nodded thoughtfully, and never asked for seconds. I ate the whole pot anyway because I'm stubborn, but I vowed to crack the code on what makes restaurant black bean soup taste like liquid velvet while mine tasted like liquid cardboard.
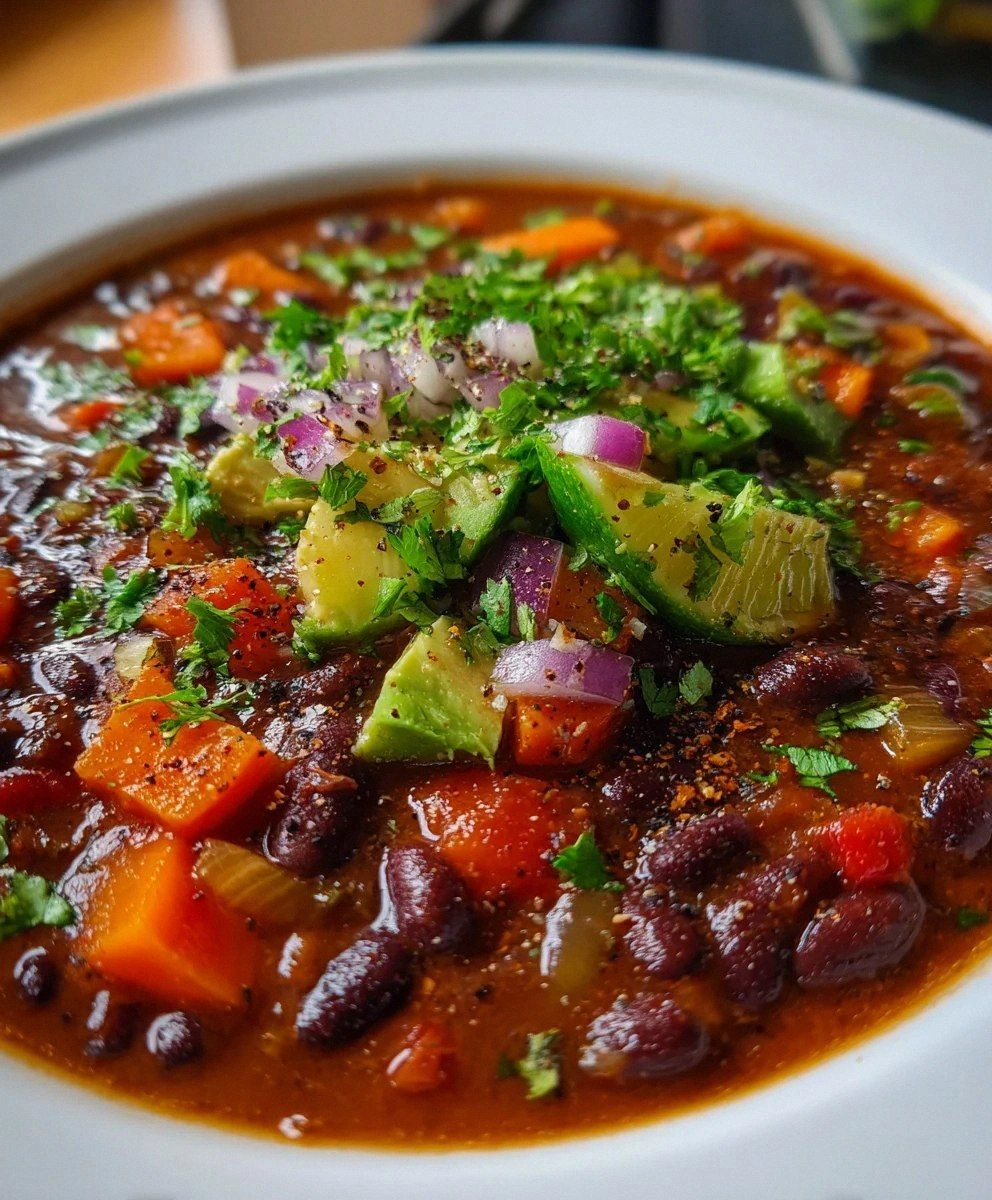
Fast forward through twelve iterations, three grocery store trips, one minor spice explosion, and a very patient neighbor who became my official taste tester, and I finally landed on this version. This black bean soup doesn't just fill your bowl — it fills your whole kitchen with aromas that make delivery drivers linger at your door. The texture hits that magical place between silky and substantial, where each spoonful coats your tongue like a warm blanket but still has enough body to feel like a proper meal. The flavor layers build like a symphony: earthy beans first, then smoky undertones, a gentle heat that sneaks up after you swallow, and finally a bright citrus note that makes you immediately dive back in for another spoonful.
Here's what nobody tells you about black bean soup: the magic isn't in the beans themselves, but in how you treat them. Most recipes get this completely wrong. They treat canned beans like finished ingredients instead of blank canvases waiting for transformation. This version takes a few extra steps that sound fussy until you taste the result — charring the vegetables until they look slightly tragic, blooming the spices in oil until your neighbors start asking what you're cooking, and finishing with a splash of sherry vinegar that makes the whole bowl sing.
Picture yourself pulling this off the stove, ladling it into your favorite bowl, adding a dollop of sour cream that melts into creamy white rivers across the midnight surface. That first spoonful hits your tongue and suddenly you understand why ancient civilaries worshipped beans as sacred food. The depth of flavor makes you close your eyes involuntarily, the way people do when they taste something that transports them. Stay with me here — this is worth it. Let me walk you through every single step, and by the end, you'll wonder how you ever made it any other way.
What Makes This Version Stand Out
Depth Charge: We start by charring the onions and peppers until they develop those dark, caramelized edges that taste like campfire and comfort. This isn't about burning — it's about pushing past the safe zone into flavor territory that most home cooks never explore. The slight bitterness balances the natural sweetness of the beans in a way that makes both taste more intense.
Texture Triumph: Instead of either leaving the soup chunky or blending it into baby food, we do both. Half the beans get pureed into silk while the rest stay whole, creating a spoonable soup that still has satisfying bites. It's like getting two soups in one bowl, and somehow both textures make each other better.
Spice Revelation: The spice blend goes way beyond basic cumin. We're talking smoked paprika that tastes like Sunday barbecue, coriander that adds mysterious citrus notes, and just enough chipotle to make your lips tingle pleasantly. Each spice gets toasted individually so they bloom and release their oils instead of tasting dusty.
Time Travel: This soup actually improves overnight as the flavors marry and deepen. Make it Sunday afternoon and Monday dinner tastes like you spent hours simmering when really you just reheated. Most soups claim this, but black bean soup is the rare dish where the transformation is dramatic enough that you'll plan ahead just to experience day-two magic.
Pantry Paradise: Every ingredient keeps for ages, so you can always have the makings of incredible soup without fresh grocery trips. Canned beans, dried spices, boxed broth — this is emergency comfort food at its finest. When you're snowed in or too tired to shop, this soup delivers restaurant-quality results from shelf-stable ingredients.
Crowd Control: I've served this to bean skeptics, spice-phobes, and one particularly picky eight-year-old. They all asked for the recipe. The soup manages to taste complex enough for food snobs while remaining familiar enough for picky eaters. It's vegetarian but hearty enough that meat lovers don't feel cheated.
Leftover Legend: Beyond just reheating, leftover soup becomes dip for tortilla chips, sauce for enchiladas, and my personal favorite — the base for huevos rancheros that will ruin you for restaurant versions forever. One batch of soup spawns three different meals, which makes you feel like a kitchen wizard.
Alright, let's break down exactly what goes into this masterpiece...
Inside the Ingredient List
The Flavor Base
Onions form the aromatic foundation, but not just any onions — we want them sliced thick enough to develop serious char without burning. Yellow onions work best because they balance sweetness and sharpness, turning jammy and complex as they cook. If you only have white onions, add a pinch of sugar to compensate for their lack of natural sweetness. The charring process transforms the onion's sulfur compounds into rich, meaty flavors that make vegetarian soup taste incredibly satisfying.
Bell peppers bring bright vegetal notes and natural sweetness that plays against the beans' earthiness. I use red peppers for their fruity undertones, but orange works in a pinch. Green peppers taste too bitter here and will fight with the other flavors instead of supporting them. Cut them into large chunks so they can char properly without turning to mush — we're building flavor through caramelization, not making sofrito.
Garlic gets added after the vegetables char because burnt garlic tastes bitter and awful. We're using a generous amount because beans love garlic the way pasta loves tomatoes. Smash the cloves with the flat of your knife and let them sit for ten minutes before cooking — this triggers the enzymatic reaction that creates allicin, garlic's potent flavor compound. The difference between fresh-minced and pre-chopped garlic here is like the difference between fresh-ground and pre-ground coffee.
The Texture Crew
Canned black beans work perfectly here, but not all cans are created equal. Look for beans packed in water without calcium chloride, which keeps beans firm but prevents them from breaking down into creamy soup. Goya and Bush's both work well, but avoid organic brands that use firming agents. You'll need three cans total — two for pureeing and one for whole beans that provide textural contrast against the smooth base.
Vegetable broth forms the soup's body, but chicken broth works if you're not keeping vegetarian. The key is using low-sodium broth because canned beans contain plenty of salt and you can always add more but you can't take it out. Water actually works better than salty broth if that's all you have — the beans and vegetables provide plenty of flavor. For an extra layer, use the liquid from the bean cans plus water to equal the broth amount.
Tomato paste deepens the color and adds natural sweetness plus glutamic acids that enhance the beans' meaty flavor. Buy it in a tube rather than a can — you'll use two tablespoons here and the rest keeps for months in your fridge. The concentrated paste adds more flavor than crushed tomatoes without watering down the soup. Let it cook until it turns from bright red to brick red, which caramelizes the natural sugars and removes any metallic taste.
The Unexpected Star
Dried epazote might be the most transformative ingredient you've never heard of. This Mexican herb tastes like a cross between mint, citrus, and petroleum (in the best way possible) and it has the magical property of reducing beans' gassiness while adding an authentic flavor that will make Mexican grandmothers nod approvingly. If you can't find it, substitute a bay leaf plus a pinch of oregano, but epazote is worth ordering online. Use it sparingly — a little tastes authentic, too much tastes like you're eating a pine forest.
Sherry vinegar provides the acid that brightens all the rich, earthy flavors and makes the soup taste finished rather than flat. Red wine vinegar works, but sherry vinegar adds nutty complexity that pairs beautifully with beans. Add it at the end because acid can prevent beans from softening if added too early. The vinegar should make your mouth water slightly but not pucker — start with less and add more to taste.
The Final Flourish
Lime juice added just before serving provides a bright, fresh counterpoint to the deep, slow-cooked flavors. The citrus oils in the zest add another layer of complexity, so wash your lime well before zesting. If lemons are all you have, they'll work but add a different personality — more California sunshine than Mexican beach party. Either way, add the citrus after you've pureed the soup to keep the flavors vibrant.
Cotija cheese for garnish adds salty, tangy notes that melt slightly into the hot soup, creating little pockets of creamy contrast. Feta works as a substitute but tastes sharper, while queso fresco is milder but won't melt as nicely. Crumble it yourself rather than buying pre-crumbled — it stays fresher and you control the size of the chunks. The cheese should be added at the table so each person can control their own salt level.
Everything's prepped? Good. Let's get into the real action...
The Method — Step by Step
- Heat a heavy-bottomed pot or Dutch oven over medium-high heat until a drop of water skitters across the surface like it's dancing. Add the olive oil and swirl to coat — it should shimmer immediately but not smoke. Toss in the onion slices and pepper chunks in a single layer and step back. Don't stir for a full three minutes while they develop that crucial char that will flavor the entire soup. The edges should look slightly burnt and tragic, which is exactly what you want.
- While the vegetables char, drain two cans of beans into a bowl and reserve the liquid. Rinse those beans under cold water until the water runs clear — this removes excess starch that can make your soup taste like canned metal. Keep the third can of beans untouched for now; these will provide the textural contrast that makes restaurant soup so satisfying. If you've ever wondered why your homemade soup tastes flat while restaurant versions have depth, this charring step is your missing link.
- After three minutes, stir the vegetables once to expose new surfaces to the heat, then let them cook another two minutes undisturbed. Add the garlic and cook for thirty seconds, stirring constantly so it turns golden but doesn't brown. The smell should be incredible at this point — like someone bottled the essence of Mexican street food. Push everything to the sides of the pot to create a clear space in the center.
- Now for the spice magic: add the cumin, coriander, and paprika to the cleared space and let them toast for thirty seconds. They'll immediately become fragrant and start to darken slightly — this blooming process releases their essential oils and transforms them from dusty powder to flavor bombs. Stir everything together so the spices coat the vegetables, then add the tomato paste. Cook this mixture for two minutes, stirring constantly, until the paste turns from bright red to brick red and starts to stick slightly to the bottom.
- Pour in one cup of the broth to deglaze, scraping up all those beautiful browned bits with a wooden spoon. Those bits contain concentrated flavor that will make your soup taste like it simmered for hours instead of minutes. Add the remaining broth, the drained beans from two cans, and the epazote if using. The liquid should just cover the beans — add some of the reserved bean liquid if needed. Bring this to a boil, then reduce to a gentle simmer and cover.
- Let the soup simmer for fifteen minutes while you prep your garnishes. This isn't just waiting time — it's when the magic happens as the flavors meld and the beans start to break down slightly. Meanwhile, drain the third can of beans and rinse them well. After fifteen minutes, remove the epazote if you used it, then use an immersion blender to puree about half the soup. If you don't have an immersion blender, transfer two cups to a regular blender, puree until smooth, and return to the pot.
- Add the whole beans from the third can and simmer for five more minutes so they heat through and absorb some of the seasoned broth. The soup should be thick enough to coat the back of a spoon but still pourable — add more broth or reserved bean liquid if it's too thick. Taste and adjust the salt, keeping in mind that the cotija garnish will add saltiness. The soup should make your mouth happy with a balance of earthy, smoky, and bright flavors.
- Turn off the heat and stir in the sherry vinegar and half the lime juice. Taste again — the acid should make all the flavors snap into focus like adjusting the focus on a camera. If it still tastes muddy or flat, add more lime juice a teaspoon at a time until it tastes vibrant. Serve hot with your choice of garnishes, or let it cool and refrigerate overnight when it will taste even better.
- That's it — you did it. But hold on, I've got a few more tricks that'll take this to another level...
Insider Tricks for Flawless Results
The Temperature Rule Nobody Follows
Most people cook soup at whatever temperature keeps it bubbling, but black bean soup has a sweet spot between 185-195°F where the beans release their starch and create that velvety texture without breaking down into mush. Use a thermometer if you're obsessive like me, or just keep it at the gentlest simmer where you see occasional bubbles breaking the surface. Too hot and the beans turn to paste, too cool and they never release their creamy starches. This temperature control is why restaurant soup has that perfect body while home versions often taste thin or grainy.
Why Your Nose Knows Best
Don't trust the clock — trust your nose. When the soup is ready, your kitchen will smell like a Mexican grandmother's house on Sunday afternoon. The sharp raw onion smell should be gone, replaced by something deeper and sweeter. The cumin should smell toasted but not burnt, and there should be an underlying aroma that makes your mouth water involuntarily. If you still smell raw vegetables or sharp spices, let it simmer five more minutes. Our sense of smell evolved specifically to detect when food is cooked and safe to eat — use it.
The 5-Minute Rest That Changes Everything
After you finish cooking, let the soup rest for five minutes off heat before serving. This isn't just about avoiding burnt tongues — it's when the flavors redistribute and the temperature evens out so every spoonful tastes the same. During this rest, the beans absorb more of the seasoned broth, the foam settles, and the whole pot transforms from "just cooked" to "perfectly melded." Cover the pot so it stays hot, but don't skip this step. A friend tried serving immediately once and texted me that the soup tasted "angry" — her exact word. After trying the leftovers the next day, she understood what she'd missed.
The Garnish Strategy That Makes It Restaurant-Worthy
Don't just dump everything on top — think about temperature and texture contrast. Cold sour cream against hot soup creates delightful temperature pockets. Crunchy tortilla chips provide textural contrast to the smooth soup. Fresh cilantro adds brightness that makes the rich flavors feel lighter. Set out garnishes in small bowls so everyone can customize, but suggest they try one at a time to experience how each changes the soup. The transformation from a simple bowl of beans to an interactive dining experience is what separates good cooks from great hosts.
Creative Twists and Variations
This recipe is a playground. Here are some of my favorite ways to switch things up:
The Caribbean Vacation
Swap the cumin for Jamaican jerk seasoning, add a can of coconut milk instead of one cup of broth, and finish with fresh thyme and a squeeze of orange juice. The coconut milk adds luxurious richness that makes the soup taste tropical and indulgent. Top with diced mango and avocado for a beach vacation in a bowl. This version tastes like something you'd eat at a beachside shack while listening to reggae and drinking cold beer.
The Spanish Flamenco
Add smoked Spanish paprika, a bay leaf, and a pinch of saffron for a version that tastes like it came from a tapas bar in Seville. Replace the sherry vinegar with actual sherry for deeper, more complex flavor. Serve with crusty bread and manchego cheese for a Spanish twist that makes regular black bean soup seem boring. The saffron turns the soup golden and adds an earthy, almost honey-like note that plays beautifully against the smoky paprika.
The Breakfast Champion
Make the soup slightly thicker by using less broth, then serve it over fried eggs and toast for breakfast that keeps you full until dinner. The runny yolks mix with the beans to create something magical, and the whole combination tastes like huevos rancheros but better. Add chorizo if you eat meat, or keep it vegetarian with some sautéed spinach stirred in at the end. This became my weekend tradition after a particularly brutal hangover demanded something substantial but gentle.
The Vegan Powerhouse
Add quinoa during the last fifteen minutes of cooking for extra protein and a pleasant pop in every spoonful. Stir in nutritional yeast at the end for cheesy flavor without dairy, and top with pumpkin seeds for crunch and healthy fats. This version tastes indulgent but packs serious nutrition that makes you feel virtuous. I served this to my bodybuilder friend who claimed beans weren't "complete" enough protein — he asked for the recipe and now makes it weekly.
The Fire Eater's Dream
Add a whole chipotle pepper in adobo sauce, minced finely, plus a pinch of cayenne for soup that builds heat slowly until you're sweating happily. The smoky chipotle adds incredible depth while the cayenne provides immediate heat that fades quickly. Serve with cooling avocado and crema to balance the fire. I dare you to taste this and not go back for seconds, even as your nose runs and your forehead glistens.
The Weeknight Shortcut
Use salsa instead of fresh vegetables for nights when chopping feels impossible. One cup of good salsa replaces the onions, peppers, and tomatoes, cutting prep time to under five minutes. The soup won't have quite the same depth but still tastes miles better than anything from a can. This version saved my sanity during a particularly brutal work week when I needed comfort food but had zero energy. Sometimes good enough is perfect.
Storing and Bringing It Back to Life
Fridge Storage
The soup keeps for up to five days in an airtight container, though I doubt it will last that long. Store it without garnishes because dairy and fresh herbs don't age well. The soup will thicken considerably as it cools — this is normal and actually desirable. When reheating, add a splash of water or broth to loosen it to your preferred consistency. The flavors continue developing in the fridge, so day-three soup often tastes better than fresh. If it separates slightly, just stir it back together — the beans release starch that can settle.
Freezer Friendly
This soup freezes beautifully for up to three months, making it perfect for meal prep or emergency comfort food. Freeze in portion-sized containers so you can thaw exactly what you need. Leave about an inch of space at the top because liquids expand when frozen. Thaw overnight in the fridge or use the defrost setting on your microwave. The texture might seem slightly grainy after freezing, but a good stir while reheating brings it back to creamy perfection. Pro tip: freeze some in ice cube trays for instant soup starters or to add body to other recipes.
Best Reheating Method
Gentle is the name of the game when reheating bean soup. Use medium-low heat and stir frequently to prevent scorching on the bottom. Add liquid gradually — you can always thin it more but you can't remove it. Microwave reheating works but heat it at 70% power in one-minute intervals, stirring between each. The soup should never boil hard during reheating or it can break and become grainy. If it tastes slightly flat after reheating, brighten it up with a squeeze of fresh lime or a splash of vinegar. That sizzle when it hits the pan? Absolute perfection.