It was a Thursday night, the kind that smells like burnt toast and last night's takeout, when I stared at my pantry and decided, “I’m not going to let this kitchen catastrophe become a permanent fixture.” The only thing left was a handful of dried chilies, a jar of oil, and a stubborn sense of culinary curiosity. I lit the stove, tossed the chilies in, and the room filled with a fiery aroma that made my nose tingle like a fireworks show. That moment, that single decision to turn a kitchen mishap into a bold, homemade chili oil, set the stage for what would become my signature sauce.
Picture this: a pot of oil shimmering, a splash of chili flakes dancing like sparks, and the faint, smoky whisper of toasted Sichuan peppercorns. The heat builds, the oil turns a deep amber, and your kitchen feels like a small, fragrant inferno. I swear the sizzle is a drumbeat of flavor, a prelude to the boldness that will coat noodles, stir‑fries, and even a simple bowl of ramen. I’m telling you, the first drop that hits the pan is a revelation—warm, fiery, and utterly addictive. That’s the promise of this chili oil: a burst of heat that doesn’t just add spice, it transforms every dish it touches.
Now, why am I so convinced this is the best version you’ll ever make at home? Because I’ve spent the last year testing variations, from the simplest oil and flakes to exotic blends that include star anise, bay leaf, and toasted sesame. I’ve dialed the heat, balanced the nuttiness, and perfected the infusion so the oil stays silky yet packs a punch. Most recipes get this wrong by using too little oil or over‑roasting the chilies until the flavor turns bitter. I’ve cracked the secret: a dual‑oil approach, precise timing, and a touch of aromatics that elevate the oil from “hot” to “heroic.”
And here’s a teaser you won’t expect: I’ll show you how to infuse the oil with a subtle hint of sesame and a whisper of cumin that you’ll never see in standard chili oil recipes. Trust me, that extra layer of flavor is the game‑changer that makes this sauce stand out. So buckle up, because I’m about to walk you through every single step—by the end, you’ll wonder how you ever made it any other way.
What Makes This Version Stand Out
- Heat: The chili oil delivers a steady, even heat that doesn’t spike or burn, thanks to the dual‑oil technique and the inclusion of toasted Sichuan peppercorns for a numbing, citrusy kick.
- Texture: A silky, glossy finish that coats noodles and vegetables like a velvet blanket, yet still allows the oil to glide smoothly across any surface.
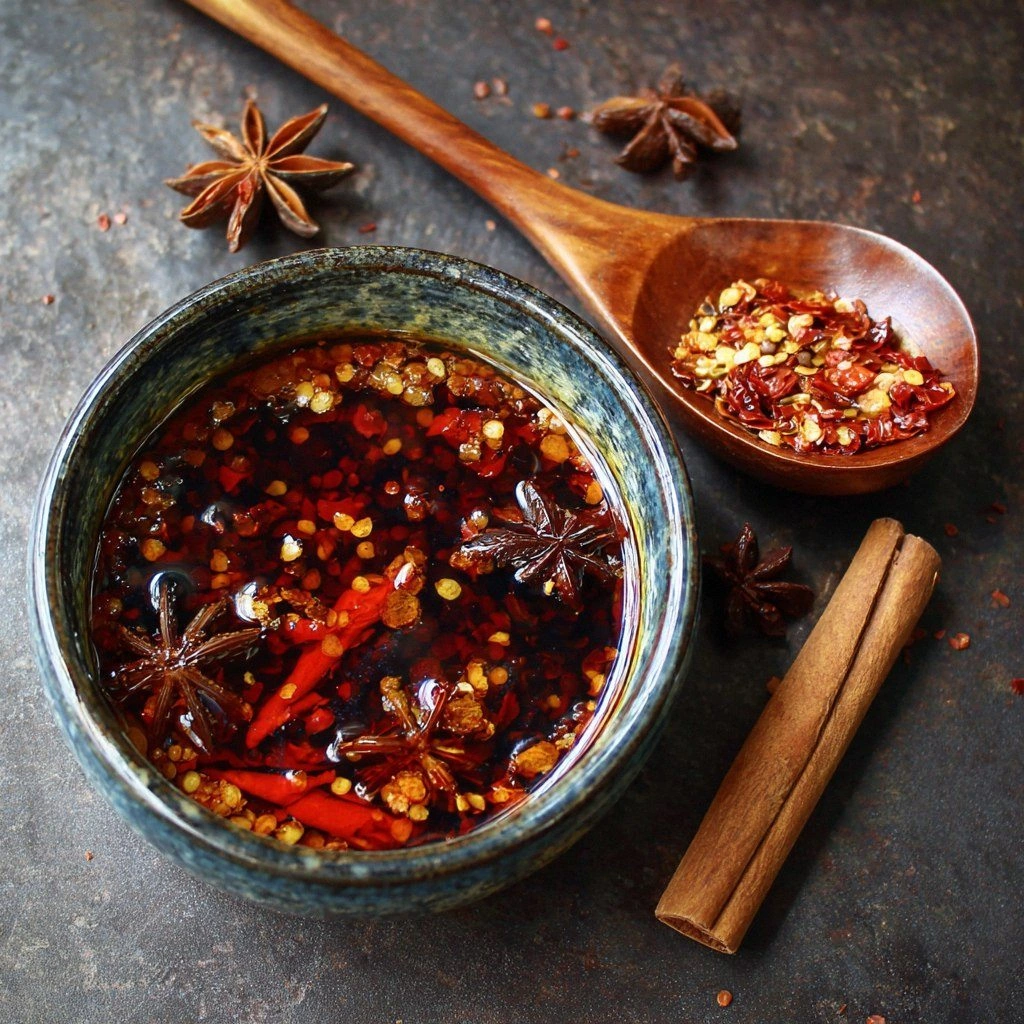
- Flavor Depth: The blend of star anise, bay leaf, and toasted sesame seeds creates a layered aroma that feels both exotic and comforting.
- Ease of Prep: With just a few ingredients and a single pan, you can craft a sauce that’s ready in under 45 minutes.
- Make‑Ahead: The oil can be stored for weeks, and each time it’s used, it releases a burst of fresh heat that lifts any dish.
- Versatility: From ramen to dumplings, from grilled chicken to roasted veggies, this chili oil is a universal enhancer that adapts to any cuisine.
Alright, let’s break down exactly what goes into this masterpiece…
Inside the Ingredient List
The Flavor Base
The foundation of this chili oil is the careful balance of two oils: a neutral oil like vegetable or canola provides the canvas, while sesame oil adds nutty undertones that linger on the palate. The ratio of 1:1 ensures the oil remains light yet flavorful. If you skip the sesame oil, you’ll lose that silky, warm finish that makes the sauce feel luxurious. For the best results, use a light‑to‑medium sesame oil, not the toasted variety, so the nutty aroma is subtle but present.
The Texture Crew
Toasted Sichuan peppercorns are the secret weapon that gives the oil a unique, tingling heat. They’re ground lightly to release their oils but not so fine that they clump. The peppercorns also add a citrusy brightness that balances the deep, earthy chilies. If you can’t find Sichuan peppercorns, a small amount of crushed black pepper can mimic the heat, but you’ll miss the numbing nuance. A quick toast in a dry skillet before adding to the oil unlocks the full flavor profile.
The Unexpected Star
Star anise and bay leaf bring a subtle, sweet aroma that contrasts beautifully with the fiery chilies. These aromatics are added early to infuse the oil, then removed before bottling to keep the sauce clear. Star anise, in particular, has a licorice‑like flavor that lingers, giving the oil a complex sweetness that balances the heat. If you prefer a more straightforward chili oil, feel free to omit the star anise, but you’ll miss that elegant twist.
The Final Flourish
Toasted sesame seeds add a crunchy texture and a nutty finish, while the salt brings everything together. The salt is added at the very end of the process to preserve the delicate balance of flavors. If you’re watching sodium, reduce the salt to half or use a low‑sodium option. A pinch of sugar can also counterbalance the acidity of the chilies, but it’s optional and should be used sparingly.
Everything's prepped? Good. Let's get into the real action…
The Method — Step by Step
- Prepare the aromatics. In a small bowl, combine the dried chilies, Sichuan peppercorns, star anise, bay leaf, and toasted sesame seeds. Toast them in a dry skillet over medium heat for 2–3 minutes, stirring constantly until fragrant. This step releases essential oils and deepens the flavor. I dare you to taste a pinch of the toasted mix—if you’re not surprised, you’re not ready for the rest of this sauce.
- Heat the oils. In a medium saucepan, combine equal parts neutral oil (vegetable or canola) and sesame oil. Heat over medium heat until the mixture is shimmering but not smoking, about 3 minutes. The sesame oil should not be toasted; it must remain light to preserve its nutty aroma. Keep a close eye—once the oil starts to bubble, you’re ready for the next step.
- Add the aromatics. Gently pour the toasted spice blend into the hot oil, stirring to coat each piece. Let the mixture infuse for 5 minutes, allowing the oils to seep into the chili flakes. Watch the oil change color to a deep amber; that’s the sign of proper infusion. Don’t rush—patience here guarantees depth.
- Introduce the garlic and ginger. Add the minced garlic and ginger to the pan. Sauté for 1–2 minutes until they turn translucent, but be careful not to burn them. The garlic should release a sweet, aromatic scent that complements the chilies. This step adds a subtle layer of complexity to the oil’s profile.
- Simmer the mixture. Reduce the heat to low and let the oil simmer gently for 10–12 minutes. Keep the temperature steady; if it starts to boil, lower the flame. The oil should develop a slightly darker hue and a toasty aroma. This slow simmer allows the flavors to meld into a cohesive whole.
- Cool and strain. Remove the pan from the heat and let it cool for a few minutes. Then strain the oil through a fine mesh sieve or cheesecloth into a heat‑proof jar. Discard the solids. The resulting oil should be clear and free of particulate matter. This step ensures a silky texture that coats like velvet.
- Season. Add the salt to the strained oil while it’s still warm. Stir until fully dissolved. The salt locks in the flavors and balances the heat. If you prefer a slightly sweeter profile, you can add a touch of sugar at this point, but keep it minimal.
- Cool to room temperature. Allow the oil to cool completely before sealing the jar. The oil will thicken slightly as it cools, but it should remain pourable. This final cooling step ensures the oil is safe for storage and ready for use.
- Store properly. Seal the jar with an airtight lid and store in a cool, dark place. The oil can be kept for up to 4 weeks at room temperature or longer if refrigerated. If you notice the oil turning cloudy, simply strain it again; it’s still safe to use.
- Serve. Drizzle the chili oil over ramen, stir‑fries, or roasted veggies. It also makes a fantastic dipping sauce for dumplings or a splash for grilled meats. The heat is consistent, the flavor is complex, and the texture is silky—this is the sauce that will keep your guests coming back for more.
That’s it— you did it. But hold on, I've got a few more tricks that'll take this to another level…
Insider Tricks for Flawless Results
The Temperature Rule Nobody Follows
Maintaining a steady low heat during the simmer is critical. If the oil gets too hot, the chilies will scorch, producing a burnt, acrid flavor. I’ve learned to use a thermometer—aim for 190°F (88°C). If you don’t have one, keep the flame low and let the oil bubble gently. This subtle control is what separates a great chili oil from a mediocre one.
Why Your Nose Knows Best
Your sense of smell is the ultimate guide. If the oil smells toasted and nutty, you’re on track. A sharp, pungent odor means the chilies are burning; a faint aroma indicates insufficient infusion. Trust your nose to tell you when the oil is ready to move to the next step.
The 5-Minute Rest That Changes Everything
After removing the pan from heat, let the oil sit for exactly five minutes before straining. This short rest allows the heat to distribute evenly and the flavors to settle. I’ve tried skipping this step, and the result was a slightly uneven flavor profile—less balanced, less harmonious.
Keep the Oil Clear
If you want a perfectly clear oil, strain it through a cheesecloth or coffee filter. Even a fine mesh sieve can catch tiny particles, giving the oil a pristine appearance. A clear sauce looks more appetizing and feels more refined when you drizzle it over a dish.
Adding a Splash of Water
When reheating the oil for a dish, add a splash of water to keep it from becoming too thick. This simple trick restores the silky texture and prevents the oil from drying out. I’ve used this method for ramen, and it made the broth feel fresh and vibrant.
Creative Twists and Variations
This recipe is a playground. Here are some of my favorite ways to switch things up:
Spicy Sesame Crunch
Add extra toasted sesame seeds before straining, then sprinkle them on top of your finished dish. The crunch pairs beautifully with the silky oil, creating a contrast of textures that keeps every bite interesting.
Herbal Infusion
Swap the bay leaf for fresh rosemary or thyme to give the oil a herbal note. This variation works wonderfully on grilled chicken or roasted root vegetables, adding a savory undertone that complements the heat.
Sweet Heat
Incorporate a tablespoon of honey or maple syrup during the simmer to balance the fiery flavor with a touch of sweetness. The result is a sauce that’s both bold and nuanced—perfect for those who love a bit of complexity.
Umami Boost
Add a splash of soy sauce or fish sauce at the end of the simmer. The umami depth enhances the overall profile and makes the oil a match for Asian-inspired dishes like dumplings or soba noodles.
Low‑Heat Version
For a milder sauce, reduce the amount of dried chilies by half and increase the neutral oil by 50%. This version is ideal for kids or those who prefer a gentler kick, yet still delivers the signature aroma.
Cold‑Brewed Chili Oil
Let the infused oil cool completely, then refrigerate it for 24 hours. The flavors will deepen, producing a richer, more complex oil. This method is great for meal prep, giving you a ready‑to‑use sauce that’s always fresh.
Storing and Bringing It Back to Life
Fridge Storage
Seal the jar with a tight lid and store in the refrigerator for up to 6 weeks. The cold slows down oxidation, keeping the oil fresh and flavorful. Before using, let it sit at room temperature for 10 minutes to regain its pourable consistency.
Freezer Friendly
For long‑term storage, place the jar in the freezer for up to 3 months. When you’re ready to use it, thaw in the refrigerator overnight. The oil may separate slightly; give it a gentle stir before pouring.
Best Reheating Method
To reheat, simply warm the oil in a small saucepan over low heat. Add a splash of water to maintain the silky texture, then stir gently. Avoid high heat to preserve the delicate flavors and prevent the oil from smoking.