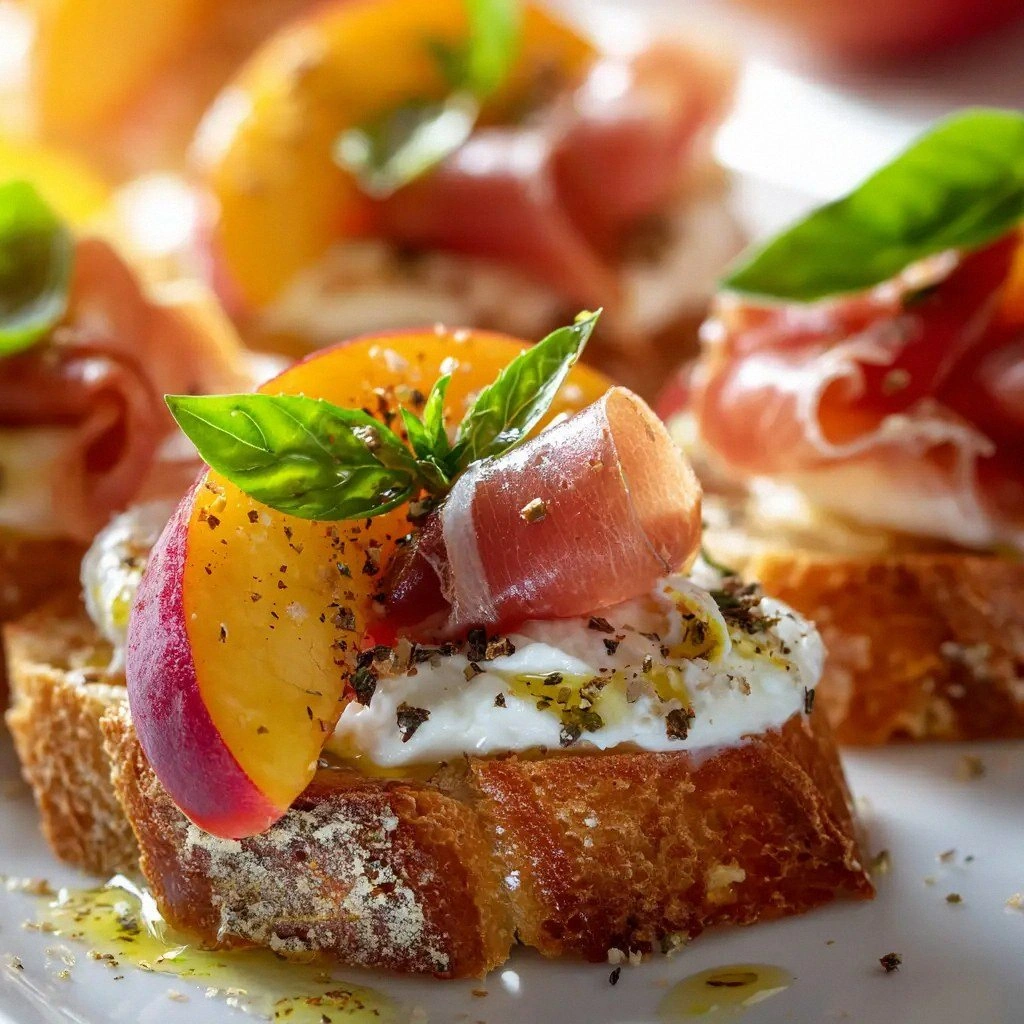
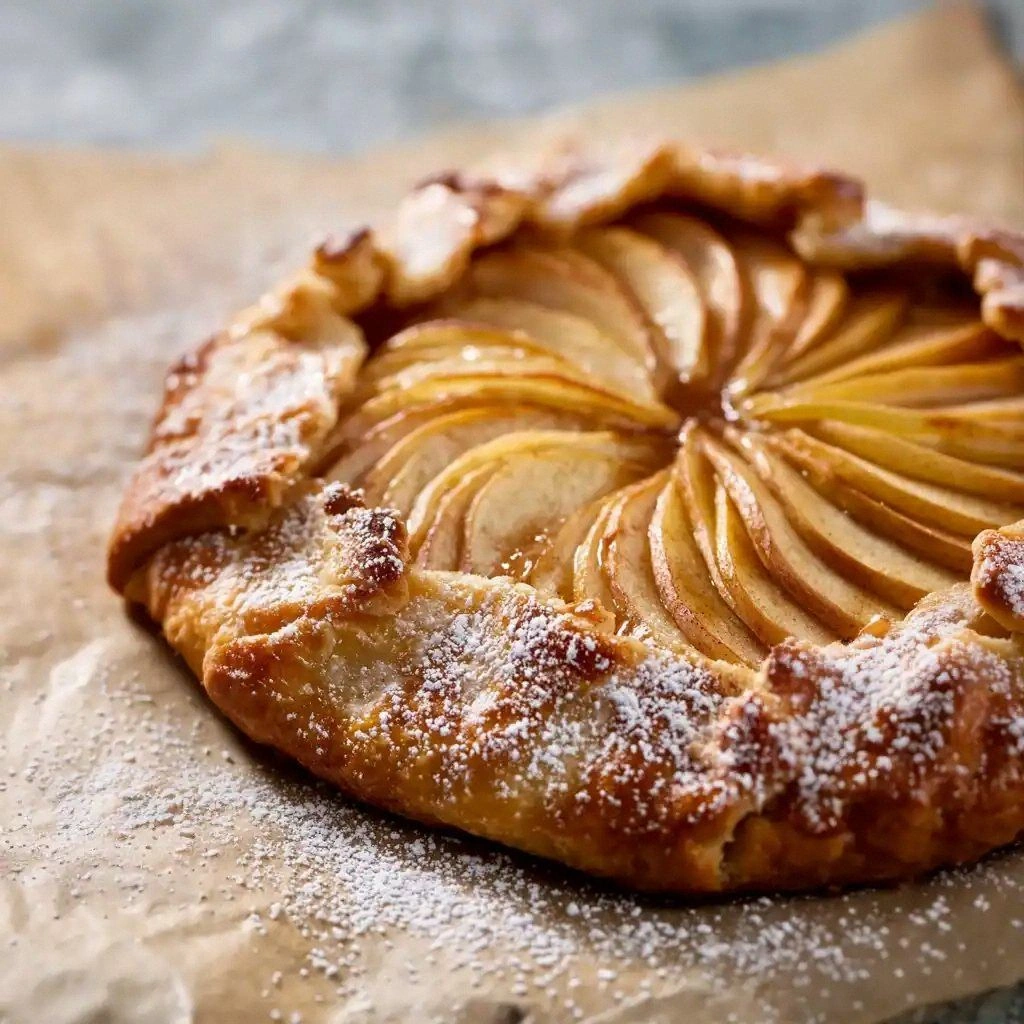
Picture yourself pulling this golden, buttery sheet of pastry from the oven, the kitchen filling with the sweet, spicy aroma of caramelized apples and cinnamon. The moment the sheet cools, the crisp edges crackle like thin ice, and the filling glistens like a sun‑kissed glaze. I was halfway through a disastrous pie, the crust too soggy, when a friend dared me to try a simpler, more rustic apple galette that would turn my kitchen into a sweet sanctuary. That dare sparked a midnight experiment, a mash of Honeycrisp apples, flaky dough, and a sprinkle of coarse sugar that turned the chaos into a masterpiece.
I was obsessed with the idea that dessert should be a bold declaration, not a shy whisper. The first bite is a symphony: the buttery crust shatters, releasing a burst of caramelized sugar, while the apples surrender their juicy heart, coated in a velvety sauce of cinnamon and vanilla. The contrast of the crisp exterior against the soft, slightly tart interior is a dance that lingers on the tongue. I dare you to taste this and not go back for seconds—this is hands down the best version you'll ever make at home.
What sets this galette apart is not just its ingredients but the way I layered them. I used Honeycrisp apples for their natural crunch and balanced sweetness, a touch of nutmeg for warmth, and a generous splash of lemon to keep the flavors bright. The dough is a quick, no‑knead blend that yields a flaky, golden crust without the fuss of traditional pastry. The result is a rustic, yet refined dessert that feels like a warm hug on a cool evening. If you've ever struggled with a flaky crust that turns out dense, you're not alone—and I've got the fix.
And now the game‑changer: I swapped out the usual butter for a combination of butter and a splash of ice water, which creates air pockets that puff up into a light, airy texture. The apples are sliced thin, not thick, so they cook evenly and release their juices to form a natural glaze. This version is so simple, you can make it in under an hour, yet the flavor is so layered it feels like a multi‑course dessert. Stay with me here — this is worth it.
What Makes This Version Stand Out
- Taste: The natural sweetness of Honeycrisp apples pairs perfectly with a subtle caramel glaze, creating a flavor profile that feels both comforting and sophisticated.
- Texture: A flaky crust that shatters like thin ice, combined with a soft, juicy filling, delivers a satisfying contrast in every bite.
- Simplicity: The dough requires no kneading, and the assembly takes less than 15 minutes, making it ideal for busy evenings.
- Uniqueness: The addition of nutmeg and vanilla gives a hidden depth that sets this galette apart from classic apple pies.
- Crowd Reaction: Friends who have tried the traditional version rave that this one is the “go‑to” dessert for any gathering.
- Ingredient Quality: Using Honeycrisp apples ensures a crisp bite and a naturally sweet finish, while coarse sugar adds a subtle crunch.
- Cooking Method: A single sheet baking technique saves time and reduces cleanup without compromising flavor.
- Make‑ahead Potential: The galette can be assembled ahead of time and baked just before serving, keeping the crust crisp.
Alright, let's break down exactly what goes into this masterpiece…
Inside the Ingredient List
The Flavor Base
All-purpose flour is the backbone of the crust, providing structure without heaviness. A tablespoon of granulated sugar balances the savory salt and adds a subtle caramel note to the dough. The ½ teaspoon of salt is critical—it enhances every flavor, preventing the apples from tasting flat. Skipping the salt would make the entire dessert feel bland and underdeveloped.
Unsalted butter, measured at ½ cup, lends richness and a buttery aroma that permeates the crust. Butter melts into the dough, creating delicate layers that puff up during baking. If you replace butter with margarine, the flavor will suffer, and the texture will become dense.
Ice water, 3 to 4 tablespoons, is the secret to a flaky crust. Cold water keeps the butter chilled, preventing it from melting prematurely. This keeps the dough from sticking and allows it to hold air pockets that expand into a light, airy crumb. Using room‑temperature water will result in a soggy, greasy crust.
The Texture Crew
Honeycrisp apples are the star—crisp, juicy, and naturally sweet. Their high water content creates a natural glaze when they cook, eliminating the need for added sugar in the filling. If you use a softer apple variety, the filling will become watery and lose its structure.
Granulated sugar (2 tablespoons) in the filling balances the apple’s tartness and encourages caramelization. Brown sugar (1 tablespoon) adds depth and a hint of molasses, while a teaspoon of ground cinnamon and a quarter teaspoon of nutmeg introduce warmth and complexity. Together, they form a fragrant, aromatic sauce that coats the apples like velvet.
The Unexpected Star
A tablespoon of lemon juice cuts through the sweetness and brightens the entire dish. The acidity also helps preserve the apple’s color, keeping the slices a vibrant, appetizing hue. Without lemon, the apples may brown too quickly and lose their bright appearance.
The Final Flourish
Vanilla extract (1 teaspoon) and one egg create a subtle binding agent that holds the filling together. The egg also adds a slight richness and helps the crust set perfectly. Coarse sugar sprinkled on top before baking gives a delightful crunch that contrasts with the soft interior. Finally, a drizzle of caramel sauce or a dusting of powdered sugar finishes the dessert with a sweet, glossy glaze.
Everything's prepped? Good. Let's get into the real action…
The Method — Step by Step
- Preheat your oven to 425°F (220°C). Line a 9-inch baking sheet with parchment paper to prevent sticking. The high heat is essential for a crisp crust.
- In a large bowl, whisk together the flour, sugar, and salt. Stir until evenly combined; this ensures an even distribution of flavor throughout the dough.
- Cut the chilled butter into small cubes and add to the dry mixture. Use a pastry cutter or your fingertips to blend until the mixture resembles coarse crumbs. This step is where the magic of flaky layers begins.
- Drizzle the ice water over the mixture, one tablespoon at a time, and gently fold until the dough just comes together. Be careful not to overwork; the dough should feel slightly dry but hold together when pressed.
- Press the dough into a disk, wrap in plastic, and refrigerate for at least 30 minutes. This resting period relaxes the gluten, making the dough easier to roll out.
- Meanwhile, core the Honeycrisp apples, slice them thinly, and place them in a bowl. Add the granulated sugar, brown sugar, cinnamon, nutmeg, lemon juice, and vanilla extract. Toss until the apples are evenly coated.
- On a lightly floured surface, roll the dough out into a 12-inch circle, about ¼ inch thick. Transfer to the prepared baking sheet, leaving a 1-inch border around the edges.
- Arrange the apple slices in a fan shape over the dough, leaving the center slightly uncovered for the crust to rise. Sprinkle the coarse sugar evenly across the apples.
- Fold the edges of the dough up around the apples, pleating it as you go. This creates a rustic, free‑form look that enhances the flavor.
- Brush the exposed dough with a lightly beaten egg for a golden, glossy finish. Bake for 30 minutes, or until the crust is golden brown and the apples are tender.
That's it — you did it. But hold on, I've got a few more tricks that'll take this to another level…
Insider Tricks for Flawless Results
The Temperature Rule Nobody Follows
Many bakers bake at a lower temperature, but this galette thrives at 425°F. The high heat crisps the crust and caramelizes the sugar in the filling. If you lower the temperature, the crust will stay pale and the apples won’t caramelize as richly.
Why Your Nose Knows Best
Trust the aroma: when the baking starts, you’ll smell a sweet, buttery scent with a hint of cinnamon. If the smell is faint, the dough is still too cold or the oven temperature is off. Adjust accordingly.
The 5‑Minute Rest That Changes Everything
After baking, let the galette rest for five minutes before slicing. This allows the juices to settle, preventing a soggy center. A quick rest also makes the crust easier to slice cleanly.
The “Fold‑and‑Fold” Technique
When folding the dough edges, make sure to pleat them loosely. Tight pleats can cause the crust to crack. Loose pleats create a rustic look and allow the dough to rise evenly.
The Sweet‑Heat Balance
If you prefer a sweeter galette, add an extra tablespoon of brown sugar to the filling. Conversely, reduce the sugar if you like a more tart apple flavor. The key is balance.
Creative Twists and Variations
This recipe is a playground. Here are some of my favorite ways to switch things up:
Maple‑Glazed Galette
Swap the lemon juice for maple syrup and add a splash of bourbon for a boozy twist. The maple adds a deep, caramelized flavor that pairs beautifully with the apples.
Nutty Crunch Galette
Toss the apple slices with chopped toasted walnuts before baking. The nuts add a satisfying crunch and a nutty aroma that complements the cinnamon.
Spiced Apple Crumble Galette
Top the galette with a crumble of oats, brown sugar, and extra cinnamon before baking. The crumble adds texture and a buttery, crumbly finish.
Chocolate‑Infused Galette
Drizzle melted dark chocolate over the baked galette and let it set. The chocolate creates a rich, decadent layer that pairs perfectly with the sweet apples.
Citrus‑Zest Galette
Add a tablespoon of orange zest to the filling for a bright, citrusy note. The zest lifts the apple flavor and adds a subtle perfume.
Almond‑Butter Galette
Replace the butter with almond butter for a nutty undertone. The almond butter also gives the crust a slightly different texture and a subtle almond aroma.
Storing and Bringing It Back to Life
Fridge Storage
Cool the galette completely, then wrap tightly in plastic wrap and store in the refrigerator for up to 3 days. The crust will stay crisp, and the filling will remain moist.
Freezer Friendly
Wrap the galette in parchment paper, then in a freezer bag. Freeze for up to 2 weeks. Thaw overnight in the refrigerator before reheating.
Best Reheating Method
Preheat the oven to 350°F (175°C). Place the galette on a baking sheet and bake for 10‑12 minutes, or until warmed through. Add a splash of water to the center before reheating to keep the filling juicy.