I still remember the day I ruined a perfectly good batch of deviled eggs so spectacularly that my dinner guests started calling them "deviled disasters." The yolks were chalky, the filling tasted like someone had a tantrum with the salt shaker, and don't even get me started on the paprika avalanche that turned everyone into orange-faced clowns. As I stood there in my kitchen, clutching my failed appetizers like a culinary crime scene, my best friend dared me to try something different. "What if," she said between fits of laughter, "you made deviled potatoes instead?"
That dare turned into an obsession that consumed my weekends for the next three months. I tested every potato variety known to mankind, played mayo-sour cream ratios like a mad scientist, and turned my kitchen into a spice laboratory that would make a chemist jealous. The breakthrough came at 2 AM on a Tuesday when I discovered that baby potatoes, when treated like tiny edible bowls of joy, could hold a filling so creamy and addictive that even my deviled-egg-snob grandmother begged for the recipe. The smell of roasting potatoes mingled with tangy mustard and fresh green onions created an aroma that made my neighbors knock on my door asking if I was opening a restaurant.
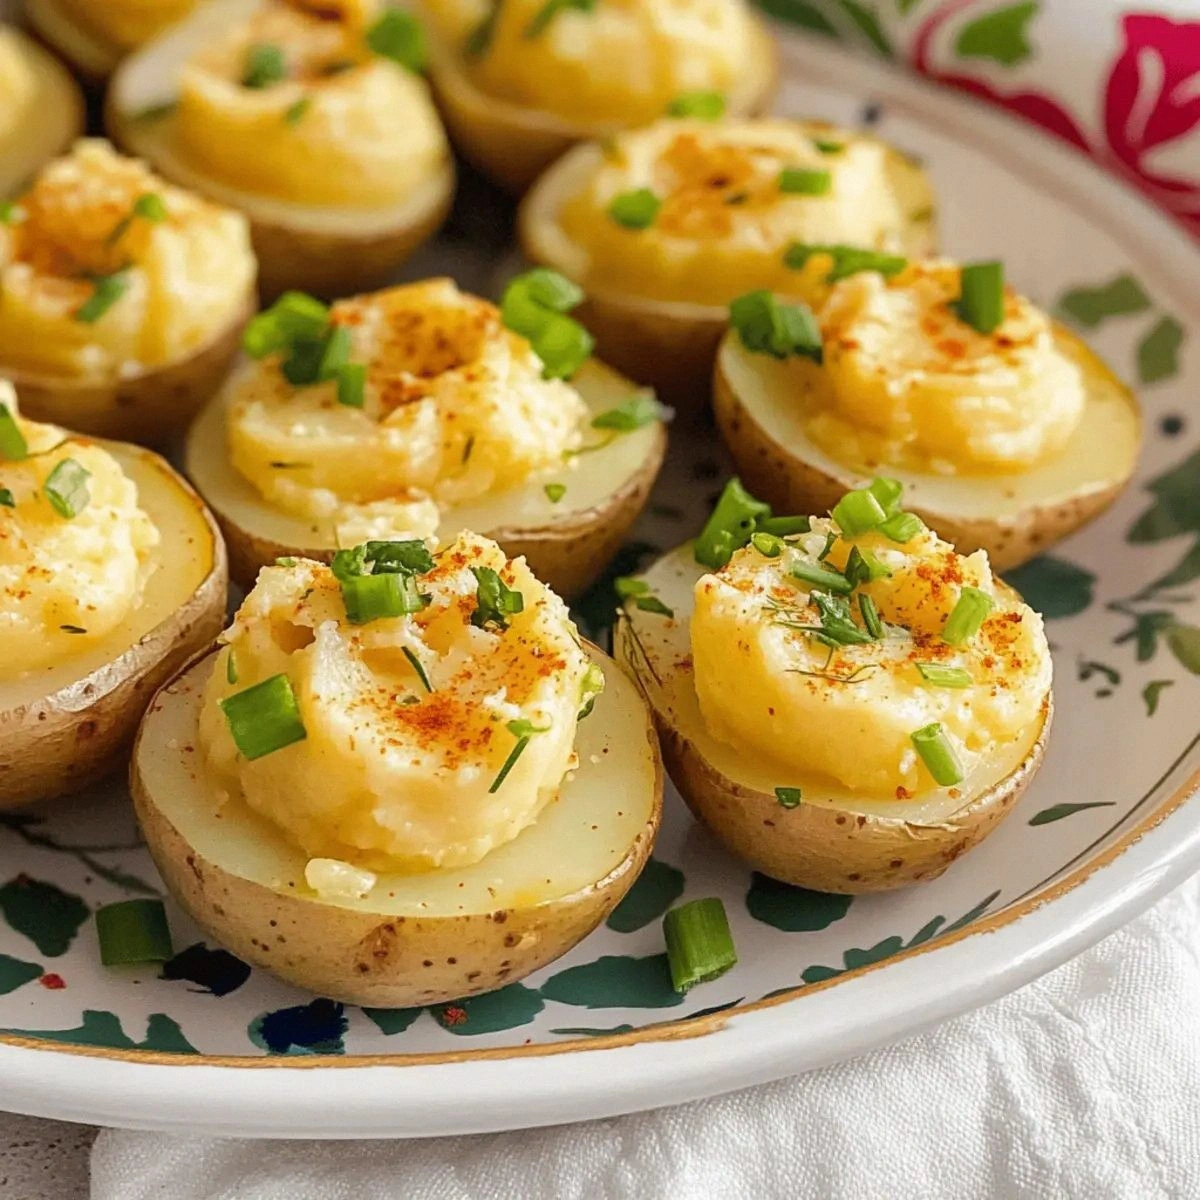
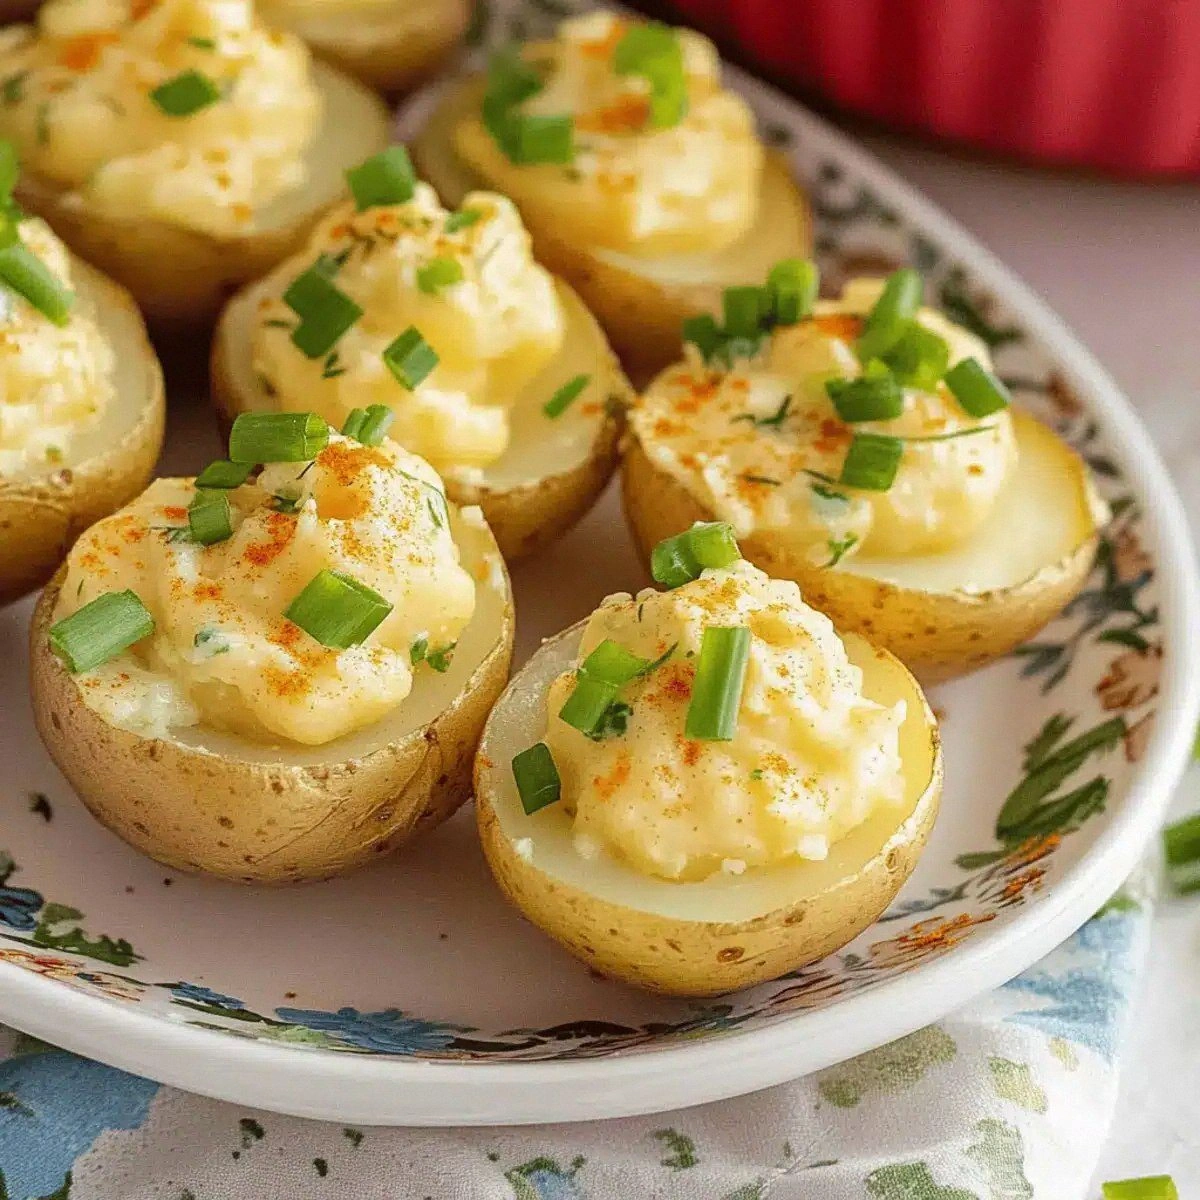
Picture this: crispy potato shells that shatter like thin ice under your fork, revealing a cloud-like filling that's silkier than your favorite cashmere sweater. The contrast between the golden, slightly crunchy exterior and the velvety interior creates a textural symphony that'll make your taste buds do a happy dance. Each bite delivers that familiar deviled flavor profile we all crave, but with a playful twist that makes everyone at the party ask, "Wait, is this really just a potato?" Trust me when I say this is hands down the best version you'll ever make at home, and I dare you to taste this and not go back for seconds.
Here's the game-changer that separates this recipe from every other "stuffed potato" abomination on the internet: we're not just scooping and filling. We're creating a flavor bomb by infusing the potato flesh itself with a tangy brine that would make pickles jealous, then whipping it into submission with a technique I borrowed from French cuisine. Stay with me here — this is worth it. By the end of this journey, you'll wonder how you ever made it any other way, and your dinner guests will think you've been secretly attending culinary school.
What Makes This Version Stand Out
Flavor Explosion: Most recipes get this completely wrong — they just mash potatoes with mayo and call it a day. Instead, we're building layers of flavor by infusing every component with tangy, savory goodness that tastes like someone bottled up summer and whipped it into submission.
Texture Paradise: We're not settling for the usual mushy mess. The contrast between crispy potato shells and ultra-smooth filling creates a textural experience that'll make your mouth water just thinking about it. That first bite through the crunchy edge into creamy heaven? Pure magic.
Party Perfect: These little gems are like the social butterflies of the appetizer world. They're elegant enough for your fanciest dinner party but approachable enough that your pickiest nephew will devour them. Future pacing moment: Picture yourself pulling these out of the oven, the whole kitchen smelling incredible, while your guests crowd around like moths to a flame.
Make-Ahead Champion: If you've ever struggled with timing appetizers for parties, you're not alone — and I've got the fix. These beauties can be prepped two days ahead and assembled at the last minute, making you look like a kitchen wizard while actually being incredibly lazy.
Budget-Friendly Luxury: Using humble baby potatoes instead of expensive fingerlings or those tiny new potatoes that cost more per pound than good steak. We're creating restaurant-quality appetizers for the price of a fast-food meal, proving that gourmet doesn't have to mean mortgage-payment ingredients.
Allergy-Aware: No eggs needed! This recipe is naturally egg-free, making it perfect for friends with allergies or those who just can't stomach another deviled egg at the potluck. Plus, the filling is so rich and satisfying that nobody misses the traditional yolk base.
Instagram Gold: These little beauties photograph like supermodels. The golden potato shells cradling pale, creamy filling with a dusting of paprika create a visual that's practically guaranteed to make your social media followers drool on their phones.
Alright, let's break down exactly what goes into this masterpiece, because understanding your ingredients is what separates kitchen heroes from culinary disasters waiting to happen.
Inside the Ingredient List
The Foundation: Baby Potatoes
These aren't just any potatoes — they're the unsung heroes of the appetizer world. Baby potatoes have the perfect potato-to-skin ratio, creating natural serving vessels that hold their shape under pressure (literally). When selecting, look for potatoes that are roughly the same size, about the size of a ping pong ball, so they cook evenly and look professional on your serving platter. Skip any with green spots or sprouts — those indicate solanine buildup that'll make your filling taste bitter and potentially give your guests an upset stomach. The beauty of baby potatoes is that their thin skin becomes deliciously crispy when roasted, creating that textural contrast that makes people close their eyes in appreciation.
The Flavor Base: Mayonnaise and Sour Cream
Here's where most recipes go wrong — they use one or the other, creating either too-rich or too-tangy results. We're using both to create a balanced foundation that's creamy without being heavy, tangy without making your face pucker. Mayonnaise brings the luxurious mouthfeel and subtle sweetness that coats your tongue like velvet, while sour cream adds that bright acidity that keeps you coming back for more. If you're feeling fancy, swap in Greek yogurt for half the sour cream for extra protein and a slight Mediterranean vibe. Don't even think about using low-fat versions — this is party food, not diet food, and your guests can taste the difference between real dairy and sad, watery substitutes.
The Seasoning Squad: Mustard and Pickle Juice
Yellow mustard isn't just for hot dogs anymore — it's the secret weapon that gives our filling that familiar deviled flavor without any eggs. The mild heat and vinegar bite wake up all the other flavors like a tiny marching band in your mouth. Dill pickle juice might sound weird, but trust me on this one — it adds complexity and brightness that plain vinegar can't match. Plus, it's basically free flavor if you're already buying pickles for burgers. If you skip the pickle juice, your filling will taste flat and one-dimensional, like it's missing something you can't quite put your finger on. Pro tip: save the juice from your favorite pickle brand, because not all pickle juices are created equal.
The Aromatics: Garlic and Onion Powders
Fresh garlic and onion would be too harsh here — we're going for subtle background notes that make people wonder what your secret is. Garlic powder distributes evenly throughout the filling, ensuring every bite has that warm, savory depth. Onion powder adds sweetness and umami that makes the potatoes taste more potato-y, if that makes sense. These aren't just throwaway seasonings — they're the difference between "pretty good" and "holy cow, can I have the recipe?" Don't substitute with garlic salt or onion salt unless you want to play Russian roulette with your sodium levels.
The Grand Finale: Green Onions and Paprika
Green onions bring fresh, bright flavor that cuts through the richness like a lighthouse beam through fog. Chop them fine so they distribute evenly and don't create awkward big bites of onion. The paprika isn't just for color — it adds a subtle sweetness and that familiar deviled aesthetic that makes everyone feel nostalgic. I dare you to taste this and not go back for seconds when you see that perfect dusting of red across the creamy tops. If you've only got smoked paprika, that works too — it adds a barbecue vibe that's surprisingly addictive.
Everything's prepped? Good. Let's get into the real action, because this is where the magic happens and your kitchen transforms into the best restaurant in town.
The Method — Step by Step
- Start by washing your baby potatoes thoroughly — these little guys grow in dirt, and nobody wants gritty appetizers. Use a vegetable brush to scrub each potato individually, paying special attention to any eyes or rough spots where dirt likes to hide. Place them in a large pot and cover with cold water by about an inch, then add two teaspoons of salt. The cold water start ensures they cook evenly instead of the outside turning to mush while the inside stays crunchy. Bring to a boil over medium-high heat, then reduce to a gentle simmer and cook until a knife slides in with just slight resistance, about 12-15 minutes depending on size.
- While the potatoes are cooking, prepare an ice bath in a large bowl — this is the key to stopping the cooking process and making the potatoes easier to handle. When the potatoes are done, drain them in a colander and immediately plunge them into the ice water. Let them chill for about 5 minutes, or until cool enough to handle but still warm inside. This temperature shock helps separate the skin from the flesh, making them easier to scoop out later. Plus, it prevents that gray, overcooked potato flavor that ruins so many appetizers.
- Preheat your oven to 425°F (220°C) — we're going for high heat that'll create crispy edges while keeping the inside tender. Line a baking sheet with parchment paper for easy cleanup, because nobody wants to scrub potato residue off pans when there are guests to entertain. Drain the cooled potatoes and pat them completely dry with paper towels — any remaining moisture will steam instead of roast, leaving you with sad, soggy shells instead of crispy vessels of joy.
- Slice each potato in half lengthwise, using a sharp knife and steady hand to create even halves that'll stand up straight on your serving platter. Use a small spoon or melon baller to scoop out the inside, leaving about a quarter-inch border around the edge. Be careful not to pierce through the skin — we want these to hold their shape like tiny edible bowls. Save all the scooped potato flesh in a bowl; we'll need every bit for our filling. If you've ever struggled with this part, you're not alone — and I've got the fix: warm potatoes are much easier to scoop than cold ones.
- Brush the hollowed potato shells with olive oil, making sure to get oil in every nook and cranny. This isn't just for flavor — the oil helps conduct heat and creates that gorgeous golden color that makes people reach for them before they even know what they are. Season lightly with salt and pepper, remembering that the filling will be well-seasoned. Arrange them cut-side-down on the prepared baking sheet — this position helps them crisp up and prevents steaming. Roast for 15-20 minutes until the edges are golden and the skins have started to pull away slightly from the pan.
- While the shells are roasting, transform your scooped potato flesh into the creamiest filling imaginable. Mash the warm potatoes until completely smooth — no lumps allowed in this party. Add the mayonnaise, sour cream, mustard, pickle juice, garlic powder, onion powder, and a generous grind of black pepper. The mixture should look too wet at this stage — that's perfect, because it'll thicken as it cools. Mix until everything is completely incorporated and the filling looks like pale, fluffy clouds of potato heaven.
- Fold in most of the green onions, saving some for garnish. The key here is to fold, not stir — we want to keep the filling light and airy, not dense and pasty. Taste and adjust seasoning with salt and additional pepper. This next part? Pure magic. Transfer the filling to a piping bag fitted with a large star tip, or use a zip-top bag with the corner snipped off. The piping creates those beautiful ridges that hold the paprika and make everything look professionally done.
- Remove the potato shells from the oven and let them cool for exactly 5 minutes — this brief rest allows the steam to escape and prevents the filling from melting into a sad puddle. Pipe the filling into each shell in a decorative swirl, starting from the outside and working toward the center. The contrast between the golden shell and pale filling should make you want to take a photo before you even taste them. Dust with paprika and sprinkle with the reserved green onions for that classic deviled aesthetic that makes everyone feel like they're at grandma's house (if grandma was a culinary genius).
- And now the fun part: these beauties are ready to serve warm, room temperature, or even chilled. The flavor actually improves as they sit, making them perfect for entertaining. Arrange them on a platter and watch them disappear faster than free samples at Costco. That first bite through crispy potato into creamy filling? Absolute perfection. Your guests will be asking for the recipe before they finish their first one — and that's the kind of kitchen victory we live for.
That's it — you did it. But hold on, I've got a few more tricks that'll take this to another level and make you the legendary host whose parties nobody misses.
Insider Tricks for Flawless Results
The Temperature Rule Nobody Follows
Here's the thing that separates amateur appetizers from professional ones: temperature control. Your potato shells need to be warm when you add the filling, but not hot enough to melt everything into a puddle. I aim for the temperature of a warm hug — cozy but not scorching. If the shells are too hot, the filling separates and looks curdled. Too cold, and the flavors don't meld properly. A friend tried skipping this step once — let's just say it didn't end well, and she ended up serving what looked like potato soup in little bowls. Test by touching the bottom of a shell — it should feel warm but not make you jerk your hand away.
Why Your Nose Knows Best
Trust your sense of smell throughout this process — it's your built-in quality control. When the potatoes are perfectly roasted, they'll smell like buttery popcorn with hints of caramel. If they smell starchy or raw, they need more time. The filling should smell tangy and fresh, never sour or off. I'll be honest — I ate half the batch before anyone else got to try it because I kept "testing" the aroma. That intoxicating smell of warm potatoes, sharp mustard, and fresh green onions hitting your nose? That's when you know you've achieved potato nirvana.
The 5-Minute Rest That Changes Everything
After piping the filling, resist the urge to serve immediately. Let these beauties sit for exactly 5 minutes — set a timer if you're impatient like me. This brief pause allows the filling to settle into the shells, the paprika to slightly hydrate and bloom, and the flavors to meld into something greater than their individual parts. During this time, the potato shells finish releasing their final burst of steam, ensuring the bottoms stay crispy instead of getting soggy. Those five minutes feel like an eternity when you're hungry and everything smells amazing, but they're the difference between good deviled potatoes and life-changing ones.
The Salt Timing Secret
Most people salt everything at once and wonder why their appetizers taste flat. We're salting in layers here — first in the boiling water to season the potatoes from the inside out, then a light sprinkle on the shells before roasting, and finally adjusting the filling at the end. Each addition has a purpose: the boiling water salt penetrates deep into the potato flesh, the roasting salt creates a flavorful crust, and the filling salt balances the creamy elements. Taste as you go, remembering that cold foods need more seasoning than warm ones. Your palate is your most valuable tool here — use it generously and without fear.
The Presentation Perfection
Here's where you transform from cook to artist: use a small offset spatula or the back of a spoon to create swoops and valleys in your piped filling. These nooks and crannies catch the paprika and create visual interest that makes people reach for them instinctively. Alternate the direction of your swirls on adjacent potatoes for a professional, bakery-style look. And please, for the love of all things delicious, don't just dump the paprika from the jar — hold it about 12 inches above and tap gently for an even, professional dusting that looks like it came from a magazine. The sizzle when these hit the serving platter and your guests start grabbing them? Absolute perfection.
Creative Twists and Variations
This recipe is a playground. Here are some of my favorite ways to switch things up:
Bacon Lover's Dream
Fold in 1/4 cup of crispy bacon bits and swap the pickle juice for a teaspoon of liquid smoke. Top with extra bacon and a drizzle of maple syrup for that sweet-savory combo that makes people weak in the knees. The smoky flavor pairs beautifully with the creamy potato base, creating a loaded baked potato vibe in party-perfect form. Your bacon-obsessed friends will form a cult around these — I've seen it happen.
Mediterranean Magic
Replace the dill pickle juice with juice from kalamata olives, add crumbled feta to the filling, and top with diced tomatoes and fresh oregano. The briny olives and tangy feta transport you straight to a Greek island, minus the expensive plane ticket. These are surprisingly refreshing and perfect for summer gatherings when you want something different from the usual heavy appetizers.
Spicy Fiesta
Add a minced jalapeño to the filling, swap the yellow mustard for Dijon, and top with a sprinkle of chili powder instead of paprika. The heat builds slowly and pairs beautifully with the cool, creamy base. Serve these with ice-cold beer and watch them disappear faster than free concert tickets. The spice level is customizable — remove the jalapeño seeds for mild heat or leave them in for a serious kick.
Everything Bagel Remix
Mix everything bagel seasoning into the filling and top with thin slices of smoked salmon and capers. The familiar flavors of your favorite breakfast sandwich transformed into an elegant appetizer. These feel fancy enough for brunch weddings but easy enough for game day. The capers add pops of briny flavor that cut through the richness perfectly.
Truffle Luxury
Add a few drops of white truffle oil to the filling and top with shaved Parmesan and fresh chives. These taste like they cost $50 at a fancy restaurant but cost pennies to make at home. The truffle oil adds an earthy, luxurious note that makes people feel special. A little goes a long way — too much and you'll feel like you're eating a forest floor.
Loaded Baked Potato Style
Mix in shredded cheddar cheese, top with a dollop of sour cream, more cheese, and chopped chives. Essentially a loaded baked potato in finger-food form, minus the fork. These are comfort food at its finest and perfect for potlucks where you want something familiar but elevated. Kids and adults alike go crazy for these cheesy, creamy bites.
Storing and Bringing It Back to Life
Fridge Storage
Store assembled deviled potatoes in an airtight container with a sheet of plastic wrap pressed directly against the surface to prevent drying. They'll keep for up to 3 days, though they're best within 48 hours. Place a paper towel in the bottom of the container to absorb excess moisture and prevent soggy bottoms. Let them come to room temperature before serving for best flavor — cold temperatures mute the seasonings and make the filling taste flat.
Freezer Friendly
You can freeze the roasted potato shells for up to 2 months — just cool completely, wrap tightly in plastic wrap, then foil. The filling doesn't freeze well due to the dairy content (it separates and becomes grainy), so make that fresh when you're ready to serve. To use frozen shells, thaw overnight in the fridge, then warm in a 350°F oven for 5-7 minutes until heated through. They're almost as good as fresh, making this a great make-ahead option for busy holiday seasons.
Best Reheating Method
If you've made these ahead and want to serve them warm, here's the revival technique: place them on a baking sheet and warm in a 325°F oven for 8-10 minutes. Add a tiny splash of water to the pan before covering with foil — it steams back to perfection and prevents drying. Remove the foil for the last 2 minutes to re-crisp the shells. Microwaving works in a pinch but makes the shells rubbery, so use it only as a last resort. The filling might need a quick stir if it separates during storage.